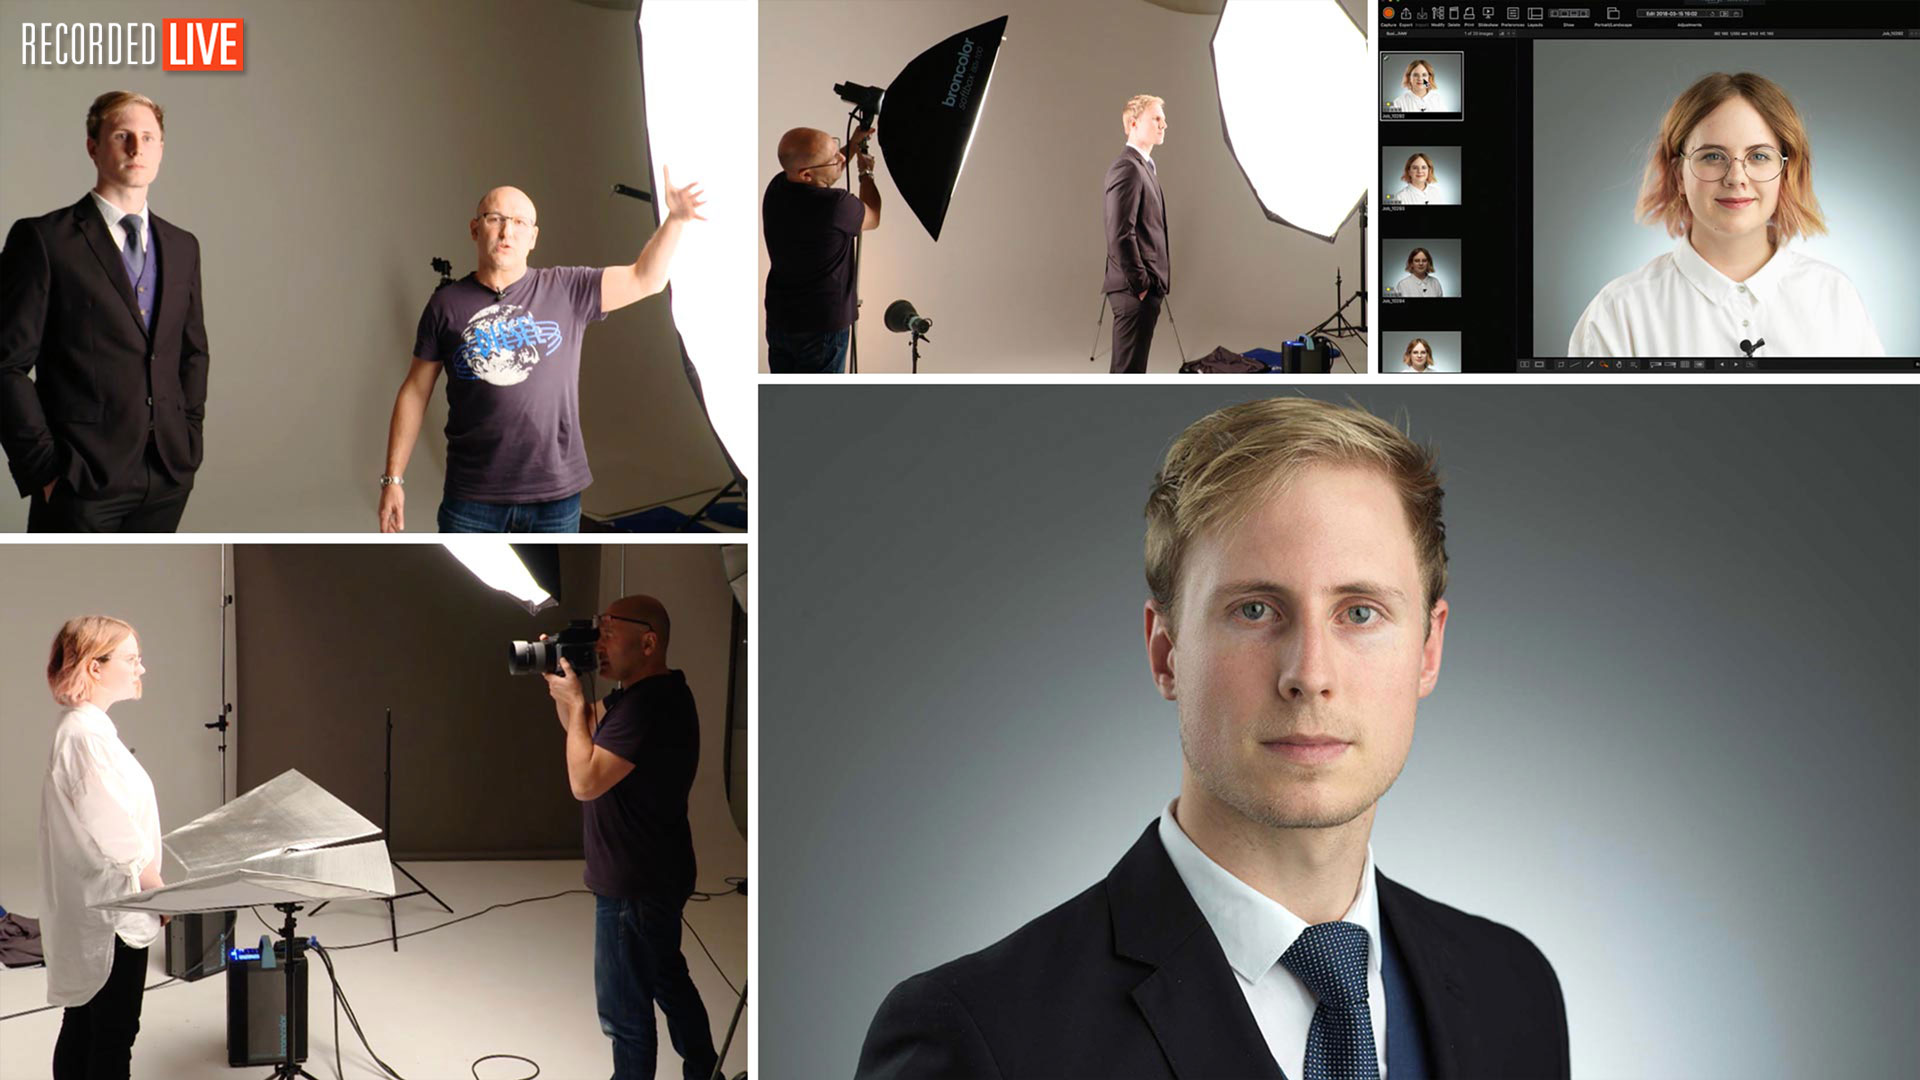

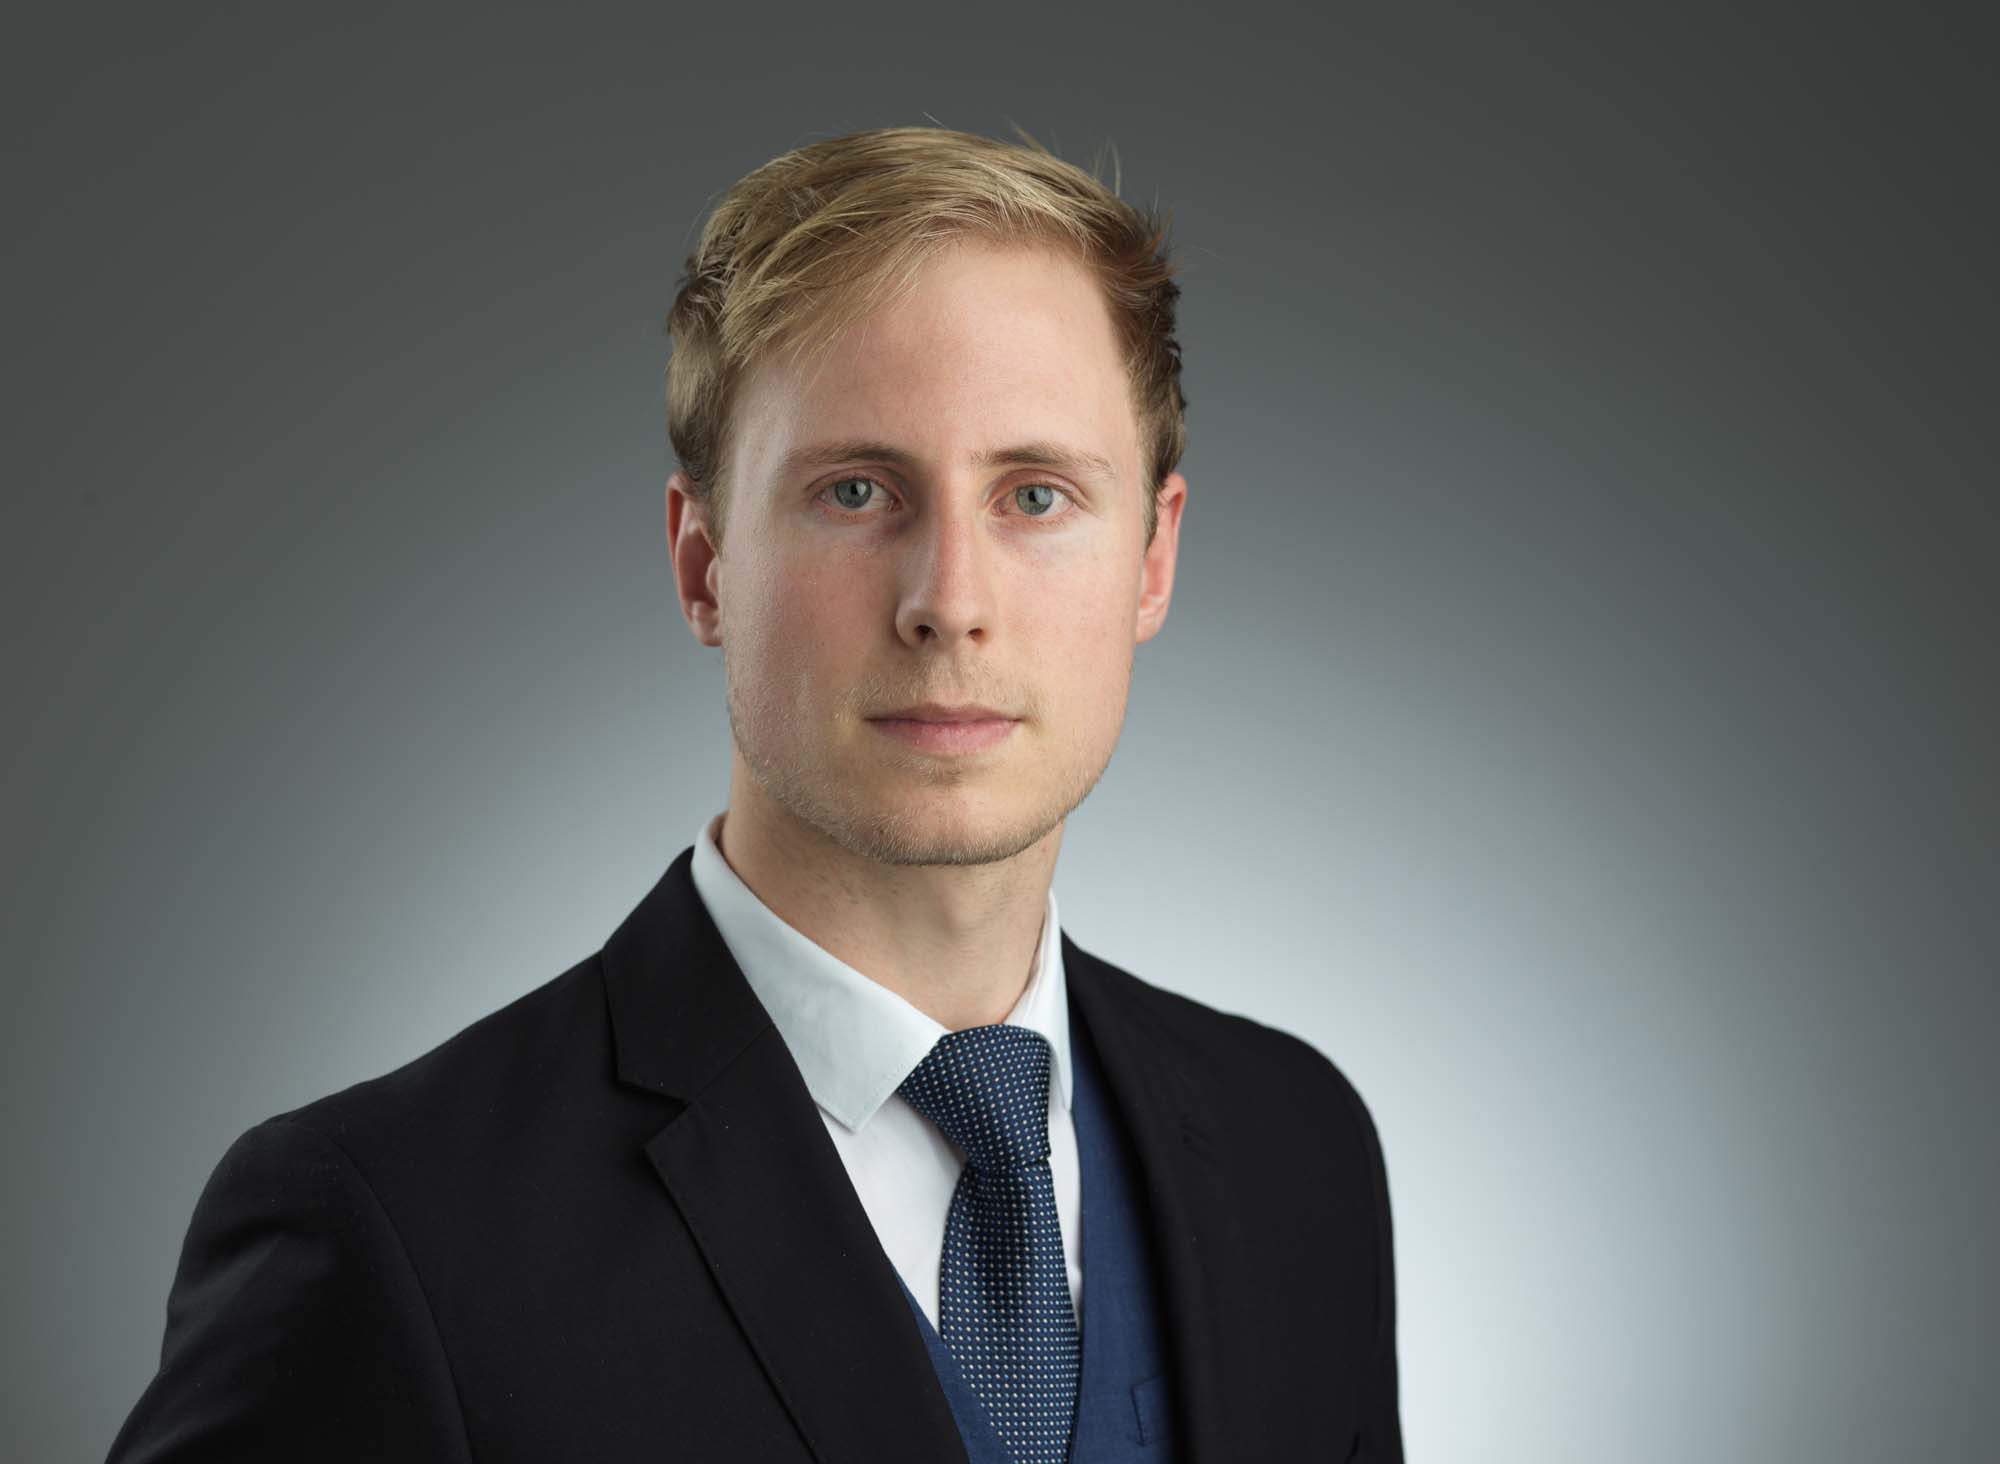
Business Portraiture and Headshots
Corporate or business portraits are a staple for many photographers, but many often face a few key challenges when it comes to taking business portraits: How to shoot and control light bounce in small spaces, how to photograph people with glasses, how to photograph older people, how to pose subjects and determining the best equipment to use.
In this live photography workshop, Karl addresses all those problems, providing practical solutions and demonstrating exactly how to overcome these problems as he shoots live.
He photographs two different subjects in a number of different lighting setups, showing how you can achieve great results straight out of camera with well-positioned lights and just basic modifiers.
In this class:
- Portrait photography: Business portraits
- Recommended equipment for business portraits
- Efficient workflow
- Posing: Business portrait poses
- Lighting setups for business portraits: Using one and two lights
- Photographing subjects with glasses
For more business portrait photography classes, visit our Portrait section.
Questions? Please post them in the comments section below.
Comments
Hi Karl, thank you for these great Tutorials! I would like to shoot a business group portrait with 6 people. I do only have a 90 cm Octo and a second light for background. Do you have an idea how can i solve this to have enough light for 6 people? Thanks Mario
Hi Mboro, I’m afraid this isn’t the right tools for the job. If you are going to accept to do work and you want to do it to the right standard that your client will be happy then you are going to have to invest in the right equipment to do the job properly i’m afraid. If you’re shooting in a plain white small to medium sized room then you could consider turning the room into your modifier and shooting the key light into the ceiling and wall above and behind you but it’s not ideal. You have to think about what you are asking me and compare it to something else, it’s a bit like you going to see the dentist and him saying to you I’ve only got this builders drill and a toothpick but are you OK with that for me to do the work.
What brand Tri Reflector did you use?
Hi, this one is an older model Lastolite
You mention having to adjust the height of lights to accommodate subjects of varying heights and possibly scheduling the subjects in height order to make lighting adjustments less time consuming. Would you consider bringing a set of various sized apple boxes to the shoot for subjects to stand on to adjust their height?
Hi Art, yes apple boxes could work as long as it doesn’t affect your subjects confidence in front of the camera. For example asking a short man to stand on a box might cause them to become conscious of their height, other people might not find an elevated platform to feel as stable as a solid floor. Raising lighting stands can take less than 30 seconds especially if you pre mark them with a pen at 3 different heights, short, medium, tall and one of these would be close enough for each type of subject.
Hi Karl, in Germany I get payed very well for more shadows on the face. :)))) So, no need to fill in the shadows. The people look a lot more interesting, also the old ones. I am specialized in business portrait of all kind. The classic style is only good for conservative jobs.
Really loving the shallower depth of field but I can’t manage to get that much blur out of my cropped sensor without it being overexposed. The lower I can go on my strobes is 1/32. Does this mean I would absolutely need a ND filter in order to achieve the same results?
Thanks!
Hi Alex, if that’s as low as your lights go then yes you will need an ND filter. There are only 4 routes to reducing light if you can’t change your aperture/shutter speed. 1. Lower the power of the light 2. Put an ND filter on the camera or the lights. 3. Reduce the ISO 4. Move the lights further away (but this will of course affect the look of the light so is a last choice).
Amazing Tutorials Karl!
I’m into the IT Business and I’m making good money, however I love photography a lot and I just want to know what sort of a mid-range income can a photographer make and which type of photography is the most profitable in your opinion?
Hi, Check out our Business section videos where I discuss pricing.
I’m asking in general, not specifically for portrait
Sorry, ignore my question, I will check that out.
Very informative video Karl, Thanks! My largest softbox I currently have is an 80cm Octagon, so it looks like I’ll be needing something larger. For this business portrait scenario, I was wondering if there would much difference between an umbrella softbox and a traditional octagon softbox. I appeal to an umbrella softbox as it would reduce the hassle of assembling a 140cm octagon softbox. But if one is better than the other, please let me know. Also, can such a large softbox (e.g 150 cm octagon) be awkward to use if trying to achieve a black backdrop in an office?
Hi Jayden, a very large white umbrella can be just as effective as a large softbox – See our live softbox show on replay – I’d go with one like i demonstrated in the show. Black backgrounds are no problem, especially if you use black velvet cloth, it sucks up all the light.
Magnificent demonstrations.
I was a bit worried at first, Because I’m used to seeing all this equipment in the videos. But when you did it with the softbox and a reflector (Which I have) it was clear and simple.
And so many equipment questions… Missing the point.
Thanks Sharon, often with lots of our demonstrations you can visualise the fancy lighting with more basic lighting and similar modifiers. The key things are understanding how light works and then applying that, if you haven’t already I’d highly recommend watching this https://visualeducation.com/class/introduction-and-understanding-light/
Hello Karl. Can I use the same lighting setup on a dark-skinned person?
Hi Yes, this question often comes up but the only difference for people with darker skin or complexion is to increase the lighting on the person but not on the background.
Hi Karl. Great live, I’m learning a lot.
About one of the questions: short lighting is when the side of the face that is closer to the camera is darker. Broad lighting is the opposite. These terms are more used in the filmmaking world I guess.
Cheers
Great live show, how to take a group shot and make sure everyone’s eye is in focus?
Hi Ahmed, thank you. You need to shoot from further back if you can as that will increase your depth of field and then of course use a sufficient aperture such as f11 or f16 to get great enough depth of field.
Hi Karl,
what should we be charging for head shots
thanks
John
hi , i just wanted to know for the second light y did u not use grid on soft box. (fill light).
Hi Sandeep, No I didn’t use a grid but surely you would have seen that in the video?
Karl, many thanks for your quick reply. Leaving the lights on was my mistake when practicing this, so something I will do when I get on site – turn them off where necessary. I thoroughly enjoy your tutorials and there is such enormous value in every single one of them!! You share a craft with those who wish to learn. A massive step up for anyone trying to break into this difficult marketplace.
All the best,
Kind regards
James
Hi Karl, another excellent tutorial as always. I say that every time but the value of your tuition is exceptional. Thank you.
I have won some corporate headshot Clients recently and taken a backdrop with me on each occasion and lights etc. All good. But and as new ground, I know I will be asked to shoot on location in the ‘environment’ of the office / work space as you have shown on your opening to the live show where you used ‘occlusion’. It is those environmental shots that get me. I need to get the ISO down for quality, bring in the ambient and use the softbox / flash to add light to the subject but when I try this, my pictures come out yellow due to white balance with the subject flashed. How on earth are you balancing this flash and ambient with such clean colour with the end result please Karl. I always get a minging yellow tone to the ambient. Do you gel the flash? What camera reading do you settle at please in terms of exposure, before you add your light on the subject please Karl?
All the best
Kind regards
James
Hi James, generally I turn off all the ambient existing lights apart from natural daylight coming in from the windows and then I mix this with my flash, therefore everything would be daylight 5600K. If I needed to keep some lamps etc for effect such as floor standing lamp or lighting of the room that was particualrly important then you can gel those bulbs inside the lampshades to take them from tungsten (3200K) to daylight (5600K) or alternatively as you said you could gel your flash with tungsten gels but that wouldn’t be my first choice. My exposure decision on the ambient is tested before I add the flash so I check what still looks natural and as I said turn off any annoying tungsten lights, or gel them. If the room is too dead without the existing lights then you can fire a honey comb grid into the ceiling or at a wall to simulate the existing lighting that was there before you turned it off, or gel it. Then when you are happy the room looks natural start adding flash gradually.