Packshots – White background product photography
If done correctly, packshots can be a reliable source of extra income if you know how to set them up and shoot them to perfection in minutes instead of hours.
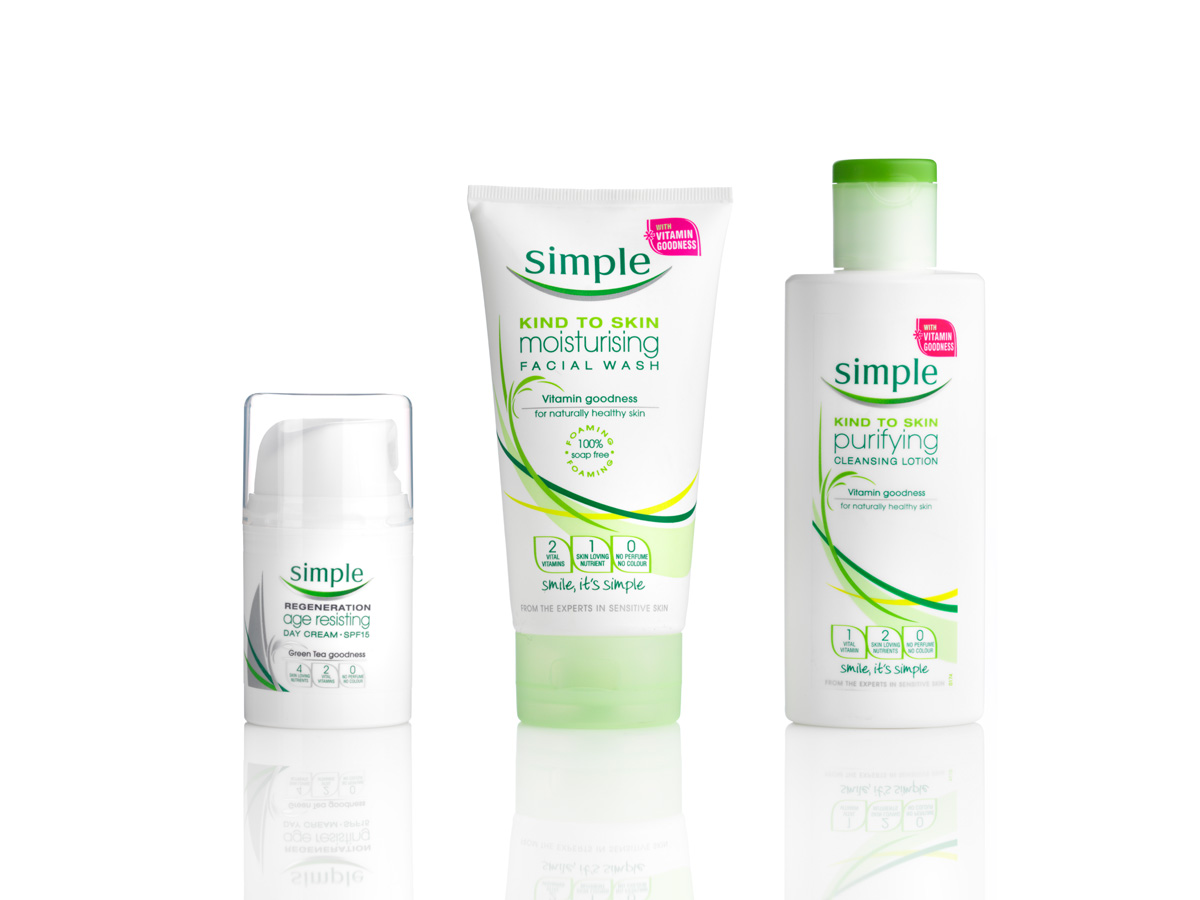
To start, Karl discusses what backgrounds he prefers to use for these simple white-on-white product shots before getting into the minimalistic, but effective three-light setup he uses for this type of work.
You’ll see how he achieves white backgrounds for product photography, how he avoids flare and controls excess light, how he prevents overexposing his shot, and how he uses just one light and a reflector to light the product itself.
Class objectives:
- How to photograph packshots
- Creating white backgrounds for product photography
- Demonstrate techniques for photographing white products on a white background
- How to prevent flare
- Using reflectors
You’ll also find an accompanying post-production class where Karl shows how to retouch packshots on a white background.
Other related class that demonstrate how to photography packshots and e-commerce shots include:
- Live Workshop – Packshot Product Photography
- How To Use Continuous LED Lighting For Packshot Photography
If you have any questions about this class please post in the comment section below.
NOTE: This class is available with English subtitles and automatic translations.
Comments
Awesome tutorial this makes things soo much easier
This was excellent to see – I dont have a big space and will try backlighting on an A1 size polyboard and check result – I do wondeer about a shot I saw somewhere you did for specsavers it featured some white blocks – I cant seem to locate clean edge white blocks, round blocks and shapes I want to use for cosmetics/jewllery/beeauty product, in wood or EVA foam in UK is there a website or store you might suggest?
thanks so much!
john leigh
London UK
Hi John, I get the white blocks made by a carpenter, I think they are made from very clean cuts of MDF and then glued/screwed together and then the screw holes and any joins filled and sanded before being sprayed. We have a few various size cubes made. These guys sell some ready made sets but I’ve not seen them myself so I don’t know what they are like – https://www.essentialphoto.co.uk/category/shop-by-product/photography-accessories/props/
thanks Karl really appreciate your feedback!
Coincidentally I had stumbled across the same essential photo props yeesterday – seems high price but I see nothing else like it in UK might have to splash out give one a try if I cant put something together DIY style!
thanks again
Hi Karl, thanks for your educational program. Why you shoot at 1/400 of second?
Hi, thanks. The shutter speed doesn’t matter because I’m using flash, please watch this chapter – https://karltayloreducation.com/class/shutter-speeds-and-apertures-to-flash/
Hi Karl,
Thanks again for teaching us science and art. My question has absolutely nothing to do with this tutorial.
As much as the native aperture value for a prime lens does not necessarily give the sharpest result, is there a rule of thumb for focal lengths in a zoom lens as in determining which focal length allows the latter to perform at its best?
Thank you.
Hi, thank you for your comments. In relation to your question as far as I’m aware the answer would be no. I’ve used some zoom lenses that were superb through the whole range and other less so. The sharpest sweetspot on most lenses is a mid aperture usually f8 or f11.
Hey Karl and friends!
Huge fan, I love all the classes on KTE! I was wondering are you ever going to do a workshop on how to photograph clothing for e-commerce use. I do a lot of work like that and am looking to make my e commerce clothing shots more systemic, cleaner and tighter. I tend to struggle with sleeves for high end shirts, and how to light to make those tiny details like the buttons and collar stand out. things like making the sleeve look nice and full have always been a struggle, especially with paper stuffing. Let me know if you have any tips. All the best!
Hi, thanks we’ll keep that in mind for a future one.
Hi Karl,
Thank you so much for this, i work for me. However the plastic sheet on my end is still not the same pure white as the background. We try to increase the light and the product is clipped. Any advise on solving this issue?
Try putting light down from behind the product down onto the base surface.
I like to see these old videos, I notice growth in the technique and in the photographic equipment. Greetings from Mexico
Hi Aldo, thanks yes we like to also keep some of our older techniques as reference. For example there are several older ‘high pass’ techniques in our post production section. I don’t use that technique anymore but a lot of people still want to know about it.
Is there any chance for future videos to do product texture lesson? Preferably on makeup – cream foundations, lipsticks, shadows. To learn how to photograph textures. I loved this video – thank you so much for all you do.
Is there any chance for future videos to do product texture lesson? Preferably on makeup – cream foundations, lipticks, shadows. To learn how to photograph textures. I loved this video – thank you so much for all you do.
Thanks Karl, I am from India and you are amazing a great Photographer and A good Teacher who is making things very simple for us.
And I want to work and learn from you more, on a two beads and one egg.
Thanks Karl
Thank you
Super! This video is very helpful for me – Thanks. Please tell me: what is the distance (approximately) from the white background to the lamps and the table
Hi, You’d only need a couple of meters.
Amazing
Thank you Rayan
Hi Karl,
Thank you for this video, could you please , tell me if this setup can also used when shooting from the top?
Thank you
Lili
Hi Karl,
The White on white is the nightmare for a lot of photographers and to see you doing it show us how simple this can be done in a very efficient way. About the reflection part, what do you think if you use transparent plexiglass the light should go through it and no more reflection, in this case, the post-production is minimized, right?
The last thing, I am a fan and you made me a better photographer by following your videos.
Karl, Big Up and thank you so much for all your advice.
Hi, if the plexiglass has any gloss to it then there will be a reflection on unless you use Matt Plexiglass. Cheers Karl.
Hi Karl. Thanks for a great tutorial and tips. My question is, as I don’t have powerful mono lights to brighten up a background, do you think using a 2x speed lights instead would work similar way.
Is it anyway good idea to use speed lights at a product photography? Regards
Hi Dan, if you set the speedlites to a wide angle spread they should work. For product photography they can work but you are limited with certain light shaping modifiers.
This tutorial is what I have been looking for to make my current workflow faster and more efficient. Thanks
Hi Karl. Thank you for this video. This video has given me a start on how to prepare my Packshots in my basement studio. I will gather up a bunch of products and practice. I know I can do this!
Fantastic, thank you!
Absolutely love this video! It’s solved a couple of problems I’ve been having with my product shots.
Hi Louise, great this will also be the subject of our next live show. See the live shows section for details.
What kinde of white balance settings is better to use for white on white ?
Hi Kristap, your white balance settings must correlate with your light source colour temperature and it’s spectrum. Please see this chapter for a full understanding https://karltayloreducation.com/class/introduction-and-understanding-light/
Hi Karl,
Great easy to follow tutorial.
Is there an easier way to achieve white background as i am limited to having 2 300w studio lights for now.
Would using a white muslin background work the same way if we lit the background with one light and use the other for product itself. Having the muslin background fairly closer to the product could may be introduce flare if we lit it with a light?
Please advise.
Thanks
Hi, you’re always better with a bright flat white wall or a piece of MDF board painted white and then using one light to light that wall or alternatively use a the light itself such as a softbox as the background as demonstrated here – https://karltayloreducation.com/class/how-to-use-continuous-led-lighting-for-packshot-photography/
Hi Karl, just signed up on your website and this is the first tutorial I’ve watched. Really well done! Love the way you explain. Quick question: I live in the States and for some reason I struggle to find to buy an acrylic board that you used on the table, I believe you call it White Perspex. I’ve only seen a couple, but they are really small, nowhere close to the size you used on the table. Can you please help? 🙂 Thanks!
Hi Marius, I believe the US brand name is Makralon? You should find it at most Sign Manufacturers (for building signs) and also large plastic suppliers. Cheers Karl.
Thank you Karl! I found something at the Home Depot.
Hey karl,
what would you recommend for deep etching images for mostly chemist products, white back ground for darker objects and black for white? or would the black cause problems with the cutting out?
Hi Mark, I’m afraid I don’t quite understand the question. I shoot product imagery for some of the worlds top brands and I don’t know what you mean by deep etching. It’s interesting because this has happened before where some strange phrase or term does the rounds and yet doesn’t come into my or other pros worlds? Can you explain what you mean and I’ll do my best to answer.
OK I’ve just looked it up, you mean ‘cutouts’! Who the hell comes up with this crap terminology that makes its way into photography? White is always safest and easiest. If you are shooting white on white as in this example you have to be careful not to loose your white object into the background so use the techniques shown. Cheers Karl.
Karl can you recommend a cheaper version of the Elinchrom Indirect Litemotiv Square 145x145cm? I know you said you can use a scrim. But I am looking to keep the light nice and even for my pack shots. Is a square lightbox recommended? I have Elinchrom heads in my studio.
Yes you could use softboxes through the scrim for this.
Hi Karl. Thanks for your reply. I know your a busy man and thankful for your time. I made a square scrim with the Lee 216 at 1.22 x 1.22 (Size of paper). I placed the Elinchrom 66 x 66 at a distance to cover the scrim. Despite the light fall off, I have to say it really created a nice soft gradual light on the products. I wish there was a way to show you the end result. I used a mirror on the opposite side of the product and it made a more hard edge so I will need to try a few different ideas. But overall my production time has increased a lot since using your technique. I sent some sample shots as well to previous clients and they are really loving the new look.
I have 2x Elinchrom 66x66cm soft boxes. If I put them behind the scrim would that work for even lighting?
Nicholas, where would your scrim be? Are you talking about using the scrim for the background?
One more question. Sorry Karl. I been looking for a sheet of White Perspex. What size sheet did you use and where can I buy one? I have looked online and there is alot of choice and options. Is it 3mm, 5mm or 7mm? Thanks Karl.
Hi Nicholas, Best place to get it is from plastic suppliers or sign making companies. 5mm is always a good one and get the biggest sheet you can afford or store but usually 1m x 1m would be the minimum i’d work with.
Hi Karl,
If I needed to shoot pack shots with a clean black background, would the technique be similar to your whiskey product shoot (minus the background gradient)?
Simple, clear and right to the point instruction.
Thank you so much!
Thank you Shermin, you are welcome.
Thank you
Hello please tell me where i can buy that reflection kind of board in UK please ?
May thanks.
Hi Baryalay, if you mean the foamboard then your local signmaking company will have it. If you mean the big ‘poly’ boards then you can try builders merchants.
Hi, Karl as you said at the beginning of the pack shots video there is no hight budget in it, my question is as a photographer if I have been asked to do it let’s say 40 shots a day for 3 weeks how can I calculate what to charge the client?
Hi Cheick, have you watched our business courses yet?
ok thanks
hope you noticed my question.
Hi Karl Taylor thanks for this tutorial, I wanted to ask, will it be fair to say that you overexposed the white background? for this shoot to get the perfect white? what about the products themselves did you color balanced them? thanks
Hi Cheick, no I think the tutorial demonstrated that we took the white exposure from slightly below pure white and then gradually increased it to just pure white. So it certainly wasn’t overexposed or this could have an adverse effect on the products and contrast of the image. Each shot is checked for neutrality using the color measuring tools in the software and also by placing a grey card in the shot at the start for reference. We will soon be releasing a tutorial on the process of using color test cards. All the best Karl.
thanks
how can i get the front of the product white without a shadow and the same time not over expose the product face?
Hi Abraham, I don’t fully understand your question? First of all is your product completely pure white? Secondly is the product flat or curved and are you saying you don’t want any shadow anywhere on your product? This doesn’t make sense to me as without any shadow there will be no three dimensionality or form. Can you provide a link to an example photo of what you mean?
thank you for your reply. in the example above you have a reflective shadow under the product. I would like for the product to have a pure white background all around including the bottom. I get better results when adding a light in front or above of the product but then the face of the product becomes over exposed.
Hi Abraham, no not easily. If you replace the reflective white acrylic with matt acrylic then you don’t get the reflection but it may still not be white enough without additional top lighting. However this tutorial shows you how to overcome the problem in post https://karltayloreducation.com/class/clean-white-background-pack-shots-retouching/ you can also try lighting through your acrylic from underneath but you need to be careful of light hitting the product. Alternatively you suspend your product in the air on a thin rod and shoot it against a white background only and retouch the rod later.
Hi! Thank you for this tutorial. Have you done any apparel on white? The reason that I’m asking is that there’s a fair amount of e-commerce work in my area these days and it would be great to study that just to be able to pull it off if needed. Any tips on shooting fabrics and clothing?
Hi Olli, I prefer a higher contrast light like a Para or a silver brolly for fabrics as you generally want to reveal more texture, but be sure to control your fill light. I’d suggest watching all of our course ‘Light Source’ in the portrait section first as this will cover a lot of that.
Hi Karl, could you help me out on getting perfect white backgrounds and how to avoid reflections when shooting metal watches
Hi Waqaar, this video will help you understand how to achieve perfect white backgrounds and we have 2 other tutorials on watch photography in the ‘product’ section. You may also use our forum to post images describing your problem to get advice.
this video keeps freezing, its really frustrating! sound but frozen screen!
Hi Karl
Excellent tutorial, thank you.
I wonder if you could assist me with the following.
I do a lot of white background catalogue photography for a shoe brand, and am struggling to find a time effective way to place the shoes to get a consistent result. My client has a large range of shoes and slippers etc, and everytime I do their seasonal ranges it is not time effective. They are picky and dont want any shadows or reflections underneath the shoes. Pen tool takes to long per image. I have devised a set that works well for the elevation to create the images without shadows and reflection. My problem is placing the shoes in the same position and angle in the shortest amount of time to get the 200 images out quicker.
Hope you can advise
Many Thanks
Hi Jaco, check out some of the product photography courses for some tips. But from what you have told me it sounds like I would have my metal worker create and elevated shoe stand that has thin metal plates to stick the shoes soles to and are already correctly angled so that you can repeat over and over quickly. You may then have two or three of these shoe supports for different angles etc, but the main this repeatability. Having the elevation on a thin metal stand will also minimise retouching and allow a clean white all around the shoes and lighting from any angle. Whenever I’m faced with a problem like this I simply design a solution and get my metal worker to build something, whilst this may cost some money in the long run it is worth it.
..I would do it with transparent plexiglas
Hi Heinz, yes you can but you need to keep it far away from your products otherwise it will ‘light’ them from the back and in having to keep the plexiglas far enough away you inevitably need a much larger piece which can be expensive and more problematic to clamp in place. A white wall or roller of paper is large enough to keep some distance away.
Thank you for the advice, much appreciated
Why can not I watch high quality video?
Hi Quang! I am in Saudi Arabia now, the video quality is exceptionally good. I have no issues. Please check the internet speed.
Hi Quang, we don’t understand, our video are in 1080 HD, if you have a good internet connection then they should play fine. We and our members watch and test them every day from our service provider so we would see if there were any issues. What sort of problems are you having and which country are you watching from?
Very nice. I had a question how about if we need a higher camera angle say for jewelery or for shoes, how do we proceed
Congrats! Great! Thanks!
Great tutorial, very well explained and shown, Karl!