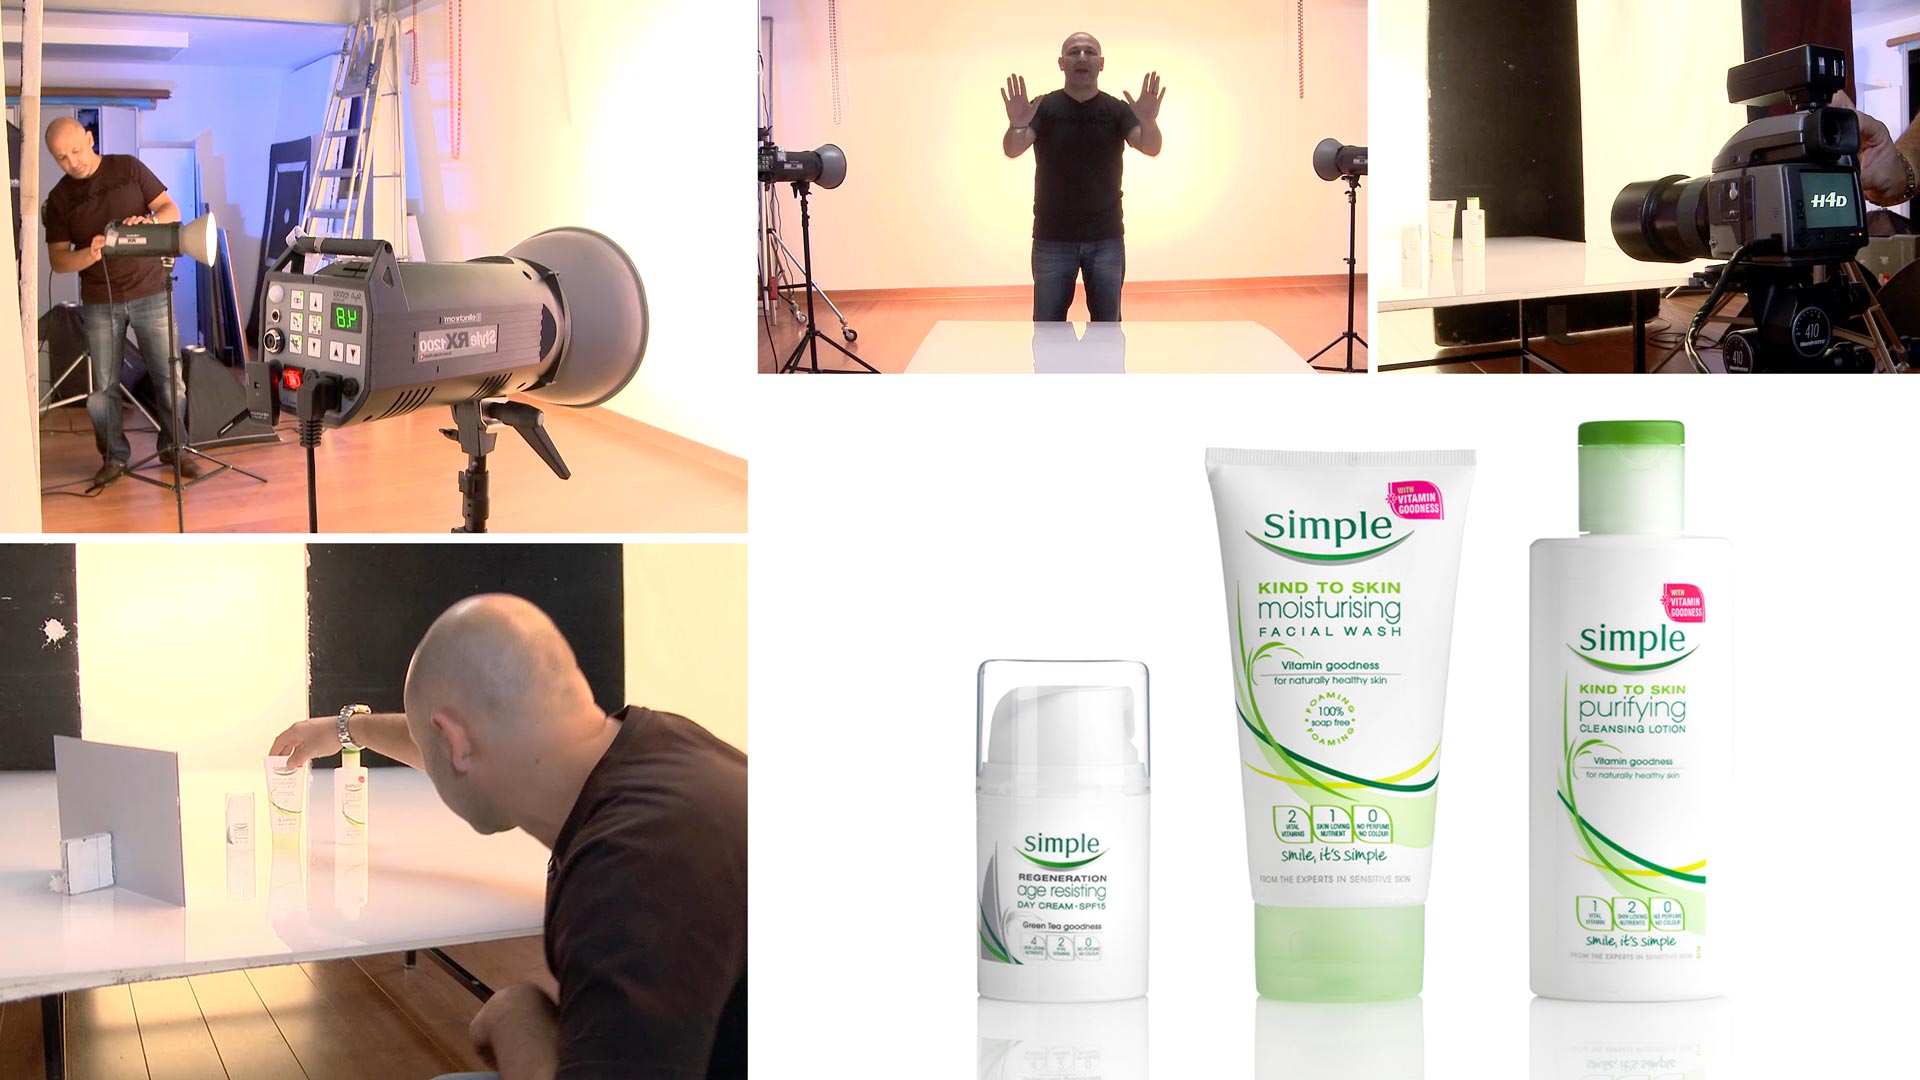

Packshots: White Background Product Photography
Packshots can be a reliable source of extra income – if you know how to set them up and shoot them to perfection in minutes instead of hours.
In this packshot photography class, Karl discusses his preferred backgrounds for these white-on-white product shots before getting into the simple but effective three-light setup he uses for this type of work.
You’ll see how he achieves white backgrounds for product photography, how he avoids flare and controls excess light, how he prevents overexposing his shot, and how he uses just one light and a reflector to light the product itself.
In this class:
- How to photograph packshots
- Creating white backgrounds for product photography
- Techniques for photographing white products on a white background
- How to prevent flare
- Using reflectors
To see Karl’s retouching process for this shot, check out Packshots: White Background Product Photography | Post-Production.
If you enjoy this class, be sure to check out Packshot Product Photography and How To Use Continuous LED Lighting For Packshot Photography.
Questions? Please post them in the comments section below.
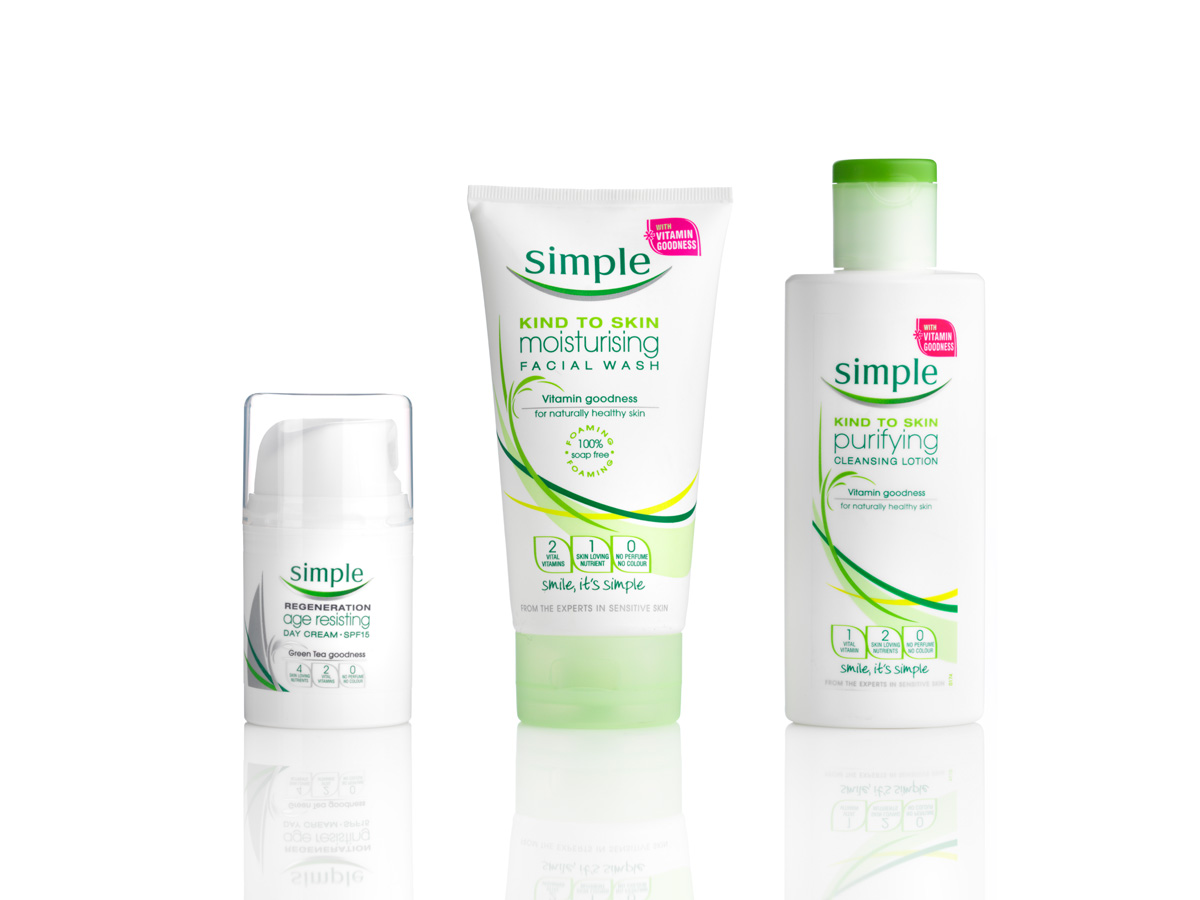
Packshots – White background product photography. © Karl Taylor
Comments
Is there any chance for future videos to do product texture lesson? Preferably on makeup – cream foundations, lipsticks, shadows. To learn how to photograph textures. I loved this video – thank you so much for all you do.
Is there any chance for future videos to do product texture lesson? Preferably on makeup – cream foundations, lipticks, shadows. To learn how to photograph textures. I loved this video – thank you so much for all you do.
Thanks Karl, I am from India and you are amazing a great Photographer and A good Teacher who is making things very simple for us.
And I want to work and learn from you more, on a two beads and one egg.
Thanks Karl
Thank you
Super! This video is very helpful for me – Thanks. Please tell me: what is the distance (approximately) from the white background to the lamps and the table
Hi, You’d only need a couple of meters.
Amazing
Thank you Rayan
Hi Karl,
Thank you for this video, could you please , tell me if this setup can also used when shooting from the top?
Thank you
Lili
Hi Karl,
The White on white is the nightmare for a lot of photographers and to see you doing it show us how simple this can be done in a very efficient way. About the reflection part, what do you think if you use transparent plexiglass the light should go through it and no more reflection, in this case, the post-production is minimized, right?
The last thing, I am a fan and you made me a better photographer by following your videos.
Karl, Big Up and thank you so much for all your advice.
Hi, if the plexiglass has any gloss to it then there will be a reflection on unless you use Matt Plexiglass. Cheers Karl.
Hi Karl. Thanks for a great tutorial and tips. My question is, as I don’t have powerful mono lights to brighten up a background, do you think using a 2x speed lights instead would work similar way.
Is it anyway good idea to use speed lights at a product photography? Regards
Hi Dan, if you set the speedlites to a wide angle spread they should work. For product photography they can work but you are limited with certain light shaping modifiers.
This tutorial is what I have been looking for to make my current workflow faster and more efficient. Thanks
Hi Karl. Thank you for this video. This video has given me a start on how to prepare my Packshots in my basement studio. I will gather up a bunch of products and practice. I know I can do this!
Fantastic, thank you!
Absolutely love this video! It’s solved a couple of problems I’ve been having with my product shots.
Hi Louise, great this will also be the subject of our next live show. See the live shows section for details.
What kinde of white balance settings is better to use for white on white ?
Hi Kristap, your white balance settings must correlate with your light source colour temperature and it’s spectrum. Please see this chapter for a full understanding https://visualeducation.com/class/introduction-and-understanding-light/
Hi Karl,
Great easy to follow tutorial.
Is there an easier way to achieve white background as i am limited to having 2 300w studio lights for now.
Would using a white muslin background work the same way if we lit the background with one light and use the other for product itself. Having the muslin background fairly closer to the product could may be introduce flare if we lit it with a light?
Please advise.
Thanks
Hi, you’re always better with a bright flat white wall or a piece of MDF board painted white and then using one light to light that wall or alternatively use a the light itself such as a softbox as the background as demonstrated here – https://visualeducation.com/class/how-to-use-continuous-led-lighting-for-packshot-photography/
Hi Karl, just signed up on your website and this is the first tutorial I’ve watched. Really well done! Love the way you explain. Quick question: I live in the States and for some reason I struggle to find to buy an acrylic board that you used on the table, I believe you call it White Perspex. I’ve only seen a couple, but they are really small, nowhere close to the size you used on the table. Can you please help? 🙂 Thanks!
Hi Marius, I believe the US brand name is Makralon? You should find it at most Sign Manufacturers (for building signs) and also large plastic suppliers. Cheers Karl.
Thank you Karl! I found something at the Home Depot.
Hey karl,
what would you recommend for deep etching images for mostly chemist products, white back ground for darker objects and black for white? or would the black cause problems with the cutting out?
Hi Mark, I’m afraid I don’t quite understand the question. I shoot product imagery for some of the worlds top brands and I don’t know what you mean by deep etching. It’s interesting because this has happened before where some strange phrase or term does the rounds and yet doesn’t come into my or other pros worlds? Can you explain what you mean and I’ll do my best to answer.
OK I’ve just looked it up, you mean ‘cutouts’! Who the hell comes up with this crap terminology that makes its way into photography? White is always safest and easiest. If you are shooting white on white as in this example you have to be careful not to loose your white object into the background so use the techniques shown. Cheers Karl.
Karl can you recommend a cheaper version of the Elinchrom Indirect Litemotiv Square 145x145cm? I know you said you can use a scrim. But I am looking to keep the light nice and even for my pack shots. Is a square lightbox recommended? I have Elinchrom heads in my studio.
I have 2x Elinchrom 66x66cm soft boxes. If I put them behind the scrim would that work for even lighting?
One more question. Sorry Karl. I been looking for a sheet of White Perspex. What size sheet did you use and where can I buy one? I have looked online and there is alot of choice and options. Is it 3mm, 5mm or 7mm? Thanks Karl.
Hi Nicholas, Best place to get it is from plastic suppliers or sign making companies. 5mm is always a good one and get the biggest sheet you can afford or store but usually 1m x 1m would be the minimum i’d work with.
Nicholas, where would your scrim be? Are you talking about using the scrim for the background?
Yes you could use softboxes through the scrim for this.
Hi Karl. Thanks for your reply. I know your a busy man and thankful for your time. I made a square scrim with the Lee 216 at 1.22 x 1.22 (Size of paper). I placed the Elinchrom 66 x 66 at a distance to cover the scrim. Despite the light fall off, I have to say it really created a nice soft gradual light on the products. I wish there was a way to show you the end result. I used a mirror on the opposite side of the product and it made a more hard edge so I will need to try a few different ideas. But overall my production time has increased a lot since using your technique. I sent some sample shots as well to previous clients and they are really loving the new look.