
Packshots: White Background Product Photography
Packshots can be a reliable source of extra income – if you know how to set them up and shoot them to perfection in minutes instead of hours.
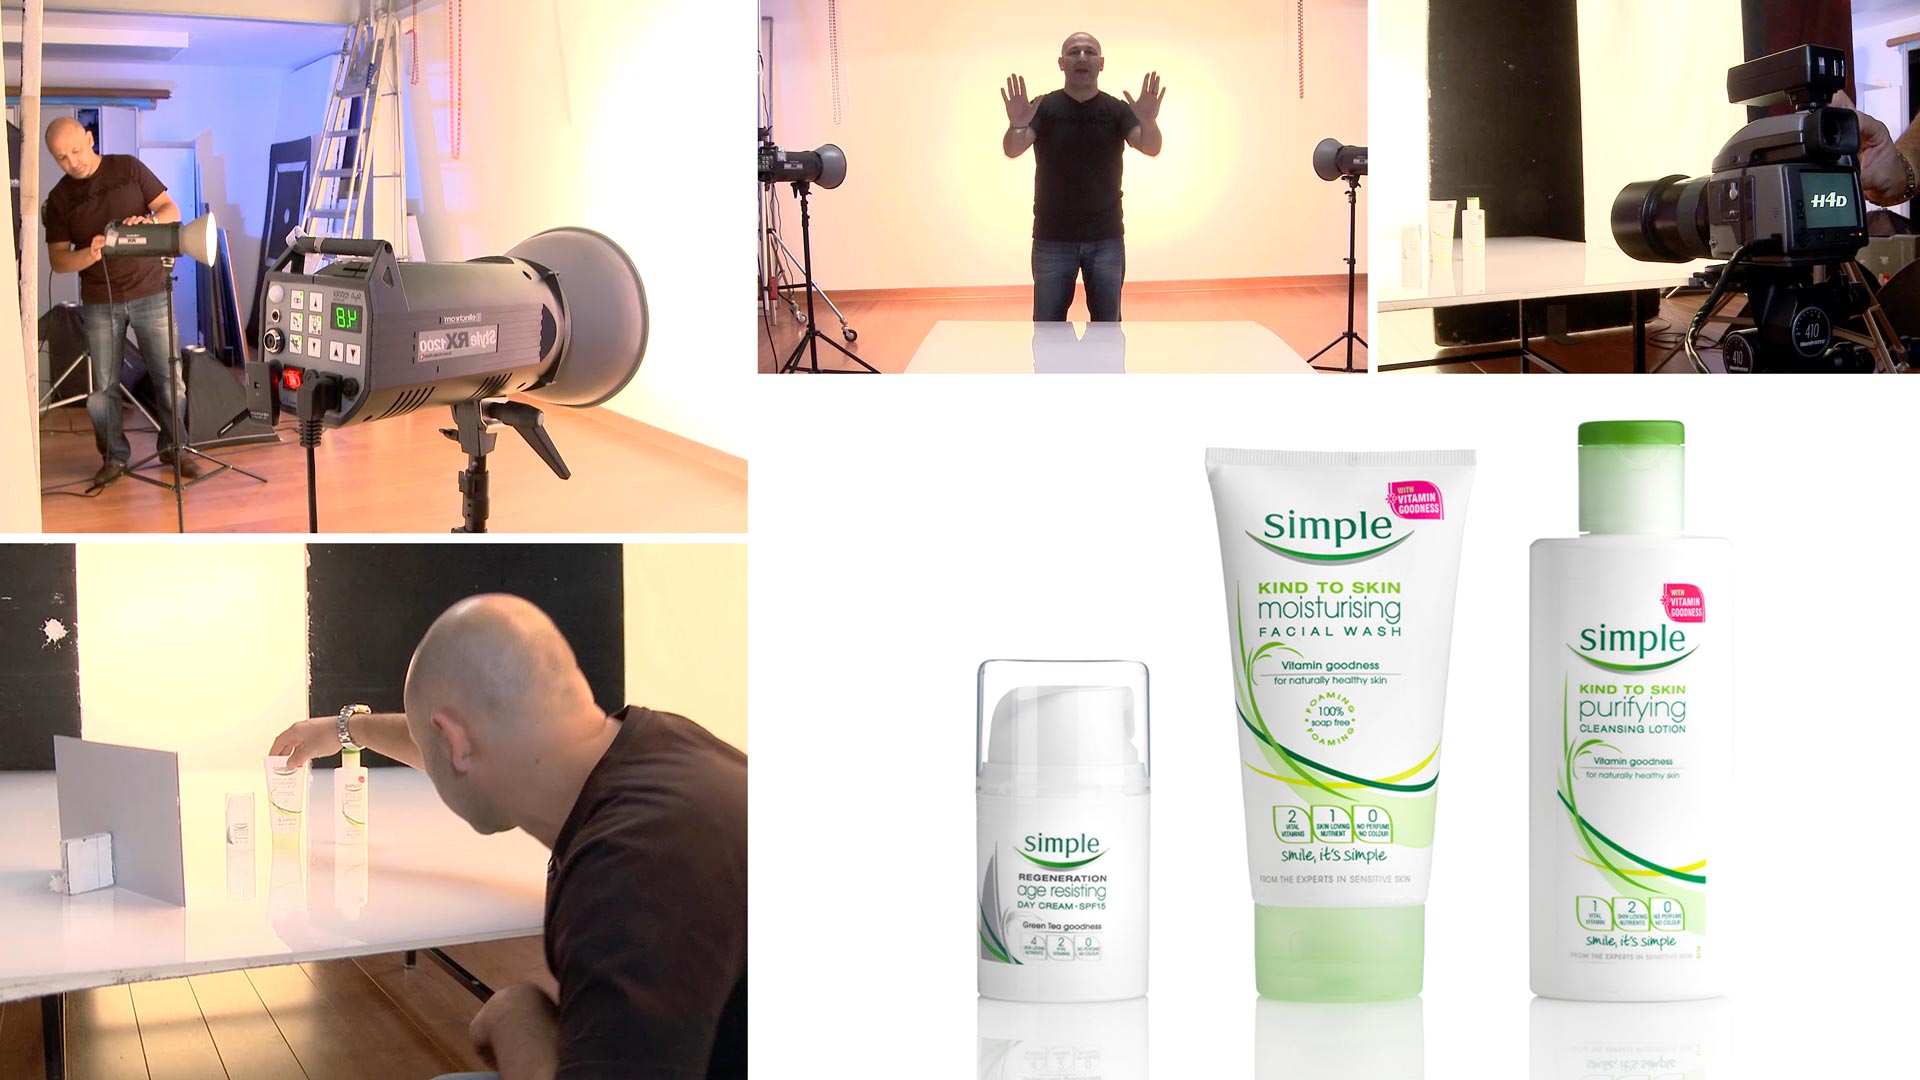
In this packshot photography class, Karl discusses his preferred backgrounds for these white-on-white product shots before getting into the simple but effective three-light setup he uses for this type of work.
You’ll see how he achieves white backgrounds for product photography, how he avoids flare and controls excess light, how he prevents overexposing his shot, and how he uses just one light and a reflector to light the product itself.
In this class:
- How to photograph packshots
- Creating white backgrounds for product photography
- Techniques for photographing white products on a white background
- How to prevent flare
- Using reflectors
To see Karl’s retouching process for this shot, check out Packshots: White Background Product Photography | Post-Production.
If you enjoy this class, be sure to check out Packshot Product Photography and How To Use Continuous LED Lighting For Packshot Photography.
Questions? Please post them in the comments section below.
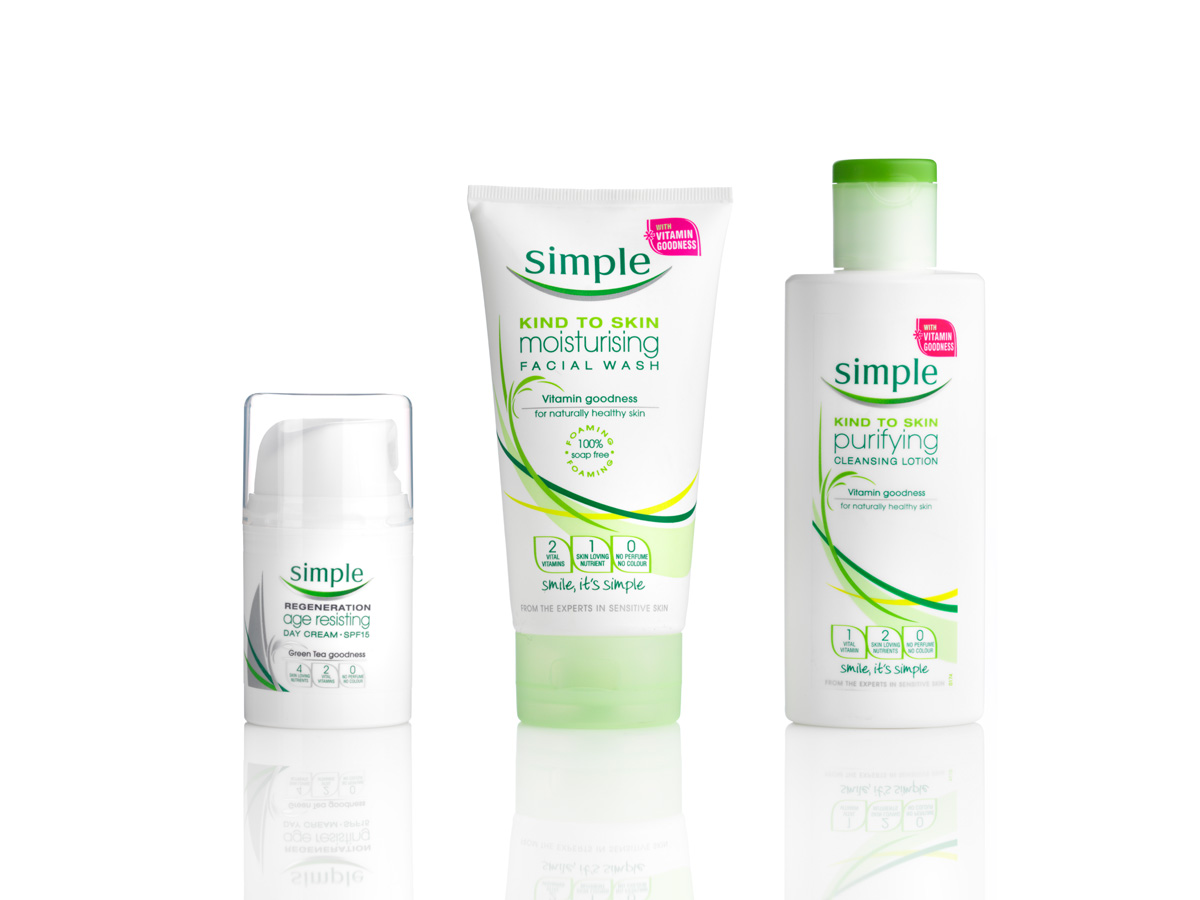
Packshots – White background product photography. © Karl Taylor
Comments
Hi Karl… how would you go about maintaining consistency if you were to have to shoot a series of products (like phone cases with different colors/designs) and you need to shoot 3 angles of each. What would be the best way to be consistent for all the shots and all the angles? I suppose you’d set up hidden markers for where to place the product each time, but then would you need to have 3 different cameras set up to make sure each angle remains the same as you change out products?
Thank you for any insights.
Hi, I wouldn’t have 3 different camera setups as that would be too costly for most studios and unnecessary. Generally you have one background angle that due to the lighting and viewpoint is the most efficient in giving you a clean white so your camera can’t deviate from that much or you will compromise the background. Then when it comes to the product where I have to shoot 3 different angles it is either have markers put down to rotate the product too each time. This is very common and we do it a lot for glasses where we have a wooden template that we put in for each new angle, place the glasses and then remove the template and then shoot. Occasionally there is also a slightly higher camera angle required so when we have finished we then raise the camera and then re-shoot all the products from the higher angle. Whenever a camera position (or product position) changes you have to consider that you may also need to change your lighting to suit. Please watch all the other classes in this packshot section to see other tricks and also watch the class we have in the Lighting Theory section called ‘Angles of incidence and reflection’ Kind regards Karl.
Thank you for the reply and information. I have watched those videos and they are very helpful! I have put in a bid on a job where they will have a bulk of cases (all same shape but different colors/patterns) to photograph at 3 different camera angles ( vs product angles). Definitely logical to do them all at each camera position before moving to the next. The tricky part is that after the bulk of products, they will have smaller groups that come in over time so I’ll have to re-create later. I suppose I’ll just take great notes and photos of my setup for the next batch. Open to any tricks if you have them! Thanks again!
Hi, yes some photos of your setup, measurements and notes are always a good idea to help re-create it the same.
Thank you, Karl!
Hi Karl, thank you for a great video!
Do you think it’d be possible to change the main lights soft box to a large reflective umbrella??
Hi, thank you. If the umbrella was matt white with an external diffuser and the products were matt. But I’d have to say that doesn’t seem to make any sense when better option would be to just fire your light into a big white board as a reflector instead or through a roll of scrim material. If you watch some of our lighting theory videos you will come to understand the concepts of lighting more clearly, when you know these you can figure out many ways to do things differently and with different tools but it requires the initial understanding of size, diffusion properties and reflectivity of the subject. The introduction to product photography section will also help you.
Hello Karl. You’re great! Great video! I have a question. May I ask what type of cable you use to connect your camera to your computer? What is the program?
Hi thank you. I use Phocus software which comes with my camera but you can use Capture One also or even lightroom and tether tools cables, we have a class on it here – https://visualeducation.com/class/shooting-tethered/
Great course on using bounce cards and mirrors also. When I get my sample products in the mail. See what I can do with the equipment I have. Helping a friend decide on a camera for some product shots.
Thank you once again for having a great site.
Thank you Kenshi.
Hello Karl
This is more like it.
All done in camera.
Beautiful.
I think you might be able to do this photography stuff full time!
Hi Karl,
I have a question regarding the distance between the wall and the subject. (is it correct to say that as more distance you have as less you get flare you get on your subject?) I’m trying to do the same at home where I don’t have that much space as you have. I only have 1-2 meter distance at all and there is nothing I can do about it, because that is the only space I have. As a result I’m dealing with a lot of flare on my products. Do you think I’m doing something wrong with my setup or I’m facing this problem because of not having enough space? If it’s not the setup I would love to have some additional guidance to avoid or reduce flare in really teeny tiny small spaces . Thank you.
Hi, it sounds like you are overlighting your background, try and get your white level down to 253 and see if you still have the flare problem.
Hi Karl, I was wondering if you have a recommendation for where to purchase the white perpex you use in the video. Any help is much appreciated!
Thank you,
Spencer
Hi Spencer,
Here are some suppliers in the UK, or go to your local Sign Service company.
https://www.theplasticpeople.co.uk/products/plastic-sheets/
https://www.trentplastics.co.uk/acrylic-plastic-perspex-sheets
https://www.theplasticshop.co.uk/perspex-acrylic-index.html
I’d like to know how to shoot same kind bottle with hologram on it. is there any way control the reflections on hologram?
Hi Tamer, a holographic label only appears holographic because we have steroscopic vision (2 eyes) which allows us to see the hologram as a 3d graphic. In photography it is two dimensional and from a fixed point so it will never look the same. The reflections from the material are also extremely bright and may need to be controlled from shooting a separate exposure and comping it in to the final shot.
Awesome tutorial this makes things soo much easier
This was excellent to see – I dont have a big space and will try backlighting on an A1 size polyboard and check result – I do wondeer about a shot I saw somewhere you did for specsavers it featured some white blocks – I cant seem to locate clean edge white blocks, round blocks and shapes I want to use for cosmetics/jewllery/beeauty product, in wood or EVA foam in UK is there a website or store you might suggest?
thanks so much!
john leigh
London UK
Hi John, I get the white blocks made by a carpenter, I think they are made from very clean cuts of MDF and then glued/screwed together and then the screw holes and any joins filled and sanded before being sprayed. We have a few various size cubes made. These guys sell some ready made sets but I’ve not seen them myself so I don’t know what they are like – https://www.essentialphoto.co.uk/category/shop-by-product/photography-accessories/props/
thanks Karl really appreciate your feedback!
Coincidentally I had stumbled across the same essential photo props yeesterday – seems high price but I see nothing else like it in UK might have to splash out give one a try if I cant put something together DIY style!
thanks again
Hi Karl, thanks for your educational program. Why you shoot at 1/400 of second?
Hi, thanks. The shutter speed doesn’t matter because I’m using flash, please watch this chapter – https://visualeducation.com/class/shutter-speeds-and-apertures-to-flash/
Hi Karl,
Thanks again for teaching us science and art. My question has absolutely nothing to do with this tutorial.
As much as the native aperture value for a prime lens does not necessarily give the sharpest result, is there a rule of thumb for focal lengths in a zoom lens as in determining which focal length allows the latter to perform at its best?
Thank you.
Hi, thank you for your comments. In relation to your question as far as I’m aware the answer would be no. I’ve used some zoom lenses that were superb through the whole range and other less so. The sharpest sweetspot on most lenses is a mid aperture usually f8 or f11.
Hey Karl and friends!
Huge fan, I love all the classes on KTE! I was wondering are you ever going to do a workshop on how to photograph clothing for e-commerce use. I do a lot of work like that and am looking to make my e commerce clothing shots more systemic, cleaner and tighter. I tend to struggle with sleeves for high end shirts, and how to light to make those tiny details like the buttons and collar stand out. things like making the sleeve look nice and full have always been a struggle, especially with paper stuffing. Let me know if you have any tips. All the best!
Hi, thanks we’ll keep that in mind for a future one.
Hi Karl,
Thank you so much for this, i work for me. However the plastic sheet on my end is still not the same pure white as the background. We try to increase the light and the product is clipped. Any advise on solving this issue?
Try putting light down from behind the product down onto the base surface.
I like to see these old videos, I notice growth in the technique and in the photographic equipment. Greetings from Mexico
Hi Aldo, thanks yes we like to also keep some of our older techniques as reference. For example there are several older ‘high pass’ techniques in our post production section. I don’t use that technique anymore but a lot of people still want to know about it.