


Clinique Shoot 2: Lighting and Splash Shots
In this second part of the Clinique style advertising shoot, Karl makes some further adjustments to his lighting and works on capturing the splash shot.
You’ll be able to watch as Karl demonstrates how to increase contrast in the bottles and creates the black logos. He also shares his tips and techniques for capturing splash shots.
Challenges:
- How to create a Clinique style advertising style image
- Backlighting through the bottles with high contrast on the edges
- Black reflection in the Clinique logos
- Getting the right splash shot with high contrast edges
Solutions:
- Reflectors and flags to add highlights and contrast
- Use card to reflect light back into the logos
- Use fast flash duration and mirror lock-up to get best splash shot
With the initial lighting setup done, the next phase was making small adjustments and adding contrast in the bottles.
In addition to adjusting the lighting ratios, I refined the black flags (which I introduced in the previous class) and also added black tape on the back of the bottles to increase the contrast on the edges of the bottles.
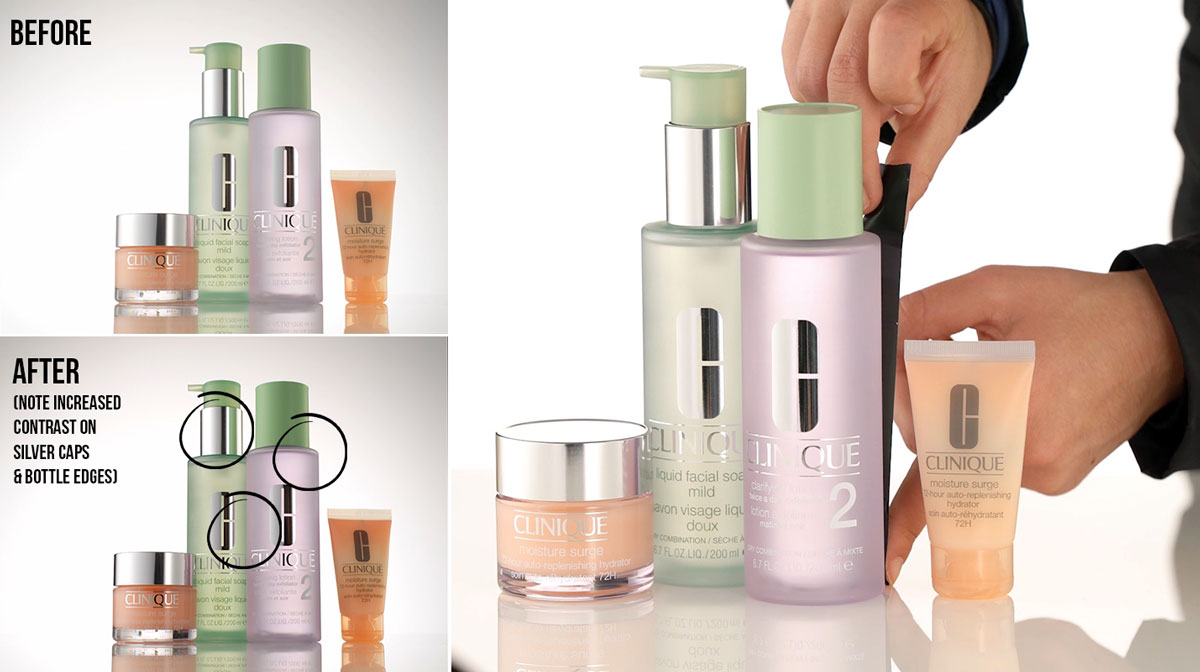
Increasing contrast in the bottles.
The next challenge was adding black into the Clinique logos. This was a crucial part of the shoot as Clinique advertising images always show the logos as black, even though they’re silver. I knew reflecting black into the logos would darken the whole shot and require some composite work in Photoshop (You can watch the full post-production for this shot here).
With the logo shot complete, the final stage of this shoot was the splash shot. Splash shot photography requires a lot of patience and a little bit of luck. To increase my chances of getting a good shot, I made sure to use a fast flash duration and use the mirror lock-up mode but it still took over 200 attempts before I got the shot I wanted.
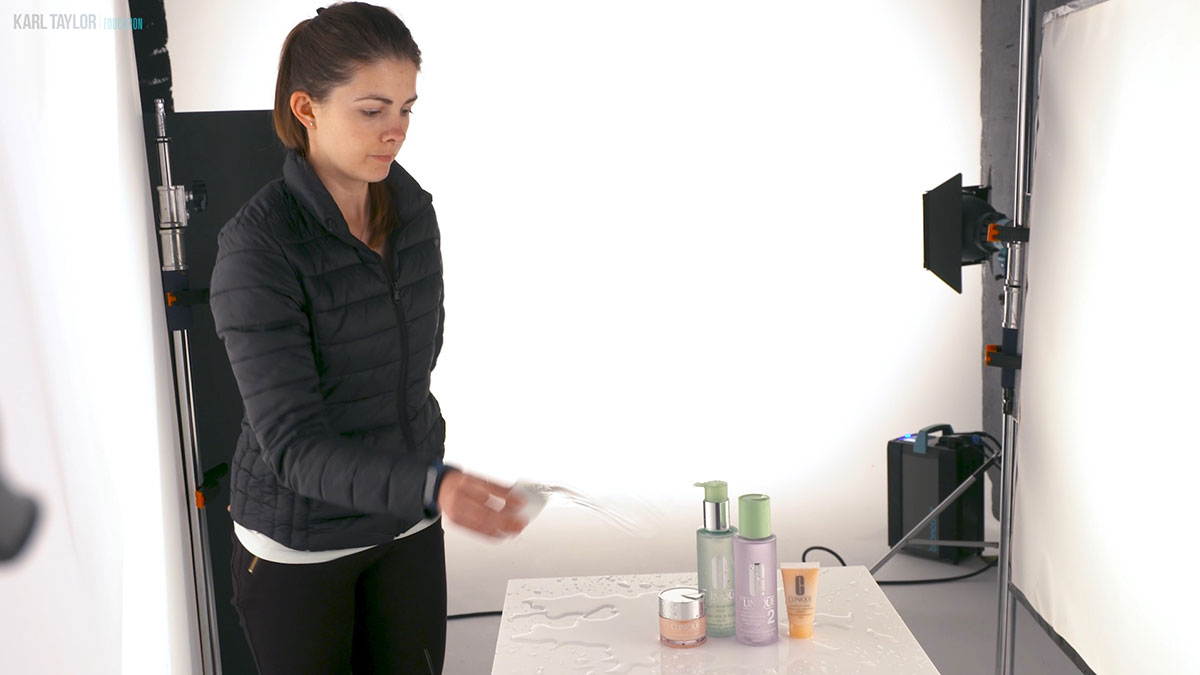
It took over 200 attempts to get the right splash shot.
After getting the right shot, I could move on to photographing the smallest bottle of the composition, which I knew would require some special treatment for the matte surface and different lighting.
To watch part one of this shoot, click here.
The final image:
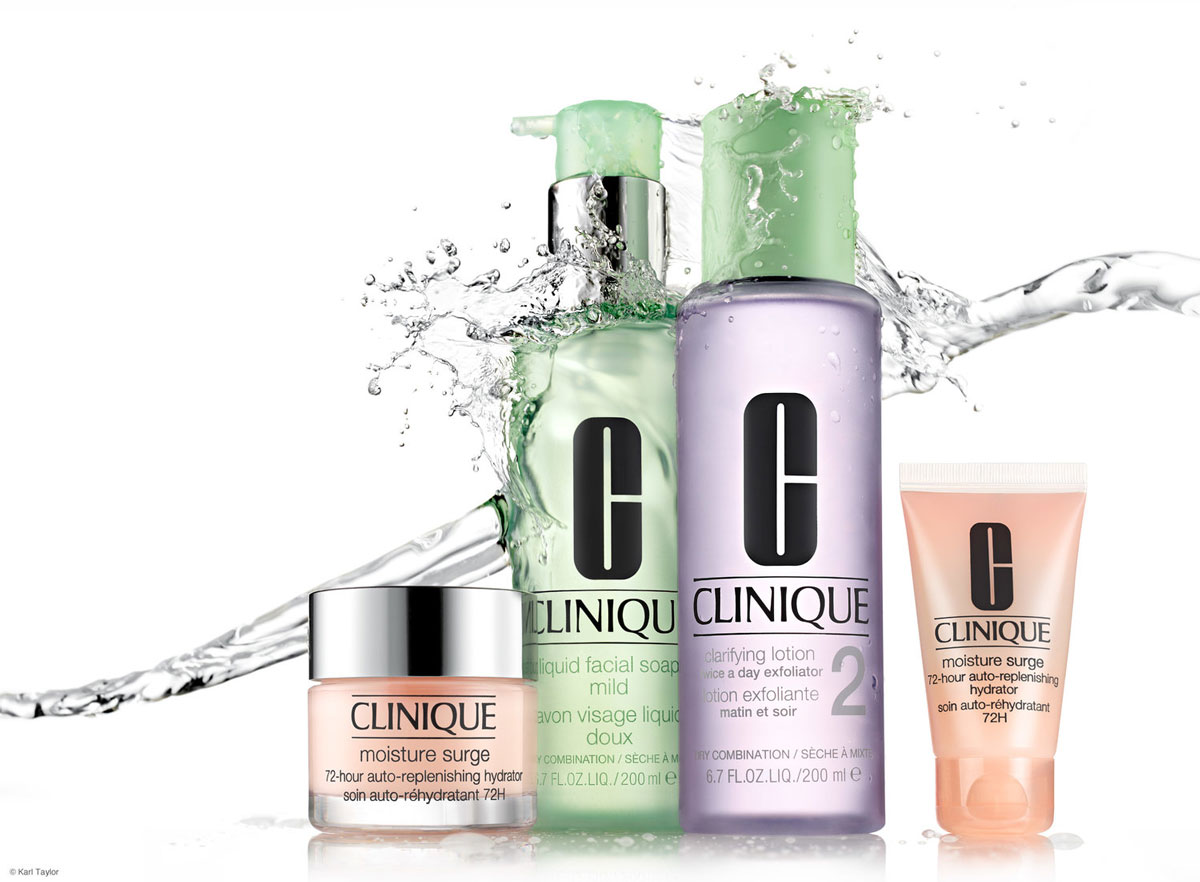
The final Clinique style adverting image
To learn more about product photography, read my top tips for product photography here. You’ll also find a selection of product photography classes on our website. I’ve put together a selection of classes below which I think you may find useful.
Questions? Please post them in the comments section below.
Comments
At 32min31s you lower your flash speed to avoid the blue shift but not only this pack has an option to correct the color shift but you can also change your white balance on your computer software so why didn’t you do that? It would have allow you to use faster flash speed.
Wow what an interesting shot. Fun and very difficult.
1. Broncolor Pulso A4 compared with Sekonic 858 to meter flash duration, close but not the same reading. Doesn’t matter as long as getting the image correct.
2. Has been raining here in California. Wondering if to do this type of shot with rain….??? Maybe just for the fun of it. : )
You did excellent creating this splash image. Lots of hard work.
Hi Karl, you always mention that in product photography there is an hero and a supporting cast. In this case one particular bottle is the hero or all are the same?
Thanks
Hi in this case all the bottles are the hero, the water and background are the supporting cast.
Hello Karl! I am new member to this amazing platform just wanted to ask you that, on one of your classes you said since water is transparent it will be invisible or barely visible if the background is white to overcome that we need to either reduce the background exposure or introduce blacks to all sides but on this shoot you didn’t reduce the exposure significantly or introduced blacks still managed to get the sheets of water. How?
Hi Rik, thanks for being a part of this platform. In answer to your question what I meant was that I didn’t go to pure white on my background, I kept it just under. There is a black foam board flag placed on the left of camera at the back of the scrim and also where Ash is throwing liquid from she is dressed in black. On the other side it is open space with no light so that area was providing a darker area relative to the surrounding lighting which provided enough contrast in the liquid. The important thing to remember with liquid is that it acts like a lens and what you see in it is from the opposite side. If I’d felt that there wasn’t enough contrast in the water to work with then I would have likely got a very large sheet of black foam board and cut a rectangle in it to let just the area of light through necessary for my background and then the water would have refracted the black surrounding area that wasn’t visible to the camera. I hope this explanation helps. All the best Karl.
Hello Karl,
Thank you for taking us on this journey of setup with you, it was really insightful.
I am starting to get into product photography mainly for grocery items. I have a Canon EOS M50 with a 15mm – 45mm lens. I started out using continuous LED light but after watching your videos, I saw that I could get better results if I added strobe lights to my setup, am I correct?
Also, would you advise me to change my lens, if so what lens should I use?
Lastly, what setup (in terms of strobe and continuous light, softbox) would you advise me to start with.
Thank you.
Hi, You can use continuous light for still life and product shots but only if you can modify the light well enough (scrims, softboxes, grids etc) and most importantly that the light is clean and pure with a high CRI. This video will give you a good example of a product shoot with continuous light – https://visualeducation.com/class/how-to-use-continuous-led-lighting-for-packshot-photography/
For the lenses please see our introduction to product photography as we cover the best equipment in that section – https://visualeducation.com/section/getting-started-in-product-photography/
All the best Karl.
Hello teacher, if I need to use a 60-watt or 100-watt constant light to shoot similar products?
Hi, you can’t do this type of shot with constant light only with flash.
Hi Karl,
I have some clear Clinique bottles, so I get the ingrediant and all the other small text coming through the back of the bottle. Unless I take some kind of chemical to it to try and remove it without damaging the bottle, is there any other kind of trick to remove it? Or am I just going to have to go to town on it with photoshop?
Thanks, Joe
Hi Joe, yes i’m afraid it is as simple as that. If it’s there it’s got to be removed, my preference would be to get it off the bottle with meths/scalpol/white spirit or whatever you find that works. If it can’t come off then yes there could be some tricky work in PS. Other options to consider are opening a bottle and inserting another level of diffusion material inside the bottle to disguise it.
Hi Karl. Another great lesson. I am really enjoying this product photography section. I just have a question about image rights. As you ask Ashleigh to take a number of shots for you, does she hold any rights to the final image if any of her images are used, or is this just for the education platform to get the shots done. I’m not sure if this is a grey area or common place. Or are her shots labeled in some way so you know that you are only using your own images?
Hi Adam, even if Ashleigh was a photographer at our company (as I used to employ) they hold no rights over the images because they work for the company and the images would be shot for a client of the company. This would be in the employees contract as an employed photographer. With regards a contribution such as pushing a button, the entirety of the work and creative process is in the lighting and the setup not the pushing the button.
That is really interesting. Thank you. I was always under the impression that the image belonged to the person who took the image, which is why I asked. Given all the creative work you had put into the shot, it seemed unusual for my long held belief to have been true. Glad you were able to clarify.
Adam
Hi Karl!
thank you so much for these fantastic Masterclasses.
I wanted to recreate at least 2 of the apple boxes that you use as a table to take these product photos. You could tell me which measurements you made yours, because I saw that you use them in various ways and they are fantastic. all heights ok!
Thank you so much!
Hi 40cm x 40cm x 80cm
Thank you KARL!
I had made mine 90x45x45.
I think I will lower it by 10cm 80x45x45.
maybe it’s too high …
Thanks Karl for one more in-depth shoot session.
I have a doubt, while adjusting bottle positions Ashleigh touches bottle quite frequently with bare hands ( without gloves etc ). I have experienced plastic products, especially chrome parts are highly prone to finger prints, which is very difficult to remove in post.
How do you manage this issue?
Thanks.
– Sanket
Hi Thank you, we use gloves as often as possible but it becomes frustrating on a long shoot so lots of regular interval hands washing with soap.
Noted, thanks !
Hello Karl .
Thank you for a creative and educational entertainment.
What I wonder is what diffusion you use ?
Hello Karl,
What a complex shooting. Thanks for your time!
One question, what about if I can’t control the speed of my flashes?. Any solution?
Would it be possible to add water without HS flash?
thank s a lot
Hi Luiz, with flash that does not have a fast flash duration then you will have a small amount of motion blur on the water which sometimes looks good as it can enhance the sense of speed. Watch this chapter for a full understanding https://visualeducation.com/class/understanding-flash-duration/