
Specialized Racing Bicycle Photoshoot
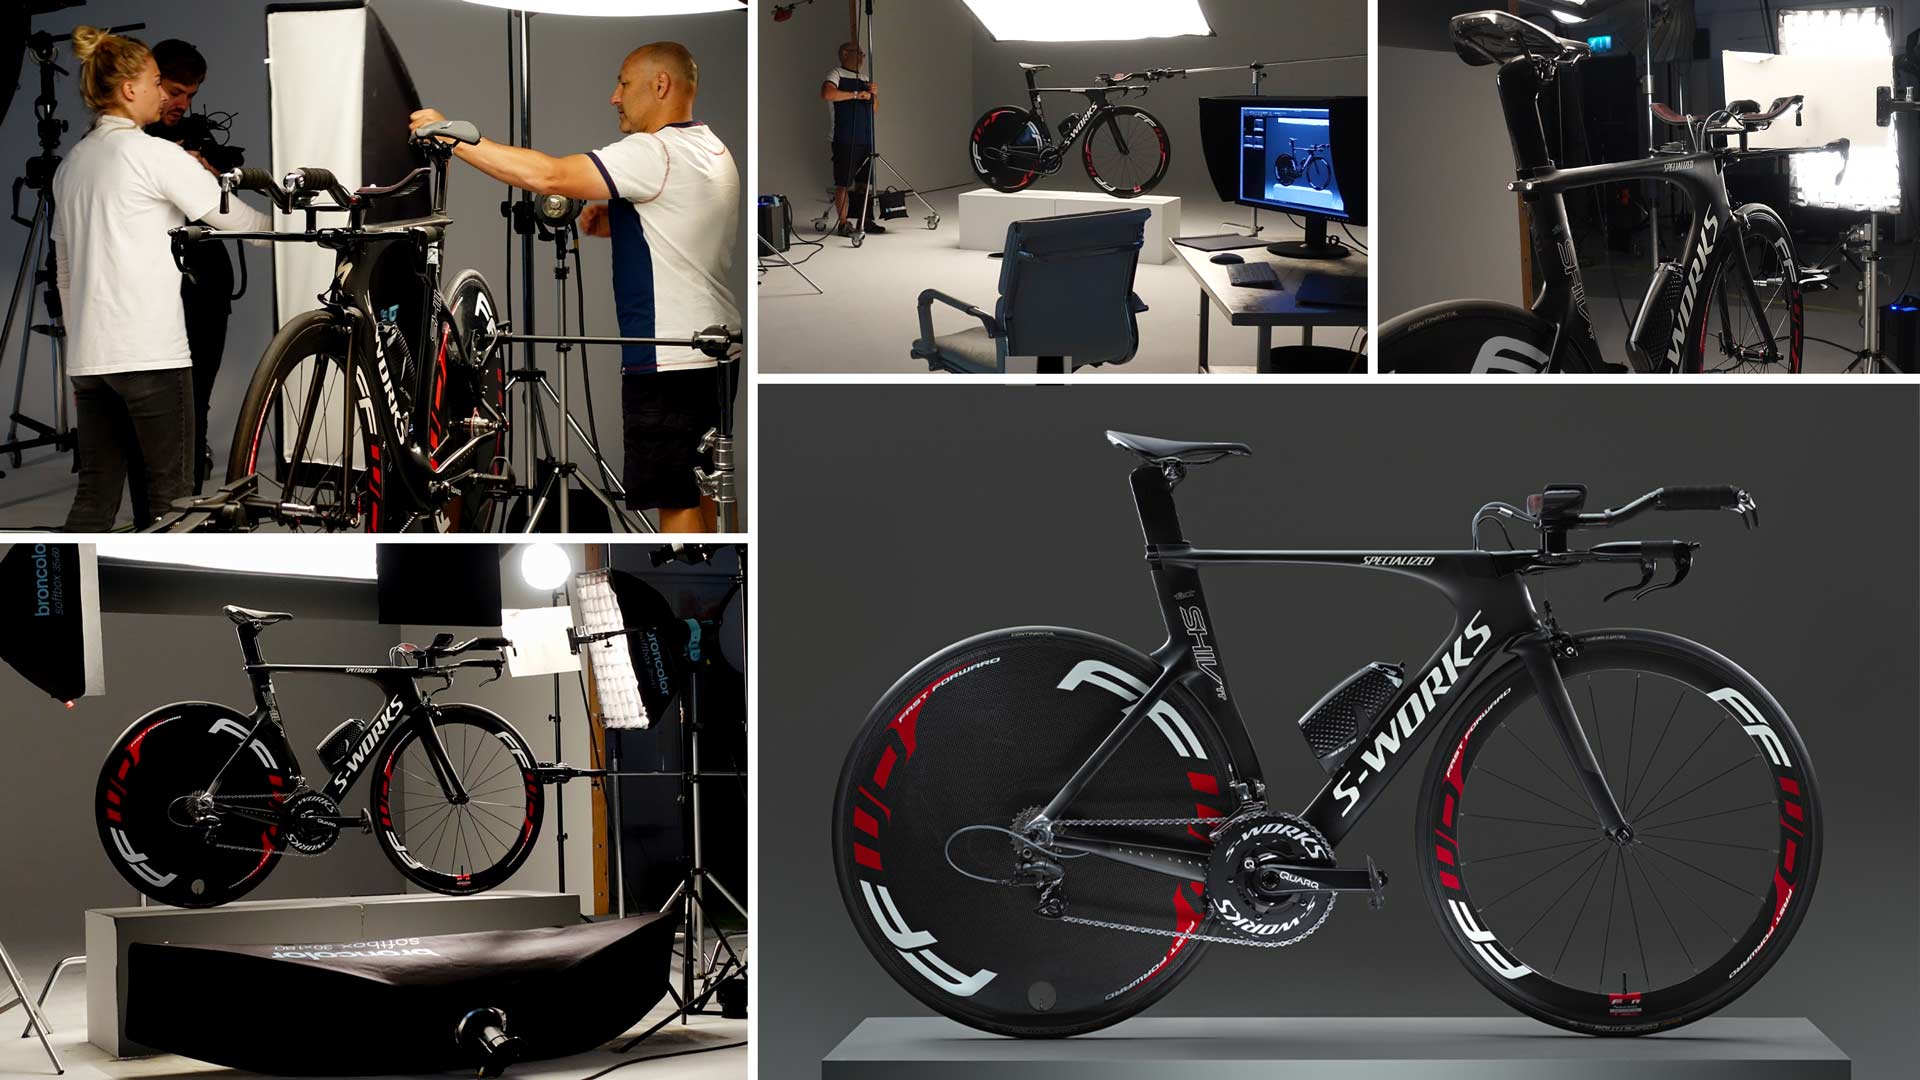
For this product photography class Karl photographs a Specialized time-trial racing bicycle to demonstrate how to light and photograph complex products that have multiple different textures and small important details.
Throughout this step-by-step shoot, Karl explains the concept for the shot, his composition decisions, background choice and techniques for controlling the lighting. As he gradually builds the lighting setup, you’ll learn techniques for lighting matte products, how to reduce flare, and see exactly how important the position of the light is.
This detailed class covers multiple techniques that could be applied to numerous different products and clearly demonstrates the value of methodical work practice and deliberate problem-solving.
Class objectives:
- Professional techniques for how to photograph a bicycle
- How to secure objects for a product shoot
- Lighting techniques for matte products
- How to avoid flare
- How to create rim lighting for products
- The importance of lighting position
If you have any questions about this class, please post in the comment section below.
This shoot was one that I really enjoyed, but it wasn’t without its challenges. If you only see the final setup, the shoot itself may seem quite complex, but in actual fact it wasn’t as complicated as it looks. This is because, by working methodically, I could solve problems one by one to get the final image.
The first problem to solve was securing the bicycle. It needed to be in a fixed position to avoid any movement during the shoot. You can see exactly how we did this in the video.
The bicycle was fixed in position to ensure it did not move during the shoot.
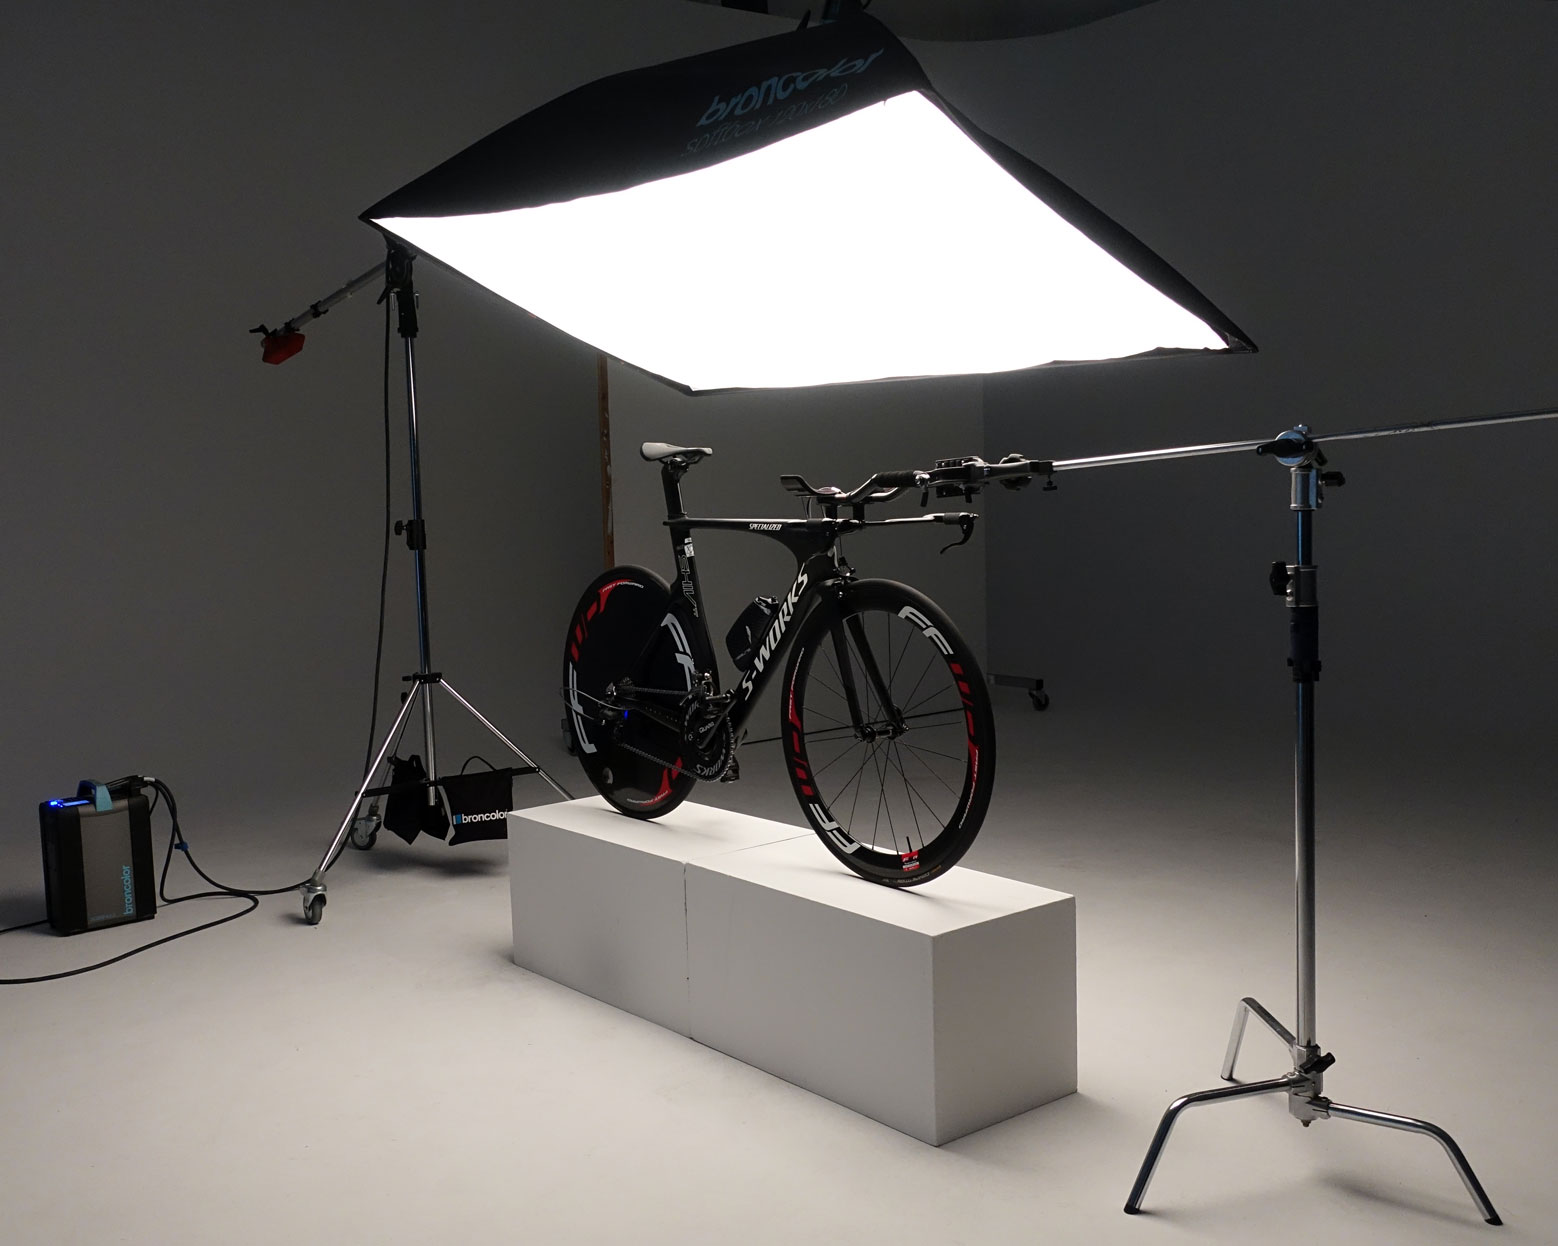
With the bicycle in position, the next step was to start building up the lighting. Starting with an overhead softbox, I continued to add to my lighting, enhancing the rim lighting on the frame and adding small pockets of light to other key areas.
Lighting the product included techniques such as rim lighting and small controlled pockets of light.
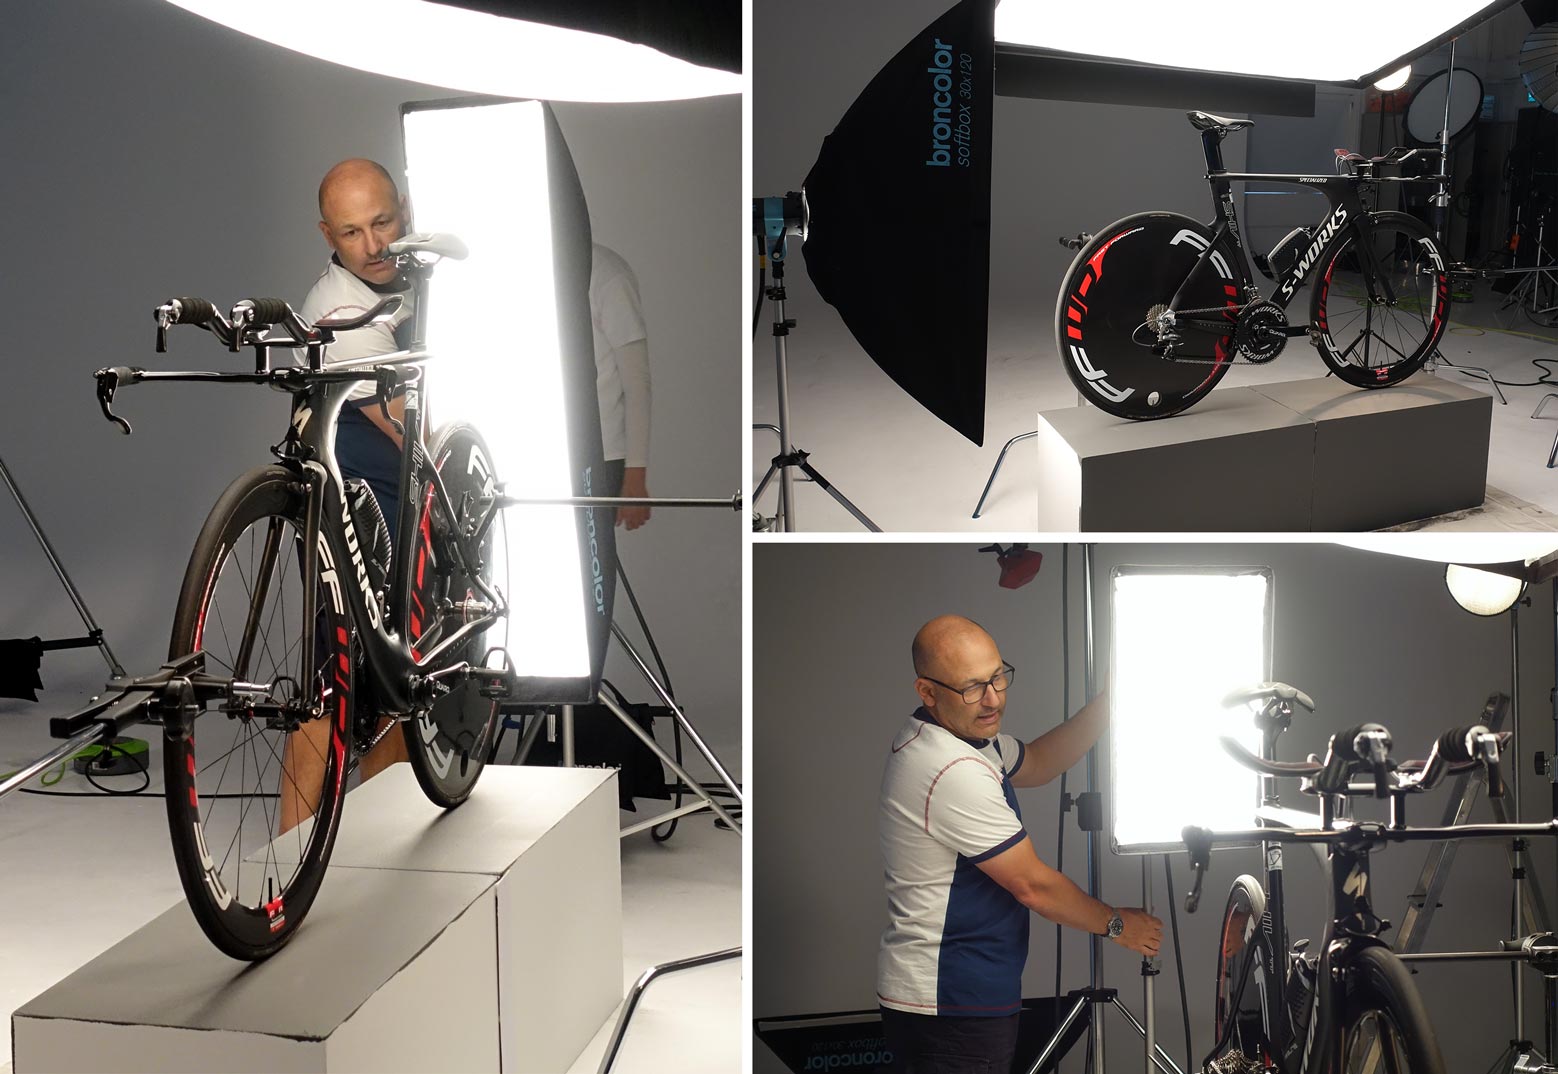
As I started to balance the multiple lights one of the challenges I had to overcome was flare. The position of my lights meant I was getting flare, which was causing the image to appear dull and low-contrast. Once this was solved, it was a case of balancing the lights to achieve the mood I wanted.
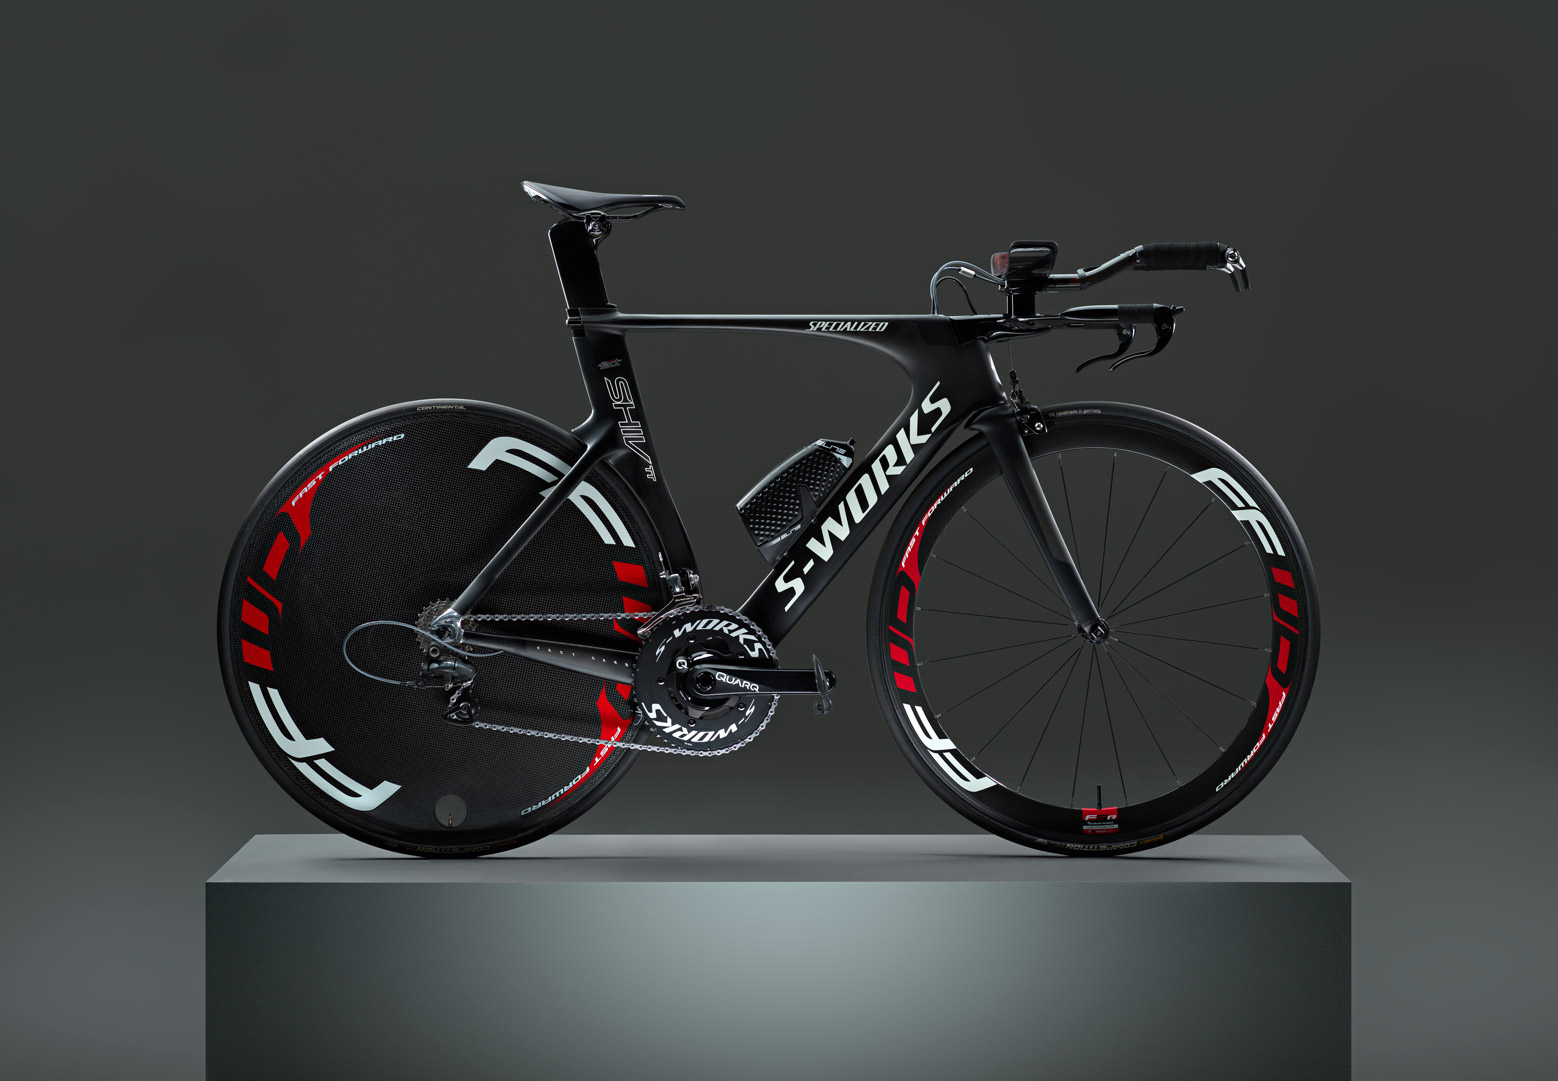
The final image.
Comments
Hello Karl, What kind of clamp you use to hold the front bike tire?
Thank you.
Hi Ragi, did you check the ‘equipment list’ on the lower right of the page? Also this chapter will help you understand the different clamps etc – https://visualeducation.com/class/grips-and-clamps/
AWESOME! BEAUTIFUL ❤ THANK YOU VERY MUCH 😁
Hey Karl
First time I have seen you use a grid on a softbox. I think I have about 5 different softboxes, from large to small, a couple narrows as well as large, medium and small, but I don’t have any grids for them. How often have you had to use a grid on a softbox? Is it something, as far as accessories, that I should look into adding? Generally, I’ve controlled them with clip on black cards to control light spill, but have not really seen the variety of situations that you have. As far as accessories, for the narrow ones, I am looking to find or make a narrower slit cover, which would be immediately useful, but do you think having the grid as being fairly essential?
Hi Gary, your right I very rarely use a grid. They are most useful in smaller studios where you are trying to avoid light bouncing around in the small space reflecting off walls, the trade off is that they will become a slightly harder more contrasty light source than without them and of course a softbox is designed to be the opposite. In a big studio space you don’t really need to worry about light bouncing around as due to the inverse square law if your walls are further away and your lights relatively close to your subject then there won’t be much effect from the bounce. This video I made with broncolor will give you a good comparison of the difference with and without a grid and the effect on the background – https://www.youtube.com/watch?v=PnMj_fey7pI&t=13s
Hi Karl, Thoroughly enjoyed this class, I was smiling and grinning through every time you solved a problem with such ease and explained the same soo beautifully step by step.
I have one doubt – How and where was the clamp or grip attached at the back to support the bike when the clamp from the front wheel was removed?
You are a Genius!!. Thank you soo very much.
Update : I found the back support in the BTS images. All Clear now.
Thank you Owais much appreciated.
Thoroughly enjoyed this class. I really want to try photographing a bike next but currently only have the Godox AD-200 (which I love). Instead of sculpting the light in stages with one light, I’d much rather have at least 2 more strobes but am on a tight budget at the moment. Is there anything budget friendly that you would recommend? I initially thought of maybe trying to find 2 more used AD 200’s but not sure if working with the same type of light would negatively affect the look and feel of the shot. I see many other strobes that are cheaper than the Good, but not sure about quality and all that.
Hi Kelloosh, more of the same strobes would be absolutely OK as may even other brands. The key thing is how the light is modified, controlled and directed, it’s modifying the light and controlling it that makes the image. But as you may have seen at the end of this live show it’s all completely possible even with speedlites – https://visualeducation.com/class/live-photography-workshop-product-photography-earphones/
Hey Karl,
Great video. I was wondering what kind of clamps you were using on the tires to hold the bike up right?
Hi, I think those were Kupo clamps.
Its not better to use construction tracing laser for alligining your products towards camera?
Quite probably! Send me one please 🙂
I learned a lot watching this. Would have liked to have seen the editing, specifically how you cleaned up the wheel shadows and the blocks. Cheers.
Hi Jidoe, thank you. There wasn’t a great deal of retouching on this image as I remember. When there is extensive retouching that is of a type we haven’t covered before then we usually include it as an extra class to the product shoot as you will see in many of our product photography classes. With regards cleaning up the wheel shadows on this shot I think I used a shadow image from one of the earlier shots when I was testing with just the top light. Often for my shadow clean ups or surfaces you will see the same techniques covered in the automotive tutorials but it generally involves selection and blurring of the background/floor and then masking. Take a look at some of the similar techniques covered in the automotive section. All the best Karl.
Hi Karl,
Hope you are well.
1)When you talk about cleaning up the background, this looks like a daunting task for this particular shot, even though removing the lights on the edge etc which you can’t really do I appreciate, as this would alter the amount of light falling onto the background. With such a number of items in the way of a clear background and space, how on earth do you go about clearing up the ‘clutter’ for this shot? 🙂
2)Anything with gradations etc like on the front boxes is a nightmare in Photoshop to equal out. Do you pen round the whole item and them replace background with grey and tweak / gradate from there?? In a lot of you tutorials you remove the items and take a base shot but this one it is not poss.
Great tutorial as always!
Hi James, I generally just slide the lights out of shot a bit and then shoot a blank. If you’d like to see how it’s done you can watch a previous motorbike or car tutorial where I do this. If I’m really stuck I’ll clone out what’s there as best as possible, then I’ll use a gentle brush tool to paint over bits and then of course things might be a little patchy once everything is removed so I then cut the whole background to a new layer and gaussian blur it then add a bit of noise, put a layer mask on it and remove where the gaussian blur has gone over any of the main subject.
Cheers!
Hello Karl,
Thanks for this tutorial. I specialize in portraits but it doesn’t prevent me from enjoying product photography. I have tried a few of these challenges but am not happy with the results so far. I’m thinking of shooting my bike, a black and white Trek Madone after watching this.
I am worried that the wear and tear on my bike may make it an unsuitable subject. It is a gorgeous bike, and not inexpensive but I’ve had it since 2007. I’ll clean it up but I wonder if I would have to get new tires and have scratches buffed out and so on before it is suitable for a shot like this?
Second question is unrelated to bikes but it is related to subjects where symmetry is important. For architectural photography, how important is a tilt shift lens? The only TS lens available for my camera (a Phase One XF) is a 110 mm. That is fairly long compared to other TS lenses I have seen. Is it too long to be useful? Also, would you say that a TS lens is absolutely required to shoot architecture?
Best regards,
AP
Hi AP,
1. I always find it much easier working with new or nearly new products, there are often just to many scratches or dirt to deal with on older items that it isn’t worthwhile.
2. A TS is useful but that focal length will be too long for most architecture. Instead shoot a bit wider than normal and correct the coverging angles in Photoshop/Lightroom with Keystone correction etc.
Thanks for the reply. I particularly appreciate the advice to correct in Photoshop. That is what I have been doing but worried it wasn’t a good idea due to resolution loss in distorted regions. FYI: I have shot architecture with medium format lenses of the following focal lengths: 28mm, 55mm 80mm, 120mm, and 150mm. My favorite results usually come from the 55 and the 28, which are about equal to 35mm and 14mm in 35mm format. I have had good results from the longer lenses, but those are usually very long shots (100 yards from subject) that are made of many stitched images.
Did you see our live show with Sean Conboy? It’s in the replay section, Sean talks about his architectural work and using view cameras and tilt and shift lenses.
GREAT WORK AGAIN , FINAL SHOT LOOK GREAT THANKS AGAIN KARL
Thanks Frank, all the best Karl.
Thanks for the reply Karl. I have a high gloss finish on my bike, so I will give the scrim a go.
Karl, love the video. I love both cycling and photography and appreciate your approach to the bike as a work of art. Would a bicycle with a high gloss frame instead of matte affect your choice of lighting modifiers?
Hi, thanks. Yes i’m pretty sure that I explained near the start of the shoot that I didn’t need to use a scrim in this instance because the bike was made from a matt material. If it was gloss then I would likely have tested a scrim at different heights below the key softbox.
Amazing work Karl! As an avid cyclist, I really enjoyed this module. I very much appreciate the precision in the use of lights as I suspect many folks out there try to create the light sculpting effects in post. Will you have a video on the post production of this image? Thanks!
AG
Hi Arjun, thank you very much. There is no post production video simply because the only post production was to clean up the background and the blocks that the bike is sat on so it’s very similar to the post production shown in our other motorbike or car tutorials.
Fantastic work!
Thank you.