
Environmental Portraits: Electronics worker
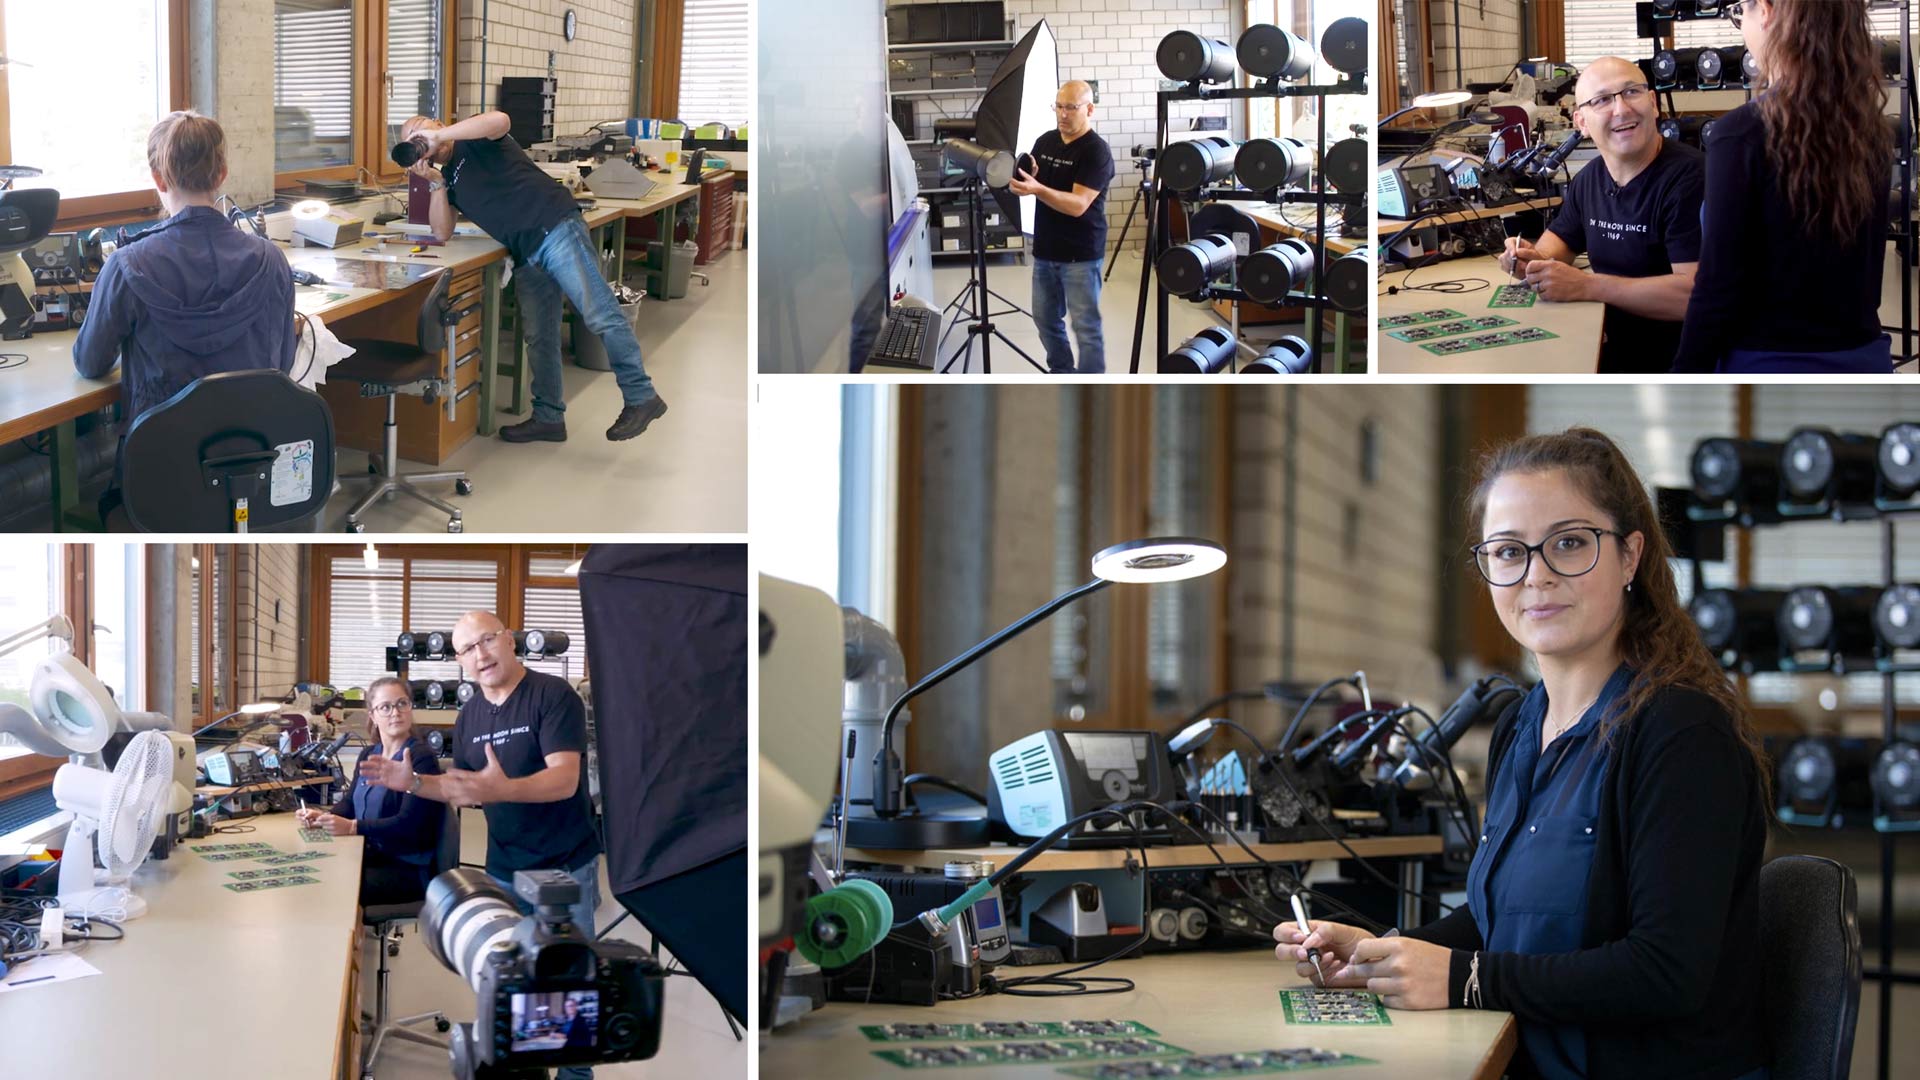
For this environmental portrait shoot Karl was challenged with turning a busy factory setting into something far more suitable for a pleasing portrait.
Photographing an electronics worker at broncolor’s factory in Switzerland, Karl was looking for a location that highlighted the hand crafted element of the company while also acknowledging their advancements and modernity.
Once he’d found the right location, he then had to declutter the busy scene, balance daylight and studio flash to get the best possible results and also make sure the subject felt comfortable. Throughout this video you’ll learn how to overcome these common challenges as Karl walks you through the shoot from start to finish. By the end of this class you’ll have an understanding of the most important skills that will help you work confidently in any location (with both natural and artificial light) and you’ll be able to apply this knowledge to other areas of your photography.
What you’ll learn:
- How to photograph environmental portraits
- How to work in difficult environments to get distraction free backgrounds
- Balance natural light and flash for the best lighting
- How to communicate with your subject and put them at ease
- Lighting setups for environmental portraits
- Tips for environmental portraits
If you have any questions about this class, please post in the comment section below.
When it comes to environmental portraiture, each image is unique, and comes with its own set of challenges. For this image, the main challenge was finding a suitable location. Before I even started shooting, I took some time to walk around the building to try and find the best spot.
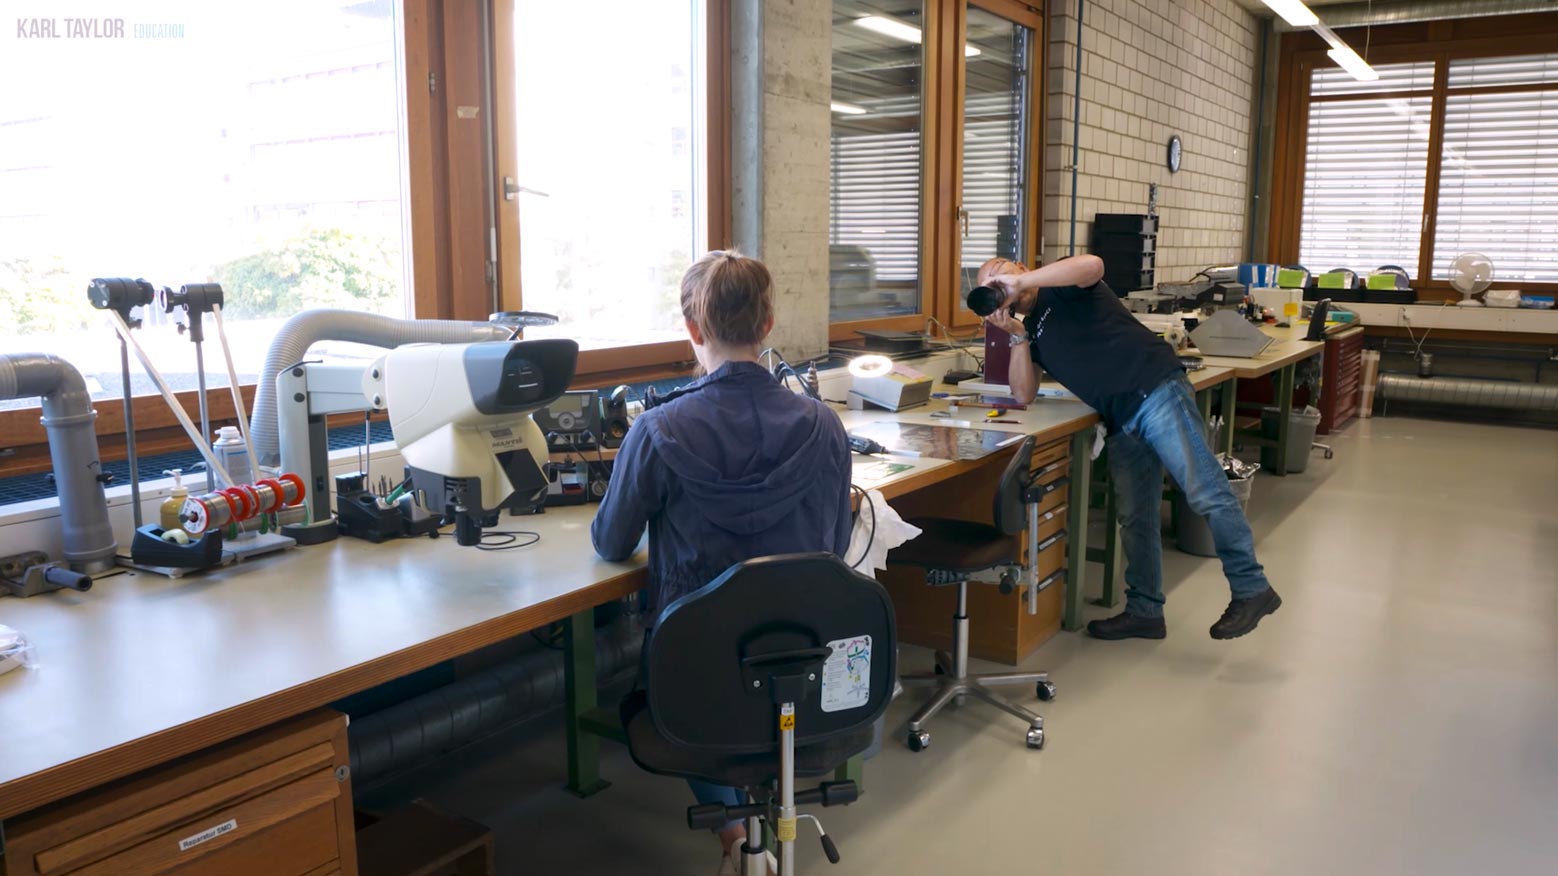
A stand-in subject can be used to test the best locations.
Once I’d found a suitable location, the next challenge I faced was decluttering the scene and lighting the subject.
Once everything was ready, I was able to get the subject in. The key to natural looking portraits is to make sure your subject feels comfortable, so I made sure to clearly communicate with her throughout the shoot so that she could see my vision too.
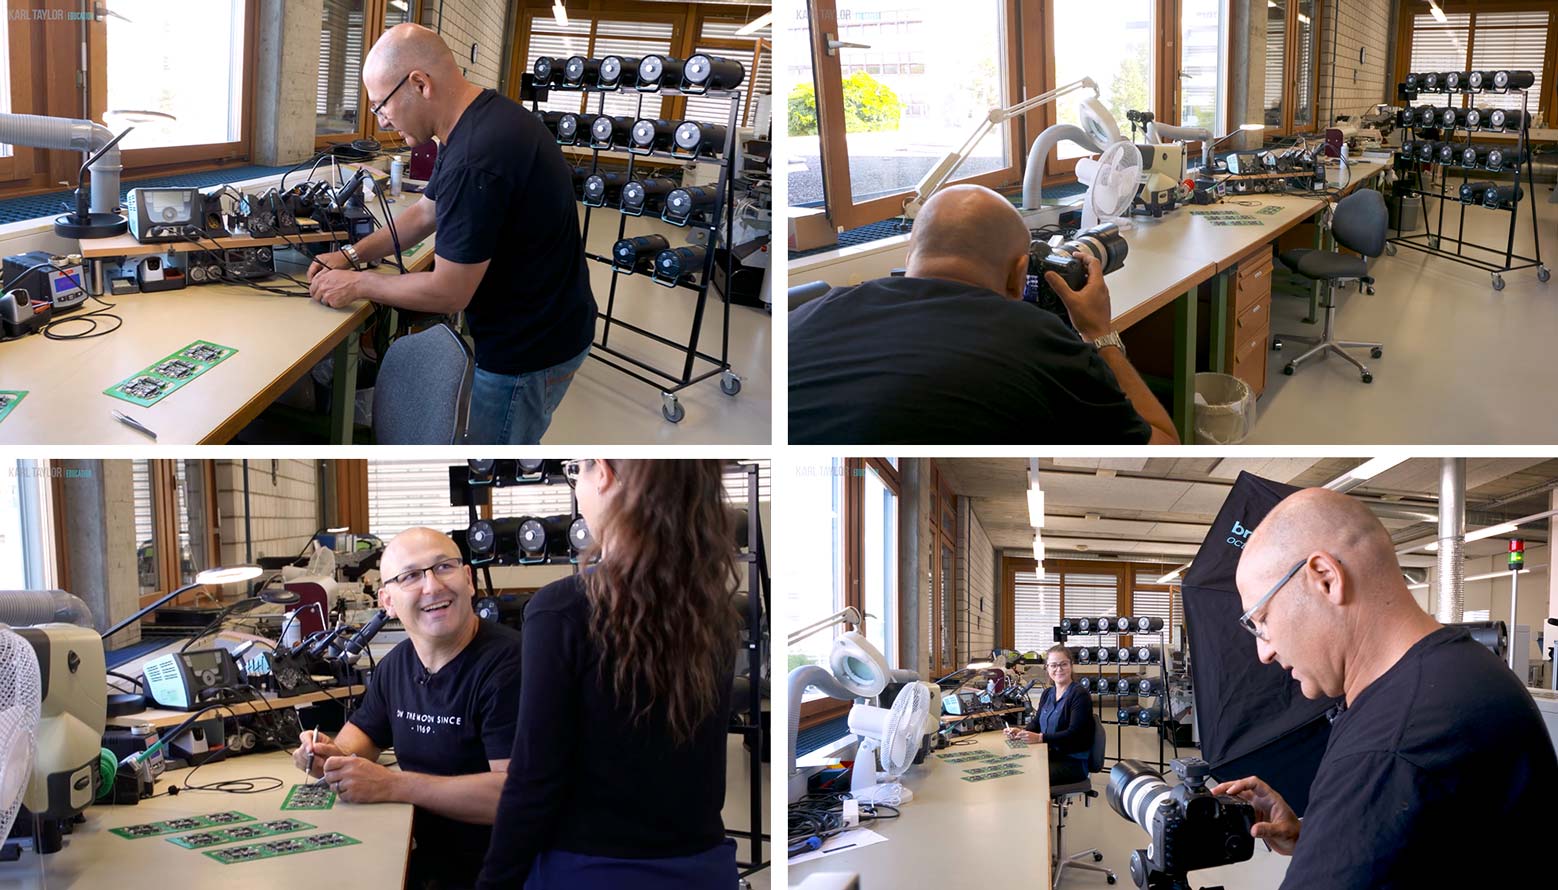
Communicate with your subject and make sure the background is not too busy before you start shooting.
In the end I used a very simple three light setup (which, as I explain in the video, could have been a one light setup), but the key thing was to balance the different types of light. After running through different combinations, I was able to achieve a very pleasing result, as you can see below.
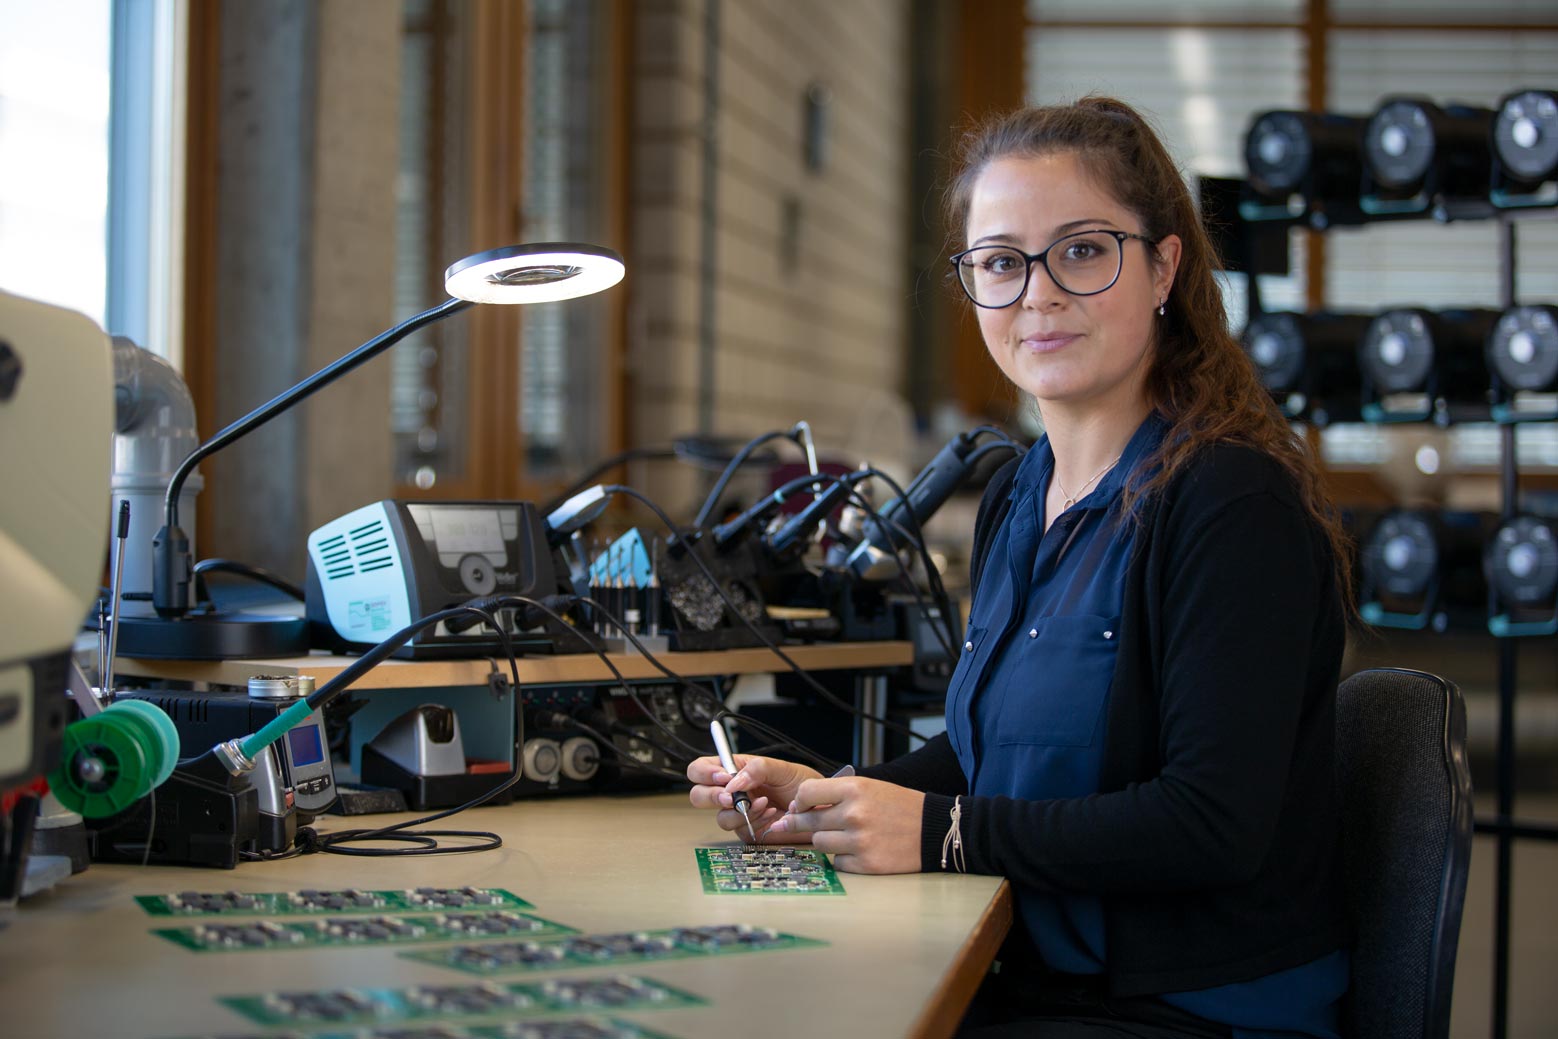
The final environmental portrait image of a broncolor electronics worker.
Comments
Hi Karl, You didn’t talk about the artificial Light on the ceiling. If they were not daylight balance, what to do ?
Thank’s
Hi Thierry, if they were a problem I would just turn them off and then if you needed more light from the ceiling you aim one flash up at the ceiling that doesn’t directly hit your subject only the ceiling.
As usual, a great video, and I’m learning a lot from how you look for, and pick out, details with light (on the hands, for example). And in the Broncolor factory. Utopia!
PS, star prize to Ash for keeping a straight face when you said ‘moderninity’. 😊
Karl, thank you for your clear and straight forward teaching. I am following your courses and live shows now for approximately three years and some months now, I guess. Four years ago, when I turned 50 I decided to realize a desire that always lived witin me. To start taking photographs professionally, what I can do now as a part time photographer. When I decided to do that, I did know nothing about studio lighting and the physics of light. I now own 6 studio flashes and I know how to handle them. What I learned from you, that light is light, no matter the source is. And this you show perfectly in this video. It is all about the balance of all light sources and the balance of all elements in the shot. What I also like in this particular shot is the colour composition of all elements. You removed those red rolls, and what is left now are blue and green tones as the predominant colours in this yellowish environment. Looking forward to more of this environmental videos.
Thank you very much for your comments Herwig, it’d great to hear we’re getting it right! 🙂
Really great video tutorial. I know you have other tutorials planned for this series. The environmental portraits I do are of children in schools. I’d be very interested to see how you would approach that.
This is going to be a great series! Thanks Karl.
Thanks John
Great series Karl. Looking forward to seeing the other episodes.
Thank you
Thank you Endre
Thanks for the video. I think it demonstrates how difficult this work is without a stand-in assistant.
If this was ‘reportage’ for a newspaper I guess you would not feel able to move any of the items in the shot? And you would have to set your lights with the subject (not an assistant_ in place?
Are you going to talk about your choice of modifier for this particular shot?
Have you one shot that shows the effect of lighting the rack of lights in the background alone? Thank you.
Hi Simon, I used to stand in myself with the self timer when there was no assistant, I think I talked about that in the introduction chapter. In this chapter there was a moment where I showed that it was a honeycomb grid on the light and I believe we showed the shot with it and without it? It wasn’t for very long but I’m sure it was in there.
Excellent & very informative. Thank you!
Thanks Graham
I just want to improve -and improve around me-only that way we can become.
Yes
What about the clothing ? what she wears ? dark ! what if we talk about the clothes she has on? could we manipulate them ?
Hi Elliot, you’ll see us talk about this in the cake decorator one that is coming soon
I think woman want to feel beautiful. maybe a shot with her being beautiful..talk about wardrobe. could that be a new subject?
Do you think it is important to take off any jewlery ? the three points of reflectives on ther shirt plus earing and the bracelet ?
Loving all your classes. I noticed that the circular dials on the rack of flashes kept my eyes attention. could you illuminate the rack of flashes from underneath ? maybe tone down the dials with stickers ?
Thank you Karl.
How many photos like this do you typically deliver in a full day shoot?
What is the number of photos that clients usually expect in a full day?
Do you charge separately for editing?
Hi I’ve never been asked to do a full day on this type of image. Maybe 2 or 3, these type of images are usually for one requirement for one client but in a bigger company they might have different roles within the company that they want to show. I could do a shot like this in one hour from start to finish if I have an assistant and I wasn’t explaining what I was doing to a cameraman 🙂
Excellent demonstration Karl. Looking forward to more of these. I take it an environmental shoot could take up to approx half day to a full day for the shoot? Also, do you give clients the images on site?
Hi Geoff, thank you. No far from it, I should be able to turn an environmental portrait around in an hour once I’ve decide where I’m going to shoot it and if I have an assistant. I’d probably need 15 mins to find the best location so let’s say I’d be finished in an hour and 15mins if I really wanted to (here I took longer because i’m explaining the shoot to a camera man) however I’d probably charge half a day to do one or two as you’ve got the time to pack everything up and then unpack it all again back at your studio.
Hi Karl, thank you for your videos. Very interesting, to hear about the time, you normally have. An hour and a bit, yes, that is my experience, too. I never have assisted, so in the first years, i alway thought about being to slow. (This was false). So maybe it would be intersting for your watchers to know about the time constraints in professional photography. Especially in Business Photography.
And it is nice to see, that one thing seems to be true on all sets: the photographer is always the one who moves the fastest 🙂
with appreciation
Oliver
Thanks Oliver