
Environmental Portraits: Sommelier
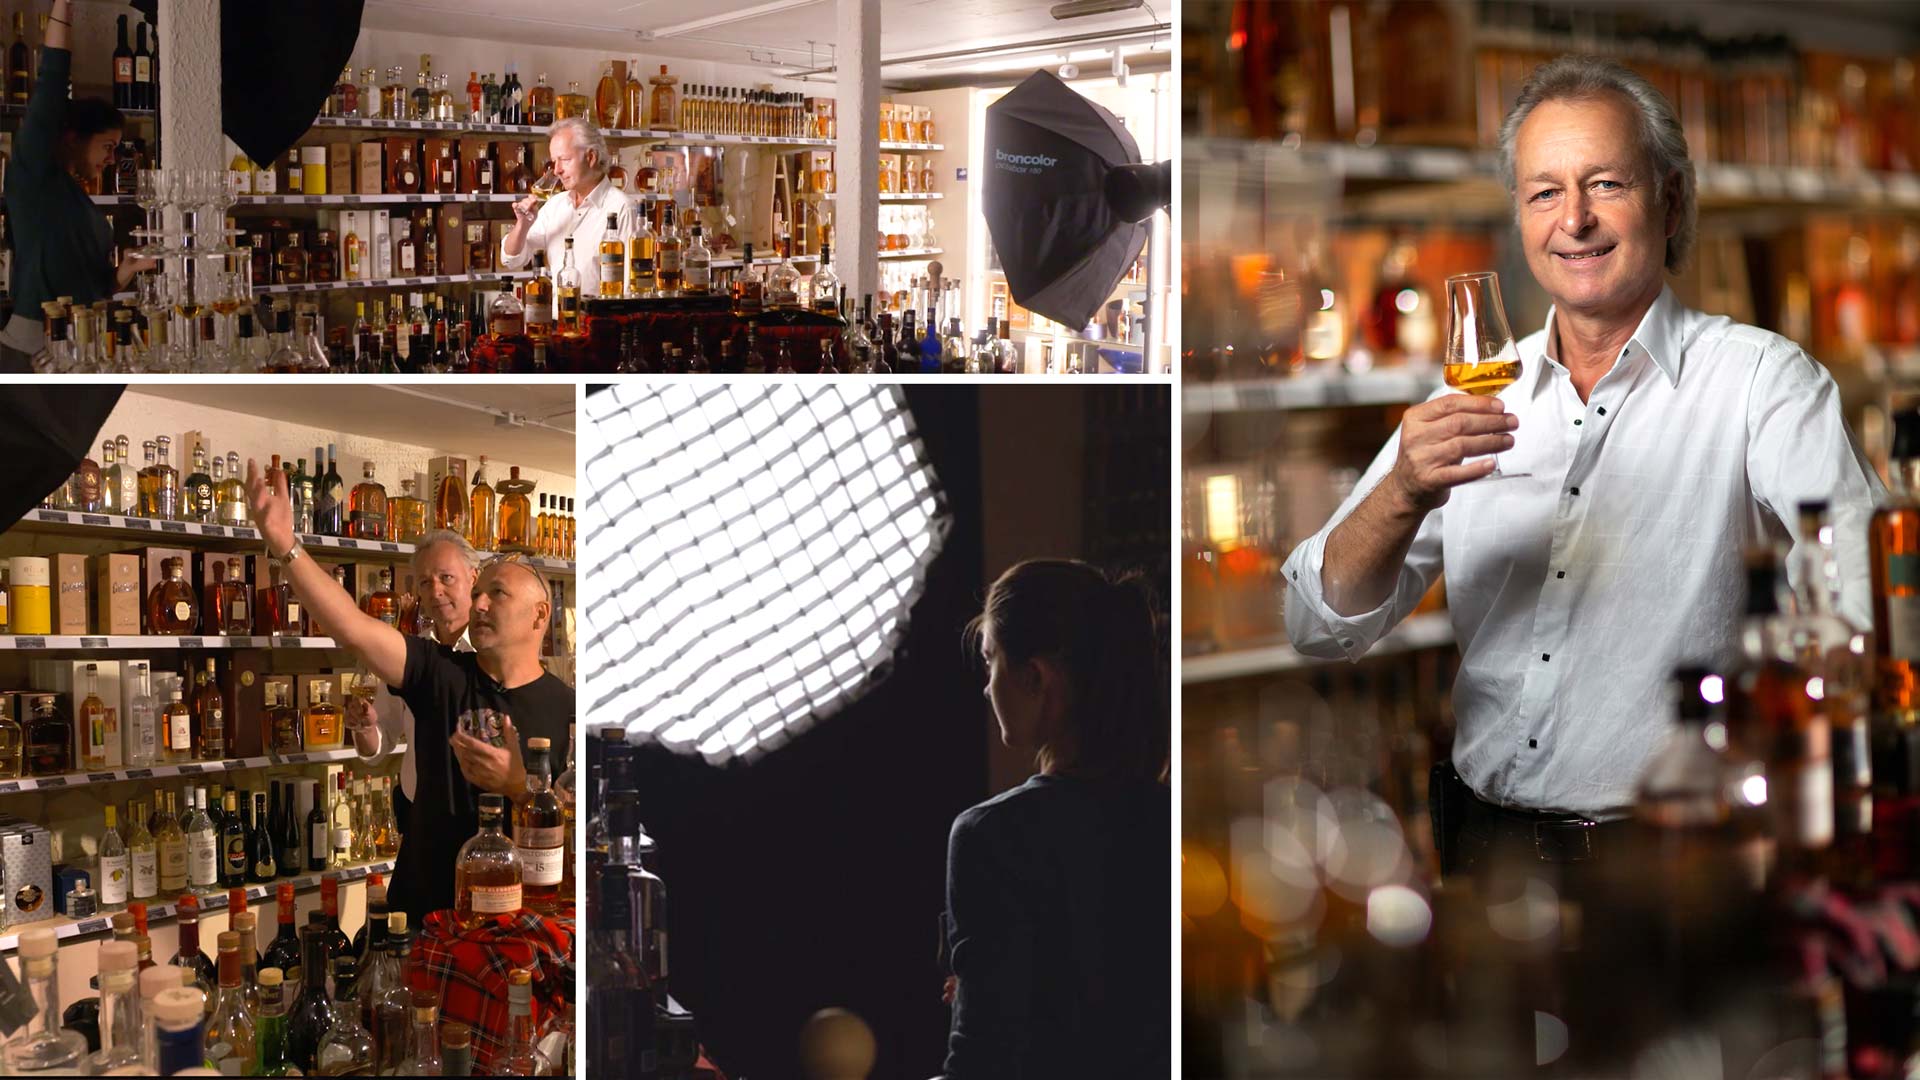
Environmental portraits, although often a lucrative genre of photography, can be very challenging. Often you have to deal with busy subjects, cluttered environments and mixed lighting. This was exactly the case with this environmental portrait shoot, where Karl had to overcome working in a busy, cluttered environment before having only 10 minutes to photograph his subject.
Photographing a whisky sommelier in a busy liquor store, this particular shoot shows how Karl overcomes challenges such as re-arranging and styling a cluttered scene, controlling light in a small space, photographing reflective bottles and how to work quickly when your subject only has a few minutes to spare.
What you’ll learn:
- How to photograph environmental portraits
- How to arrange a cluttered scene
- Controlling light in small spaces
- Tips for photographing reflective bottles and surfaces
- Communicating with your subject
- Tips for working quickly and effectively when photographing people
If you have any questions about this class, please post in the comment section below.
The pressure was on from the very start with this shoot of a whisky sommelier as we knew we only had 10-minutes to photograph him. This meant we had to style the scene and get the lighting as close to perfect as we could before starting the shoot.
The first thing we had to deal with was the setting itself. I knew I wanted to incorporate the vast whisky selection in the shot, but to get a pleasing result required a lot of re-arranging. This took a lot of time and we also had to ensure the liquid in the bottles had a nice warm golden, glow (to do this, I used a technique that’s shown in my whisky photography live workshop).
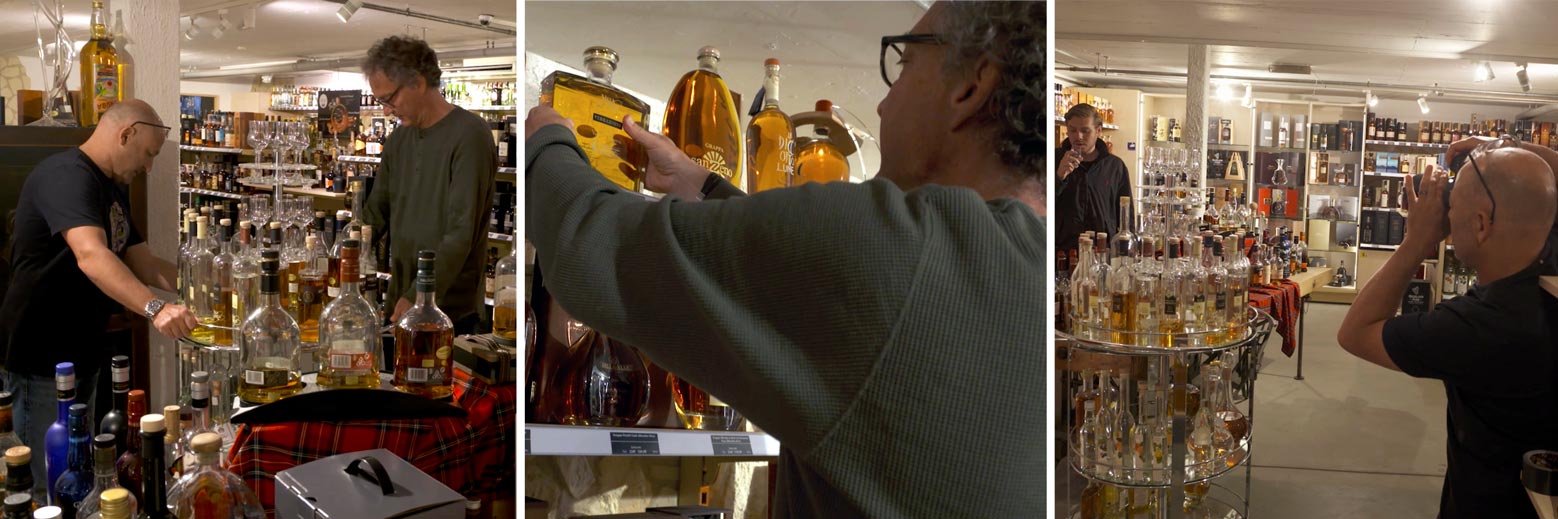
Working in a busy setting such as this meant the scene required some styling before the shoot.
Once we’d styled the scene, the next thing was to finalise the lighting before getting the subject in. Working in a fairly tight space, I had to use grids, ND gels and flags to control the light.
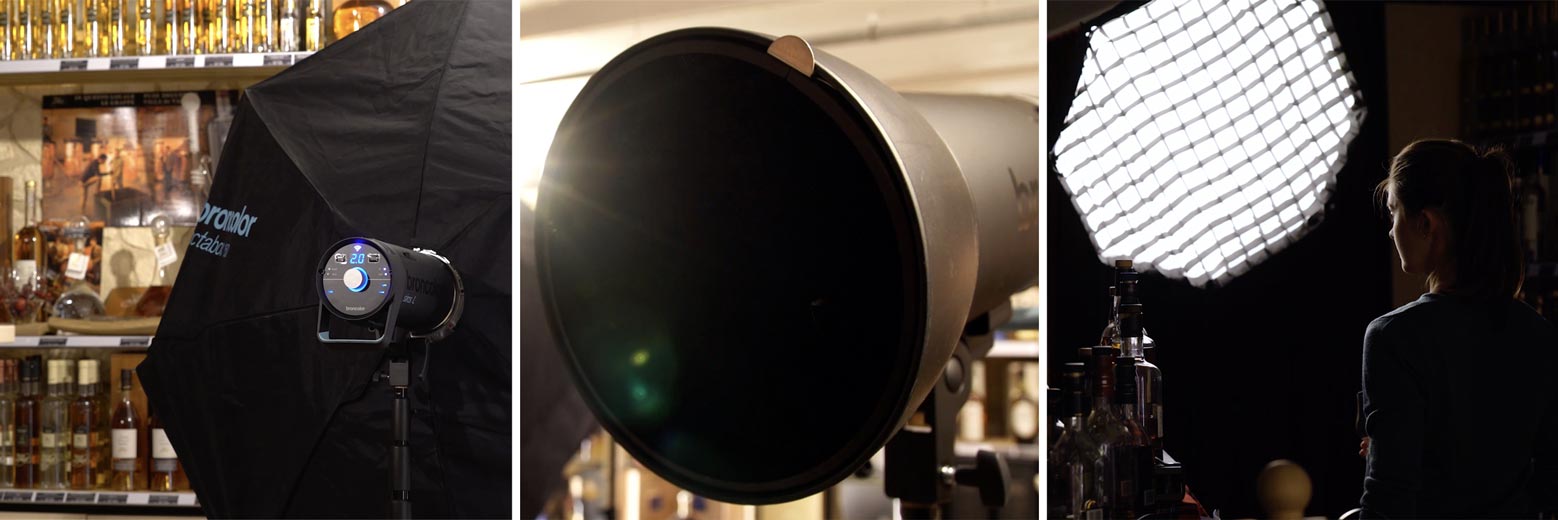
Working in a small environment meant it was necessary to control the light using accessories such as grids.
Once the lighting was right, I got the subject in. Clear communication is key, and you’ll see me clearly explaining what I wanted to achieve and discussing my ideas with the subject in the video. This is something I talk about more in my ‘Business Portrait Theory’ class.
In the end I was very pleased with the results. Thanks to careful planning and teamwork, we were able to get a great result in just over an hour.
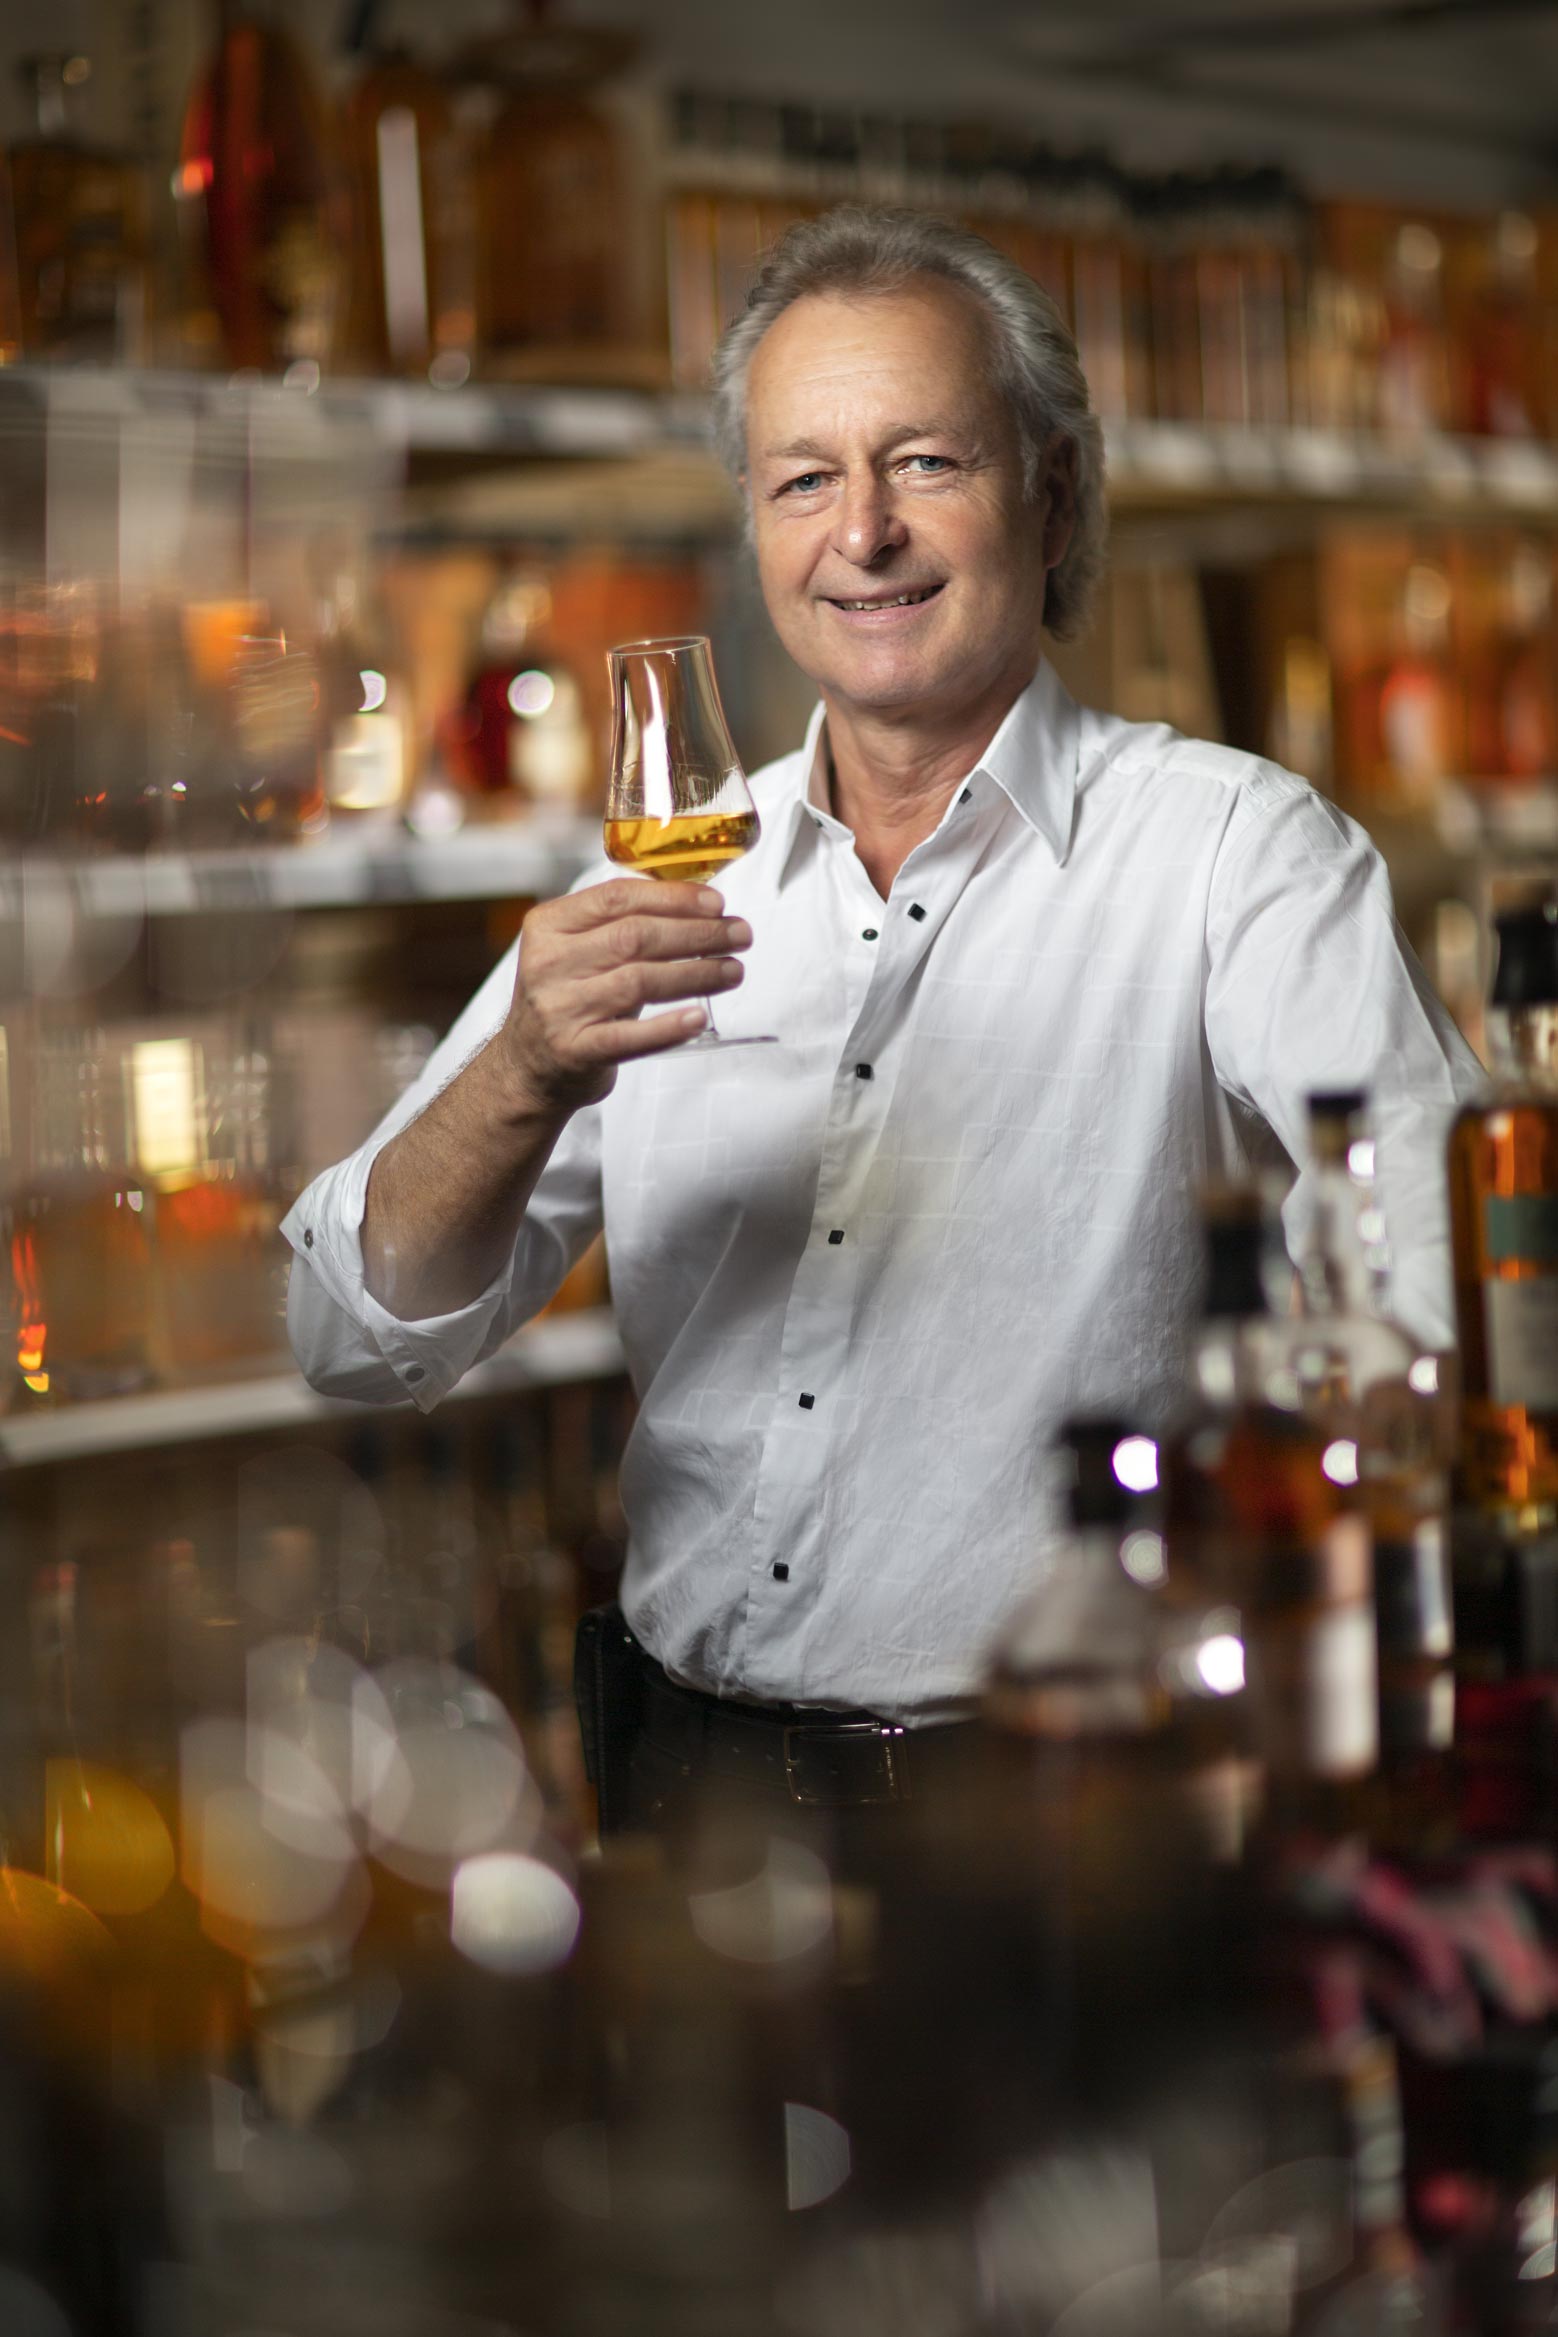
The final environmental portrait image of a whisky sommelier.
Comments
Wow brilliant tutorial…perfect, As i face similar situation as the subject / model always busy and wants to run away from the shoot..and we end up having absolutely no time preparing for it…Karl, you had just performed a real time portrait photography assignment, i think you had dropped the idea of putting a paper behind his glass due to time limitation, its a brilliant result anyways. looking forward to see a lot of tutorials like this.
Mr Taylor your a beast I love how you take your time and setup the perfect shot. I love how you use your lights very nice series sir. Salute
Thanks Jeff, much appreciated.
It is very fun to watch this series. What was the white balance you have chosen in the end? Was it 7000K? Thank you in advance.
Hi, the white balance was set for flash as we were shooting with flash and the colour temperature is around 5800K on the Siros. I was shooting in RAW so the colour temperature can also be adjusted later if necessary but it wouldn’t have ended up too far from 5800K otherwise the skin tones would be off.
Great work man as usual! Fantastic portrait! I can imagine it was a bit stressful in terms of being extremely careful to not break any bottle… Stay on the top!
Thank you.
Hi Karl and team. Although I have been doing product photography myself for 20 years and according to my customers and employees I am very meticulous, I am always surprised that there is a Karl Taylor who is even more pedantic than me. 😉 Thanks for your inspiration and the many little tips and tricks I can always draw from your videos! I wish you, your team and your family all the best and above all health. Keep up the great work!
Thank you Dieter.
Hi Karl,
Thank you so much for your learning videos. You’re a great photographer and teacher!
You’ve worked in manual focus at f1,4 for this portrait and It seems to be a great challenge for me. I miss a lot of shots with this set up, specially when the subject move slowly in front of the camera. Moreover it’s very difficult for me to appreciate sharpness of the eyes through the viewfinder when I’m not close to the model. Have you got some tricks?
Thank you for your your great job!
Guillaume
Hi Guillaume, thank you but no I don’t have any tricks. Make sure your diopter is set for your eyes, other wise go for autofocus and check your lens focus calibration.
Great job of dealing with that tricky background! How do you get light behind bottles against the wall!?… those white papers to reflect were a great idea. You worked though it methodically and nailed every obstacle in your path to a great shot. Nice touch to scrim the white shirt as well. Thank you for this fantastic video. 🙂
Thanks Patrick, hope you are well! The white paper behind the bottles really helped but the other bottles it wasn’t really possible. Where the wall had any light coming off it would have come through the bottle but I think there were several bottles deep so it wouldn’t likely have had much coming through. My favourite one is the next release (this week) of the carpenter as it was the more common scenario of having to control the daylight with flash.
Excellent shoot, a great example of how a very busy environment can be managed. The bottle re-arranging and shallow depth of field made all the difference, allowing Roland to really stand out.
By the way, that very tall assistant with glasses looks familiar. 🙂
Thanks Peter, yes he’s good to have around, he knows everything about the lights and he’s tall which compensates for when I can’t reach stuff. 🙂
Great tutorial, Karl…really enjoyed watching the process unfold in a tricky environment. Question…would leaving the modeling light on have really effected the shot? I probably wouldn’t have thought to turn it off, but will do so in the future after watching this. Does it have to do with shooting at such low power settings, low aperture? I would have thought that the flash would have eliminated the ambiance of the modeling light, but guess not.
BTW…what were the ultimate camera settings…at one point, I think you were 200th @1.4 ISO100. Is that roughly where you ended up once all the lights were finally adjusted?
Hi Matthew, thank you. Yes if you are shooting at large apertures like f1.4 then yes the modelling light can have an effect, especially on someone with a white shirt or light skin. If not controlled it will add a warm cast to the purity of the flash and can cause problems with colour balance or exposure. If you are able to use a much faster sync speed (say 1000th) then you can cut out any ambient light including modelling lamps no problem but most cameras can’t achieve those sync speeds. Yes the final settings were as stated as you saw in the video I only adjusted the power of the lights to suit.
Thanks, Karl…I was concentrating so much on how you were building the lights in such a small and complicated space that it didn’t hit me how the modeling lights would effect the final shot until you started toggling it on/off for focus. I thought you were just saving battery power, then was like, “Ohh Smack!..he’s shooting this 1.4 with strobes!” haha
So simple, but it was a “Eureka” moment for me while watching…I’ve never tried to shoot anything soo wide open with flash, but have had the exact issues that you mention while shooting even multiple stops higher with the modeling light left on…
There are a “million little things” inside this 30ish minute tutorial that tie together so many of the techniques I’ve learned from watching both your product and portrait series’ and Youtube videos with Broncolor. Great series…can’t say enough about it.
Thank you Matthew.
Great tutorial(s). They are the reason for me to join.
How much time do you usually allocate (and communicate with the client) for preparation/light setup?
Hi About 1 hour to set up and test and then 5-10mins to shoot.
Great session Karl. I love the occlusion and shallow depth used in this shot. I don’t think it would work otherwise without it. Great demonstration of flagging and use of the ND Gels. I need to get those along with ND filters. I would definitely want an assistant for this type of shoot. I take it those are Manfrotto stands? They look nice and sturdy.
It’s not to be rude, but..
I sadly have to say I don’t like this picture.
The out of focus aria looks no good, and are to bright.
And the picture just looks messy, I know it’s not easy with all the bottles..
I think it would be better with more dept of feel..
When wee hear your and your guests comments on the picture critics, well… what about this picture then?
I have followed and seen all your videos probably the last 10 years, and I love your work, but this picture didn’t do it for me, sorry..
Sorry for the bad grammar, not good in English..
Yes I know what you are saying, it looked ‘busy’in the forground but you couldn’t quite see what they were, a bigger depth of field may have added a little context to the image,…… I enjoyed the tutorial immensely though !
Would love to know what mobile light stands you’re using. Thanks!
Fantastic work, Karl. Thanks a lot.
amazing work as usual <3
Thank you for this great & informative video
Someone had a cold