
01. How Do Cameras Work?
Cameras, no matter how much they cost or what brand they are, all work in roughly the same way. Understanding the simple mechanics of how cameras work will help you realize just how similar they are and how you can get the best possible results out of yours.
But before you head out to start taking photos, it’s important to understand the six essential requirements needed to record an image.
Understanding these requirements, regardless of whether you’re shooting on a DSLR, compact camera or iPhone, will make your photography so much better. These requirements are:
- Light: Light is an essential part of any image but there are many different types of light. How we use this light is important.
- Subject: The subject is what we take photos of and refers to how we compose the image.
- Optics: This refers to the lenses, which are used to focus the light and capture an image.
- Aperture: This controls the amount of light getting into the camera and the depth of field of an image (the sharpness range either side of the point of focus).
- Time: Time relates to the shutter speed and how long it takes to record an image.
- Medium: This is what we record the captured image on to (this used to be film, but nowadays is usually a CMOS or CCD chip).
Once you understand these concepts and how they relate to one another, you can better start to understand how cameras work.
Below we explain in more detail these 6 key elements essential to your photography.
Light
An essential part of photography that we use to create our images.
© Karl Taylor
There are two types of light that we can use to create images: natural light (such as the sun or daylight reflected off of buildings) and artificial light (candlelight, car headlights and even studio lights). Each of these types of light produce either hard or soft light. This refers to the strength and density of the shadows. Soft light results in soft, very light shadows, whereas hard light results in the opposite — strong, dark shadows. When taking photographs, it’s very important to think about and identify the type of light as this can have a big impact on the final result.
Subject
What we take photographs of.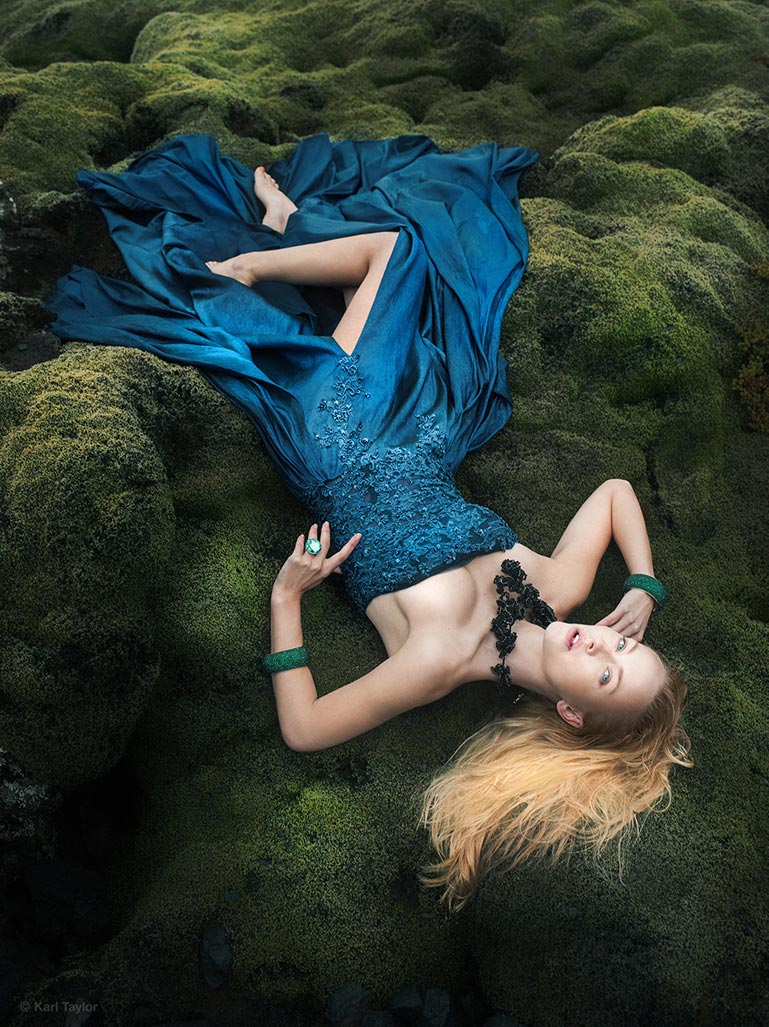
Interested in fashion photography? Click here.

Interested in natural light portraits? Click here.
The subject is the thing that we take the photograph of. This relates closely to composition (we’ll look at this later in this course), which is how we arrange, or compose, certain elements within the frame. The subject (or subjects) can be anything — from insects to landscapes, people to products.
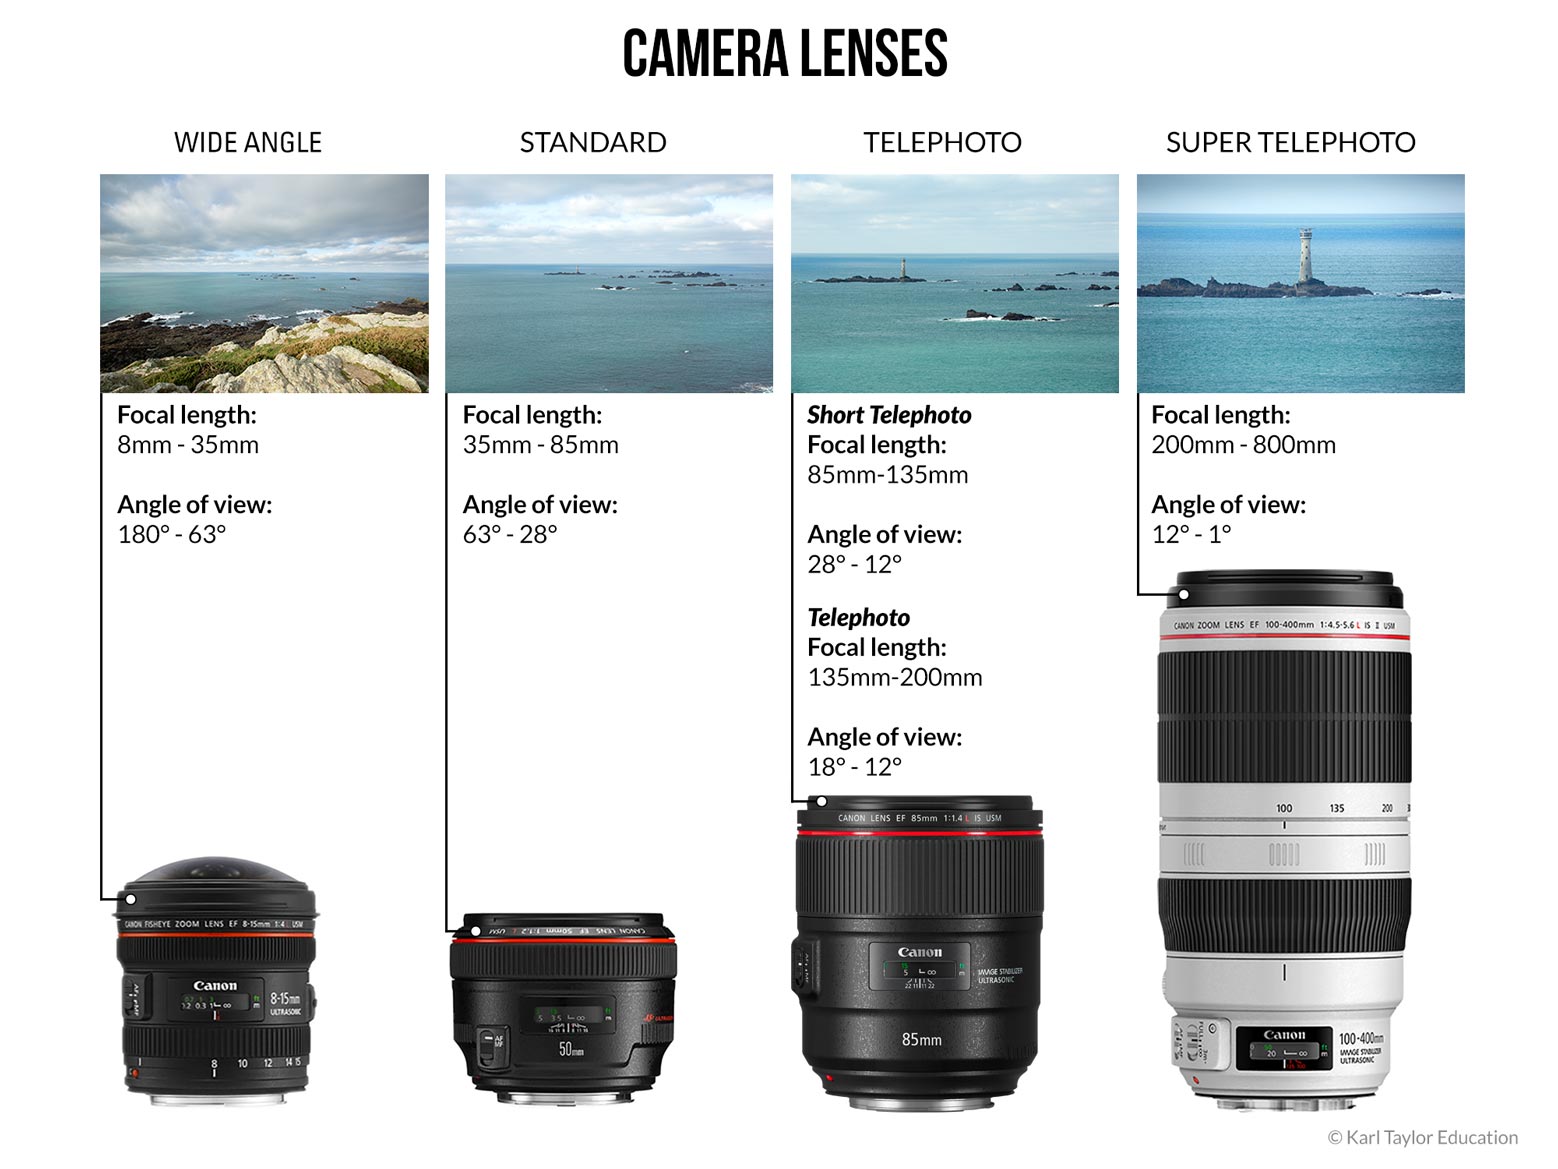
Lenses
Used to focus the light and capture an image.Optics, generally referred to as lenses, also play a part in how an image is created. They serve to focus the light onto the recording medium. Lenses control the focal length of an image, the angle of view, magnification and help describe the image based on their particular characteristics. Lenses come in a variety of different focal lengths, ranging from ultra wide angle to super telephoto, and different lenses can produce very different results depending on the configurations within the lens barrel.
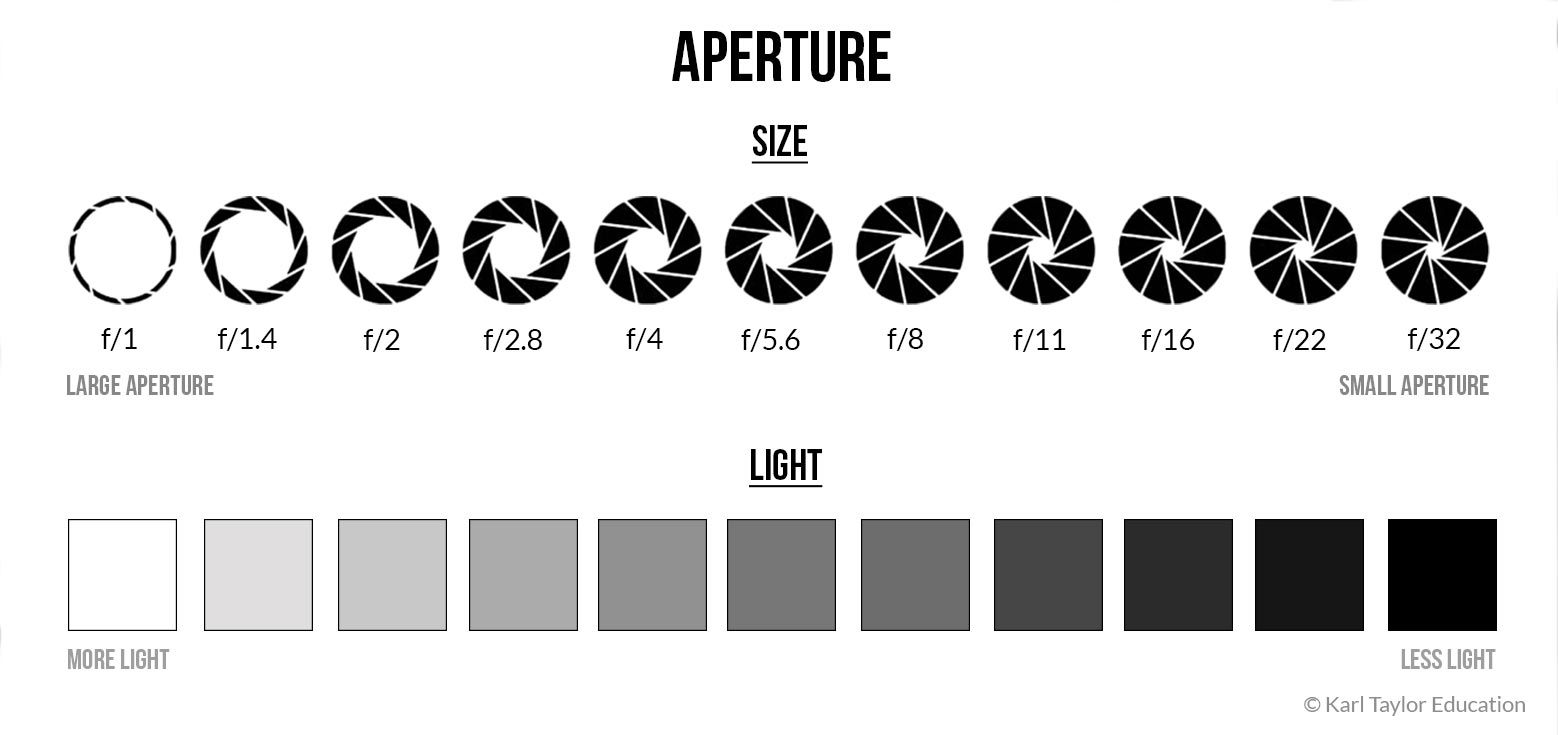
Aperture
Controls the amount of light getting into the camera and the depth of field of an image.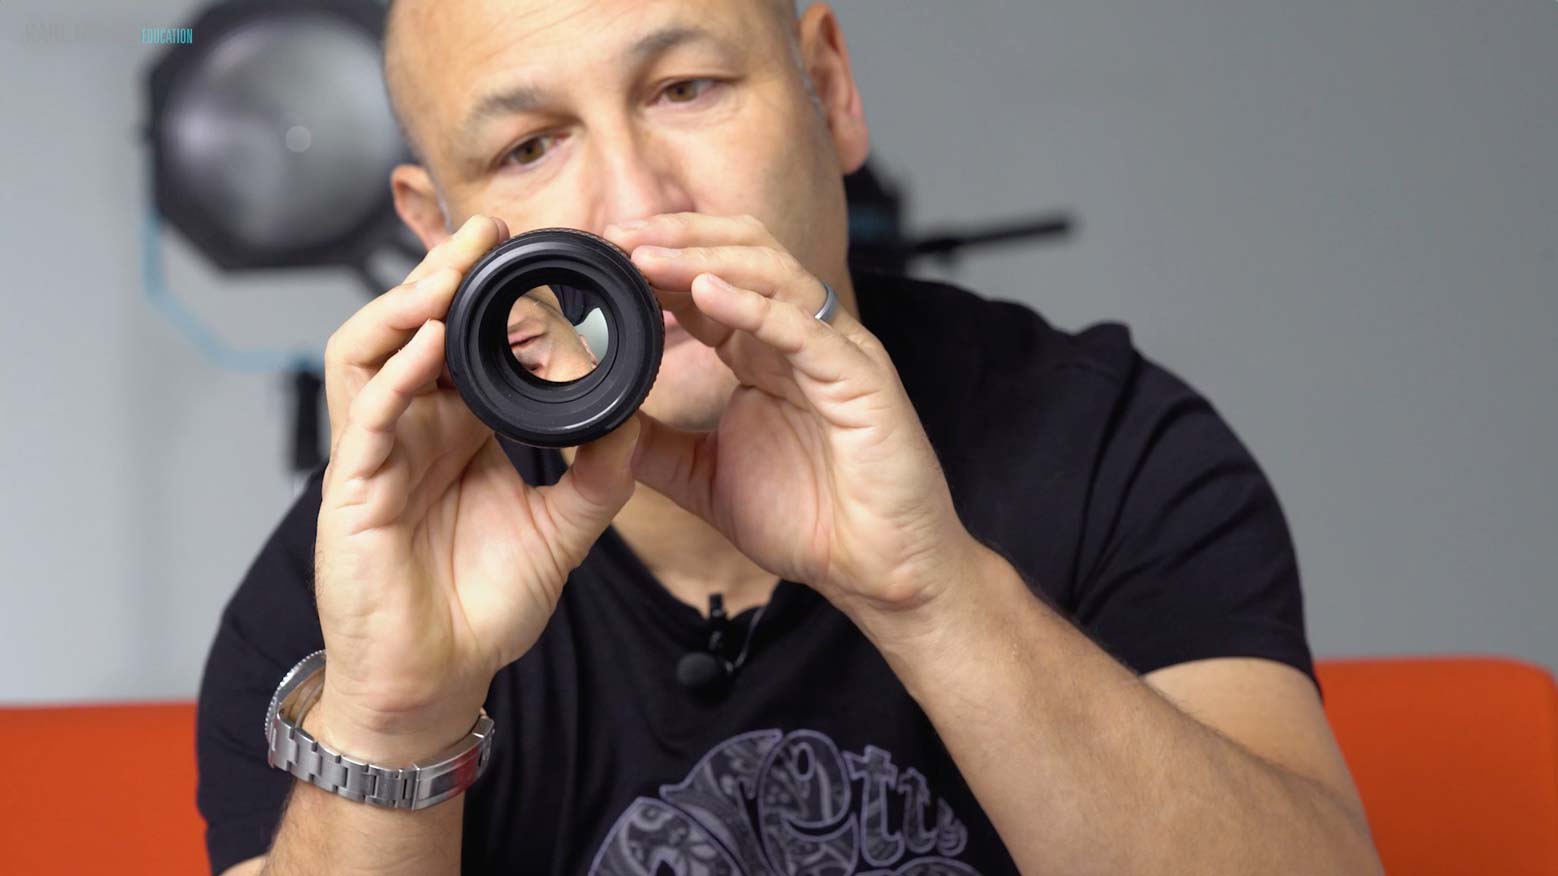
Aperture refers to the size of the opening in the lens that light passes through before hitting the sensor (or film). It is measured in f-stops and is shown on your camera by the symbol ‘f’ (for example f1.2, f5.6 or f22). The lower the number, the larger the aperture (you can see this in the image below) and the more light that can be recorded. By controlling the aperture, we can control not only the amount of light recorded in an image, but also the depth of field in an image (the sharpness range either side of the point of focus). Larger apertures, such as f2.8, allow the most light through the lens and result in a shallower depth of field, whereas smaller apertures like f22 allow less light through but have a greater depth of field. This may seem confusing at first, but it’s an important concept to understand as this can have a great impact on your image.
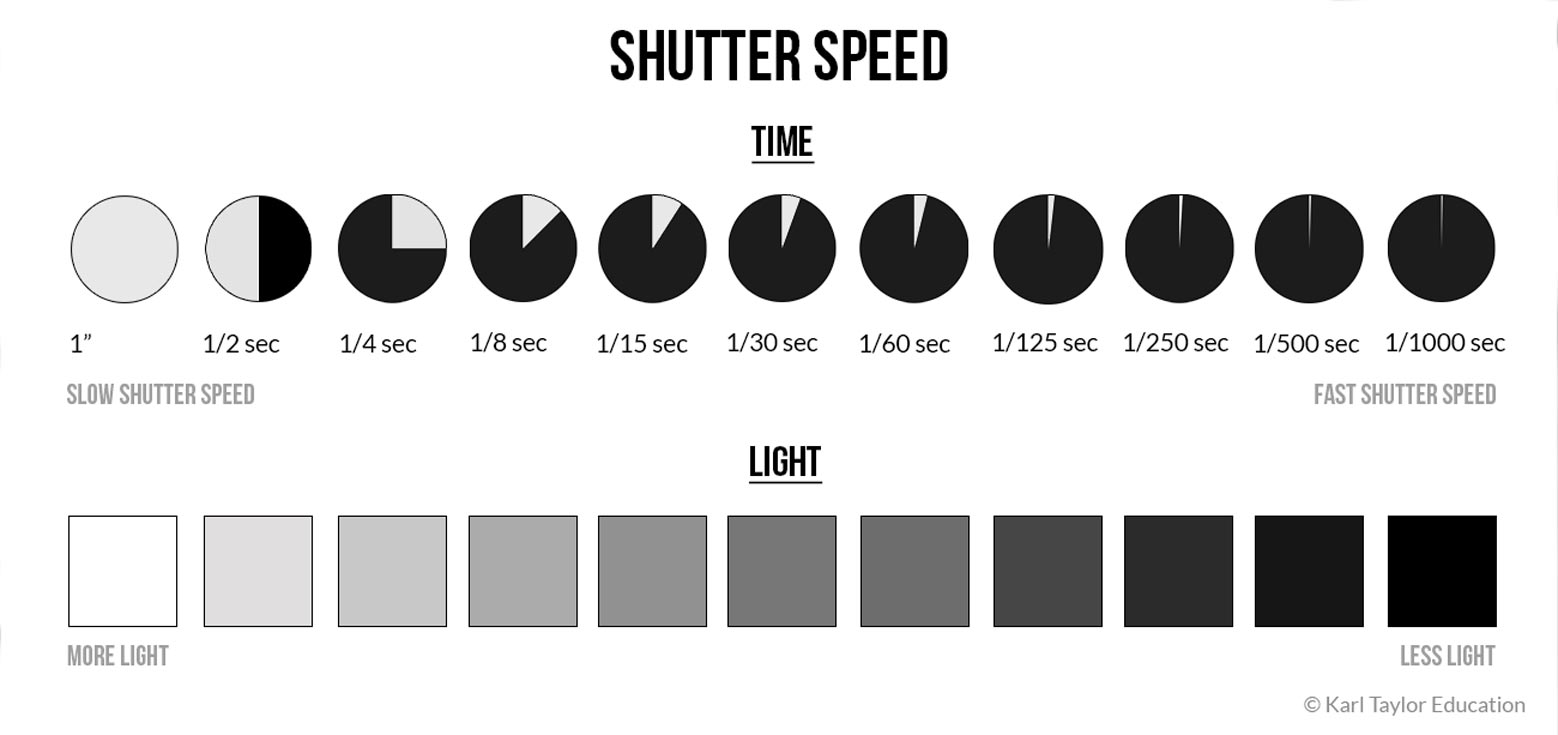
Shutter speed
Controls how long it takes to record an image.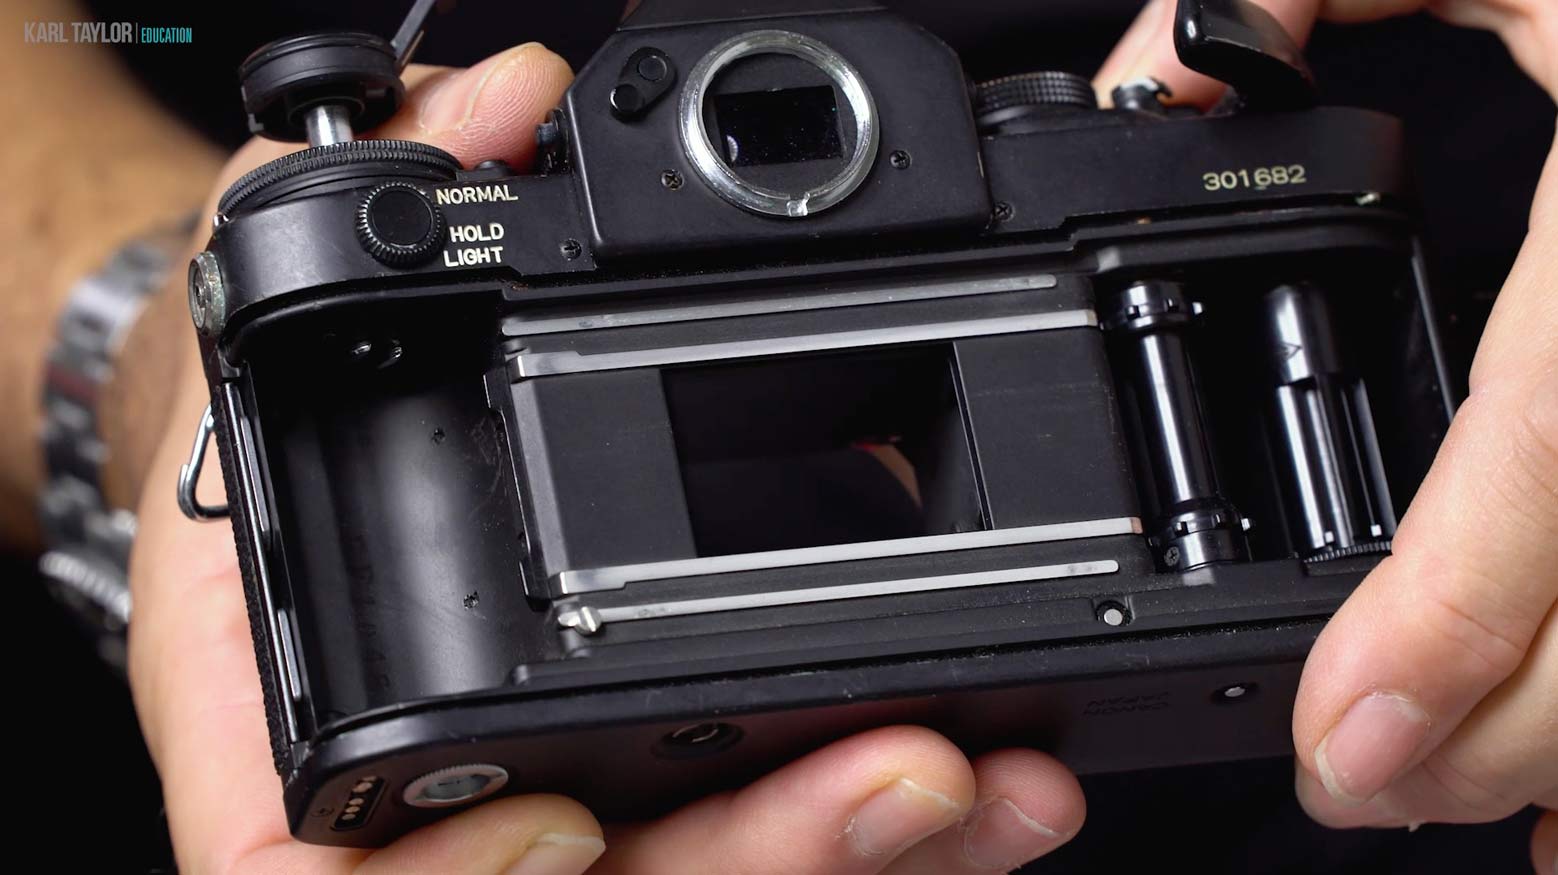
Time is an important part of recording images and is controlled by adjusting the shutter speed. The shutter speed refers to the duration that the shutter remains open to record an image. This is recorded in tenths or hundredths of a second (for example 1/10, 1/250 or 1/1000) or seconds (for example 1”, 10” or 30”). The slower the shutter speed, the longer the shutter stays open and the more light is captured. Faster shutter speeds freeze movement, while slower shutter speeds allow for motion blur.
Medium
What we record the captured image on to.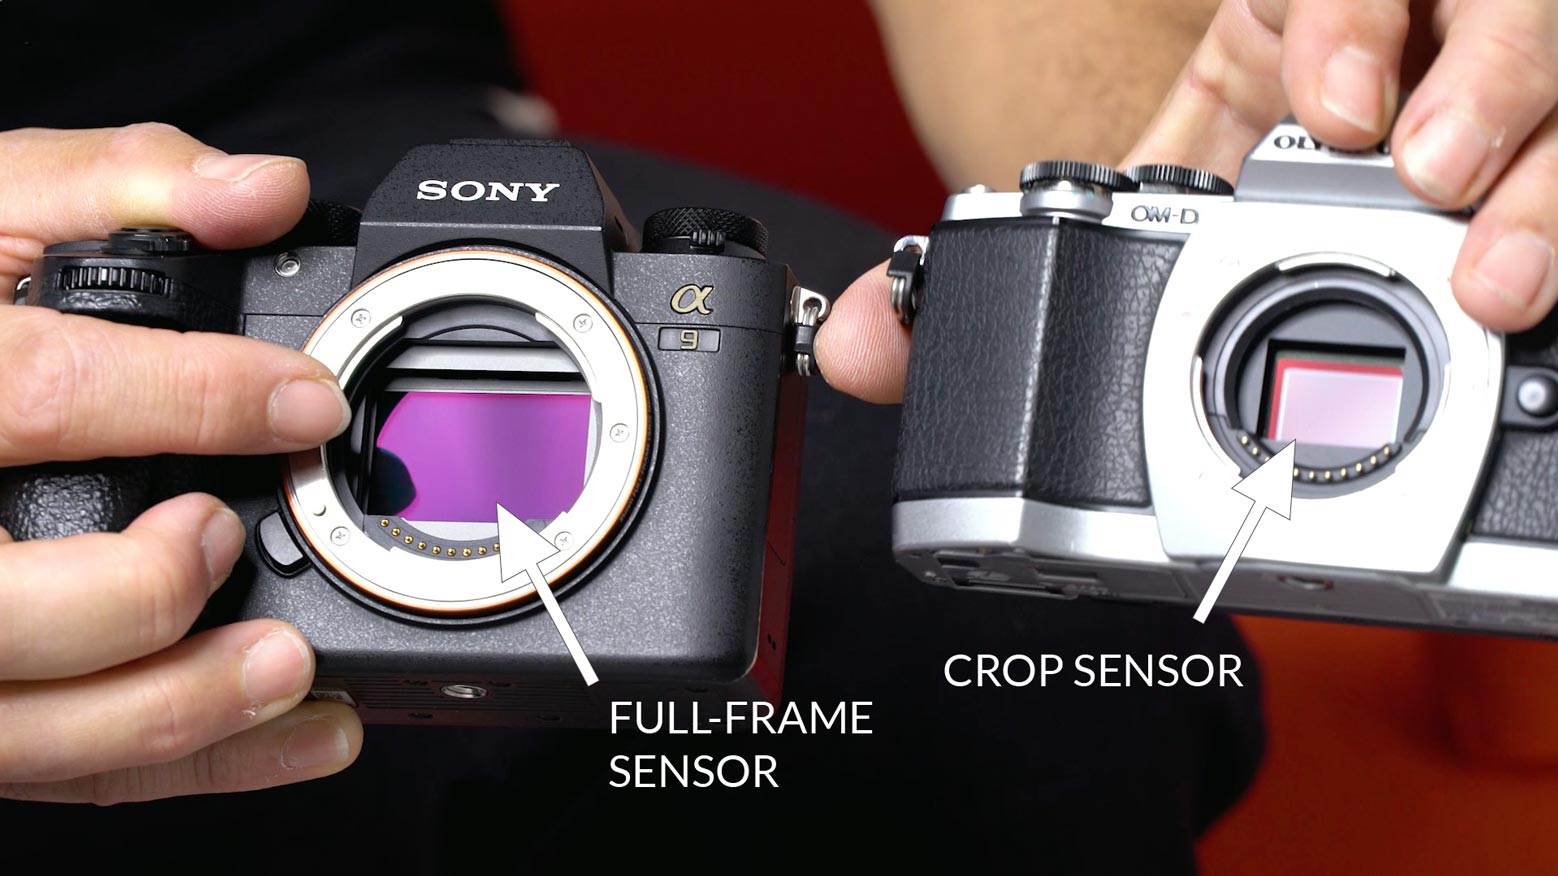
Photographic images are created by light passing through the lens and reaching the recording medium, which is what records the image. Traditionally, this was film, but nowadays images are recorded onto sensors. Modern cameras use mainly digital sensors — either CCD (charge-coupled device) or CMOS (complementary metal-oxide-semiconductor). There are a few different sensor sizes, but the three most common ones are full-frame, crop (or APS-C) and medium format (these different sizes are all covered in more detail in the video above).
Regardless of what camera you’re using, how each of these six essentials work is very similar and you’ll soon see that everything in photography relates to one, or a combination, of these six things, so a clear understanding is vital. We’ll be looking at each of these in much greater detail throughout the remainder of this course.
Before moving on to the next chapter, make sure to watch the video above as this contains vital information additional to this page. There is also a useful PDF guide that contains some great supplementary information and infographics that you may want to print out and refer to when out shooting.
All content © Copyright Karl Taylor Education.
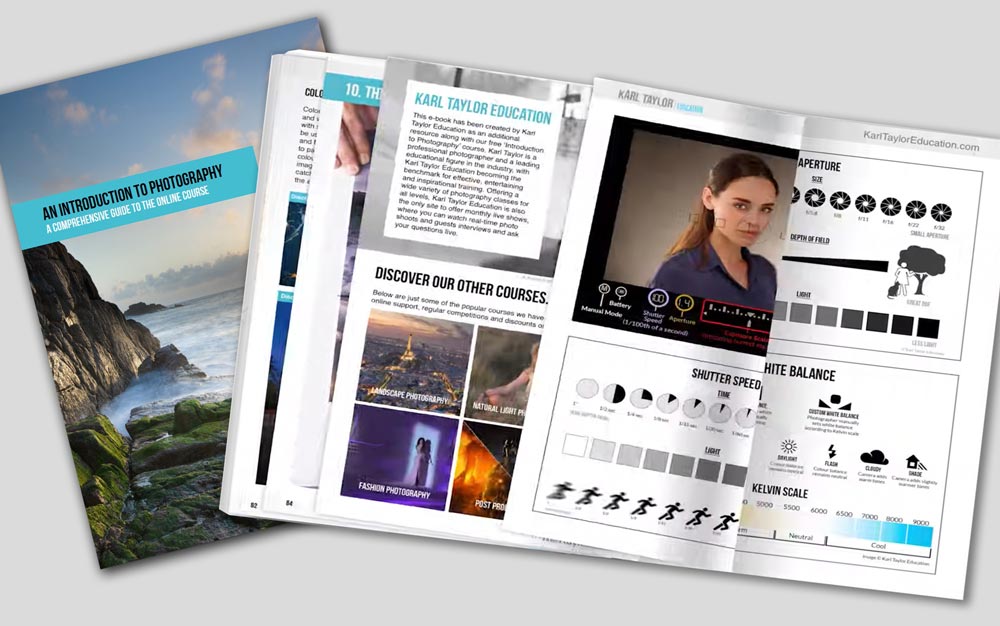
Get the e-book!
Introduction To Photography
To get your copy of this 90 page e-book click the download button below.
Comments
Hi all, I just signed up now for full access to everything. I’m all in. lol. Time to get more creative with my Canon 80D & a few lenses .. starting with how to do that here. Excited to make this a progressively improving hobby, especially for some upcoming trips in Bali, Montreal, Europe cruise and even on local hikes, etc. landscapes, people, whatever.. eager to learn. I saw something about “levels certification” which I will look to see what that’s all about. be cool to have a goal to shoot for. 😉
Hello, I just started this course today to become better acquainted with my new Canon EOS Rebel T7 2000D camera for beginners photography. I’m super excited about this course. My goal is to be well educated in landscape and astrophotography by improving my photo skills. Wish me luck!
Thank you,
Alana Allen
Orlando, Florida, US
Thank you Alana and good luck with your photography. We’re here to help!
Just starting and am very happy I am here!
Thanks that’s great to hear, let us know if you need any help with anything.
I have been shooting photography for 5 years now. Every time i go through someones beginner class i learn something new. i wish i had found you first you do the best breakdown for me to visualize what is happening in the camera. thanks
Very kind thank you, I’m sure you will enjoy much more on our platform too.
Thank you for presenting such a great course. I hope to learn much from you Mr. Taylor.
Thank you.
Hello,
where is the pdf?
Hi in ‘my account’ tab and then ‘downloads’
Hello Karl,
I am back to be your student now . You are a great teacher, but I was envoloved with my coledge and I graduated this fall and now I am ready to study with you.
Thank you,
Shadia
Hi Shadia, great to have you here. Let me know if you have any questions, Karl.
Hey love your courses. I can’t find the PDF can you point me to it please.
Loved your courses when I took them years ago and now I’m finally doing everything I want with my photography. Now I’m here again for my fiancé to learn!
Hi Stephen, great to hear I hope your fiance enjoys too.
Really excited to get things moving. I still haven’t mastered manual mode to the point I’ll shoot outdoors with it consistently. Numbers always make me nervous, but so far the way you are explaining aperture and shutter speed is really really helping. Really appreciate you.
👍
Hi,
Thank you for your website and education. I got my degree in Photographic Technology back in 2004. I’m in a wheelchair really haven’t used it much. I want to get back into it, and I am finding that it is indeed true, “If you don’t use it, you lose it.” These are great refresher courses. Thank you.
Thank you and I look forward to helping you in any way I can with our platform. Cheers Karl.
Is there an option in videos to translate into Hebrew? There are several languages but Hebrew does not.
Hi I’m afraid not as it’s quite expensive for each language that we add and therefore it is limited to those languages that are most popular at the moment.
Hy, my name is Massimo, and I am Italian. I moved from Italy in 2018 for work, and I am planned to return home in July 2021.
I have never considered photography as a hobby I could have become passionate about, but a month ago my wife bought me a camera for my 50th birthday. It is a Nikon D7500 with an 18-170mm f 3.5/5.6G ED lenses. A friend of mine bought me a Manfrotto befree advanced tripod with which I started shooting my first photographs. Then I decided to buy a SIGMA 105 mm f 2.8 DG Nacro HSM lenses along with a couple of lights to illuminate the subjects to try out the macro photography, which I found interesting. I started following you on YoutTube a few days ago, and I immediately realised your course would have dramatically helped me.
As you can understand, I am a neophyte, but I will try to get as much as I can from your classes.
Happy to be a member.
Thank you Massimo and I hope you enjoy our content and live shows.
Hi! I noticed that the mirrorless cameras have a problem, a kind of flare, this happens when I photograph objects of black leather or black material on a white background, the flash hits the bottom and this contrast between black and white of the object creates a circular halo on one of the corners of the object .. It happens with sony a7 r and other mirrorless cameras that I have tried .. it is very strange because it happens only on black or very dark objects on a white background, if the object is clear it does not happen (it does not happen it is not that you see less or I don’t see it: it doesn’t happen) and using a reflex camera with the same identical settings, the same lens with metabones adapter, hood, black wings to try to solve light infiltrations, the problem is not there. It is as if somehow the sharp black / white brightness contrast creates some noise. Have you ever noticed something like this? In these days I will also do some tests with canon rp and 5r ..
hey karl sorry my earlier question was what are the clues to find which way the diretion of light is coming from because i find it hard finding the highlights and the shadows sometimes
Hi I’m afraid the clues are primarily the direction of the shadows, especially noticeable under the nose and chin. The intensity of light, where is the brightest part of the image. The reflection of lights in the eyes and shadows and highlights on the clothes. However sometimes these clues are not all equal as the photographer may have changed certain elements in Photoshop.
hey Karl I think you’re a great photographer, even though I done an NCFE level 2 course in photography and I’ve done a UAL level 3 course in photography, and I’m currently doing HNC with the British academy of photography , my question is im having difficulty reading pictures like the way which direction the light is coming because i keep forgetting maybe it is because I’m taking medication for ocd and also I am a slow learner
Well whatever it is I wish you the best of luck with your courses and learning.