


Lingerie Shoot on Location
Finding interesting locations instead of just sticking to a studio or a plain background can transform your shots from basic catalogue-style images to something much more compelling.
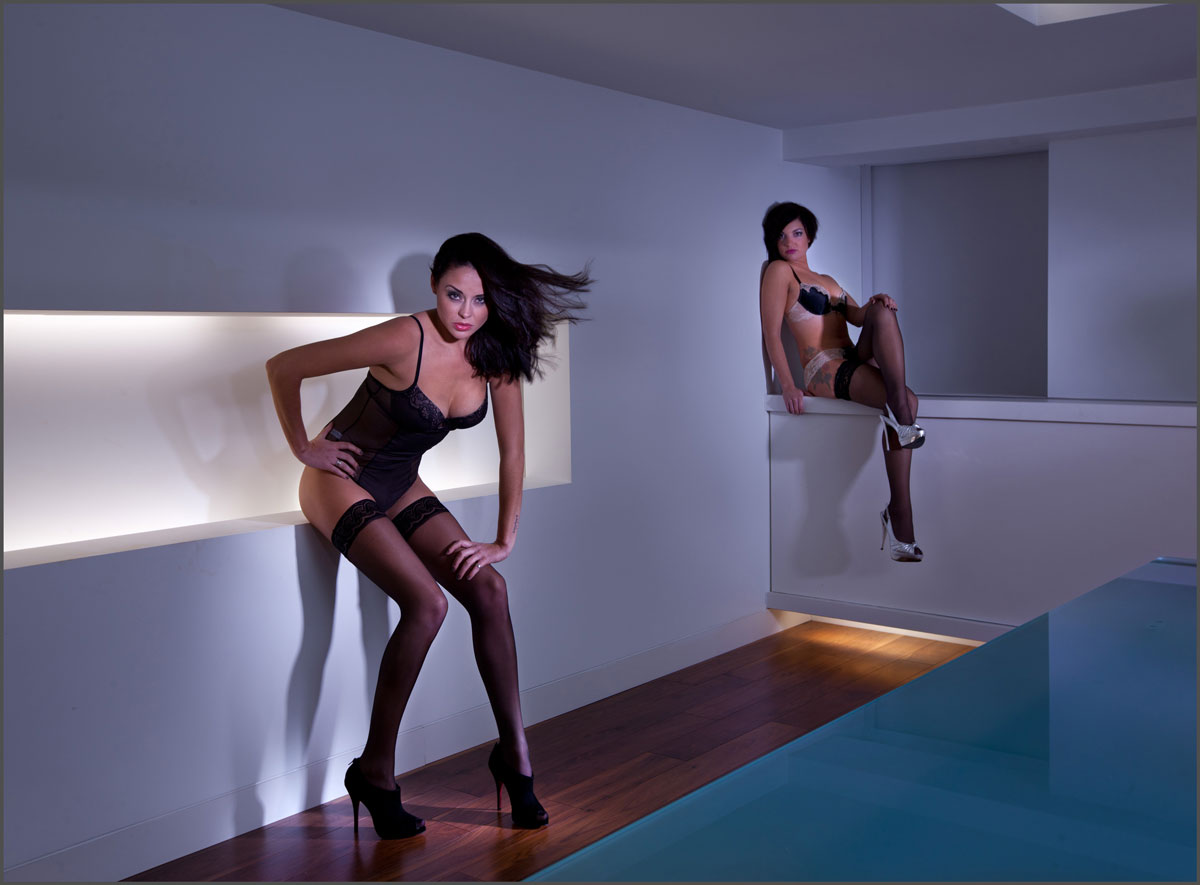
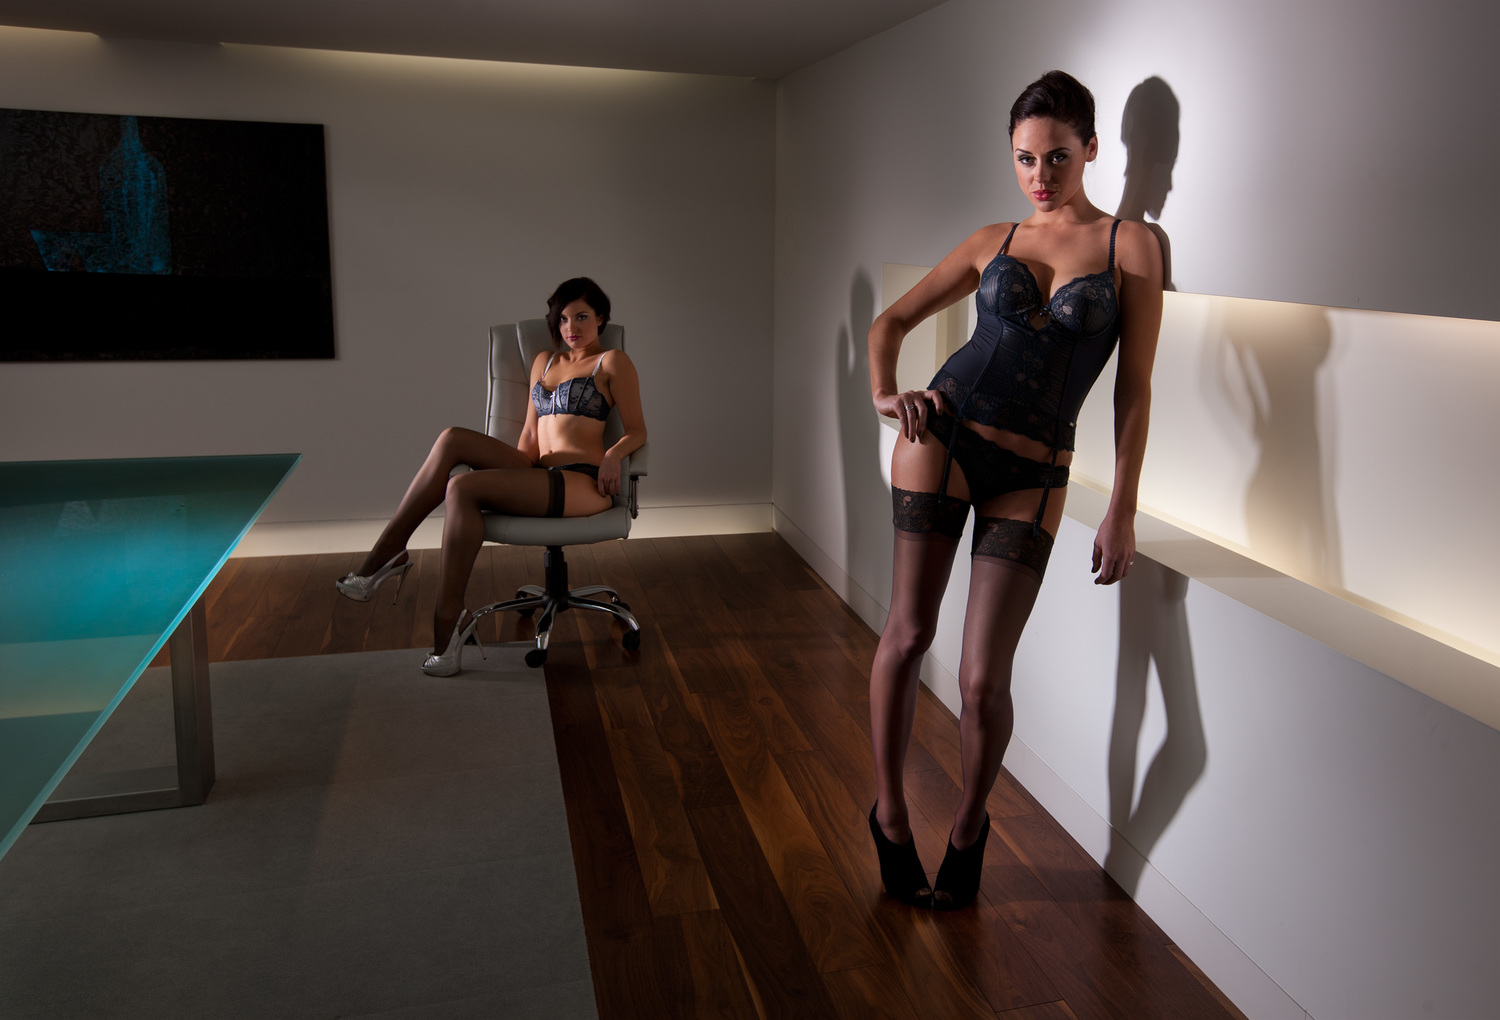
For this lingerie photography class, Karl uses a modern office as his backdrop, using a number of interesting visual elements to incorporate in the shot. He explains his lighting setup for the various shots, how to control small pockets of light and how to balance the ambient fluorescent light with his studio lights to get the best results.
A final review at the end of the class sees Karl explore in further detail the lighting for each of the images and how lighting can make a big difference and completely change the mood and feel of the shot.
In this class:
- Finding interesting locations for fashion shoots
- Tips for lingerie/boudoir photography
- Lighting setups for photographing on location
- Creating small pockets of light for a mood effect
- How to balance fluorescent and flash light
Questions? Please post them in the comments section below.

Comments
Hi Karl,
where did you put your focus on when you want that two models will be in sharp?
Hi Mor, this was some time ago so I can’t quite remember but I would likely have focused only on the front model and not been overly concerned if the model at the back was not as sharp. If you were really wanting entire DOF then you’d take the distance between the two models and focus one third of the way into that space and then check on the screen in 100% zoom that the model at the front was still sharp, if not pull the focus back a little towards the model at the front.
I must say it was a great pleasure watching this! The only problem is, I will need to watch it again and actually listen to the photography advice this time 😬
Great video and brilliant stills Karl. Loved it all. Need a 35mm now lol
Karl, this is another great video, thanks a lot!
On your portfolio website I saw this photo:
https://karltaylor.com/87k65s5l7apu1tbly9g1qnkcodrdmb
I think I also saw a few seconds of this shoot in one of your videos on youtube, and was wondering if this was covered in one of your educational videos here. Can’t find it.
I love the light, the clean look of the picture – hope you have it explained somewhere 🙂
Thanks,
Igal
Hi Igal, no this one wasn’t covered in a tutorial but essentially I put the model on white acrylic two 30×120 softboxes covering the length of her body, put above her and slightly behind pointing slightly towards camera to create a little flare and then a white background lit with two lights and overexposed slightly to create more of a backwash flare look and then a small bit of fill in flash on the silhouetted side of the model to get a bit of light in there.
Thanks a lot for the details! Promise your time was not a waist – I’m totally going to try this 🙂
Cheers,
Igal
Hi Karl, thank you for your online education courses. Generally for fashion and product photography what aperture should I use ?
Hi, The real answer to this is whatever the creative brief requires but I find that generally for product and fashion you want more depth of field than less and you want the optical sweet spot of the lens so generally f11 or f16.
Hi Karl
Witch canon lens did you use in this video?
Hi Benjamin, the equipment we use on each shoot is listed at the lower right in the equipment list.
Hi Karl, what are those square grids on the two Eli monolights, in the shot where the model is lying in the alcove? How do they differ from the round gridded reflector attached to the third monolight? Are all three of those gridded, forward facing strobes firing here? What is each doing? Presumably one is lighting the face, that much I get, but the other two? Something to do with the texture or sheen on the lingerie? (yes, there is a fourth one that bounces fill from the ceiling, of course, but that one is clear to me). Cheers, Martin
Hi Martin, they are just honey comb grids, they don’t need to be square it’s just the shape elinchrom made them.
Hello Karl.
Do you use a full body make-up (ie. Blush or powder) for such a shoot or is it just the face?
also how would you treat an oily skin is the event that the model chosen by the agency or client have such a skin? Thank you
Cheers.
Hi, The make up is mostly just the face unless there is a particular area that needs attention. As for the skin I’ve not come across the problem of oily skin on a model, sometimes it’s too dry and we use body butter to add a nice sheen. If there are any skin issues then these would be dealt with in post production.
Hi Karl. Love the contrast of the hard geometric shapes and the soft feminine curves. You didn’t mention the lighting detail too much. I notice the umbrella facing the ceiling. Was this for increasing more soft light into the shot where the model was laying down? The flashes using grids where producing the harder directed light for the other two images? Even so with grids and harder shadows (distance from model maybe) those two images still retained a softness on the skin. How?
Hi Karl
Witch lens did you use in this video?
Hi Karl,
Unfortunately, I understand English very slowly and you may have talked about it in the film, and I did not understand it – I wanted to ask about the measurement of light in such a difficult place.
All the lights in the niches are suppressed, and the studio lamps bring out the models from the background. Could you reveal the secret how you measure the light? And how do you match it to the whole scene then? Is all this later corrected in post-production?
Thank you for your answer
Darek
Hi Darek, the answer is that I don’t actually measure the light! I shoot the first few test shots without the flash light and then I adjust my camera settings until the existing (ambient) light drops down to a level that I like. I then add my flash to the scene and gradually increase its power until I like it. In essence I don’t measure light as that would often be futile, I simply adjust light until I like the look of it. See this chapter to understand why https://visualeducation.com/course_video_page/measuring-light-and-achieving-correct-exposure/
Hi Karl,
Great shots, but ça you please tell me why did you get se 2 different cameras? Aren’t big differences between 35mm and medium format? Thank you
Hi Andrei, I think I was just testing the results of the Hasselblad at higher ISO, I can’t quite remember now. Back then when the Hasselblad sensors were only CCD they were very good and 50 or 100ISO but not good above that, now they’ve changed to CMOS chips they can now shoot at higher ISOs very well.
Hi Karl,
Can you provide details on how you worked with the colour differences between the existing florescent light and the strobes?
Thanks!
Mark
Hi Mark, luckily I didn’t need to adjust for the fluorescent tubes as they seemed to be daylight balanced. When I have needed to in the past I utilise tube sleeve gels for correction or effect https://www.leefilters.com/architecture/arch-fl.html