
EarPods Product Shoot
Have you ever wondered how Apple make their products look so desirable in their ads? It’s all about the lighting – and this class shows you how.
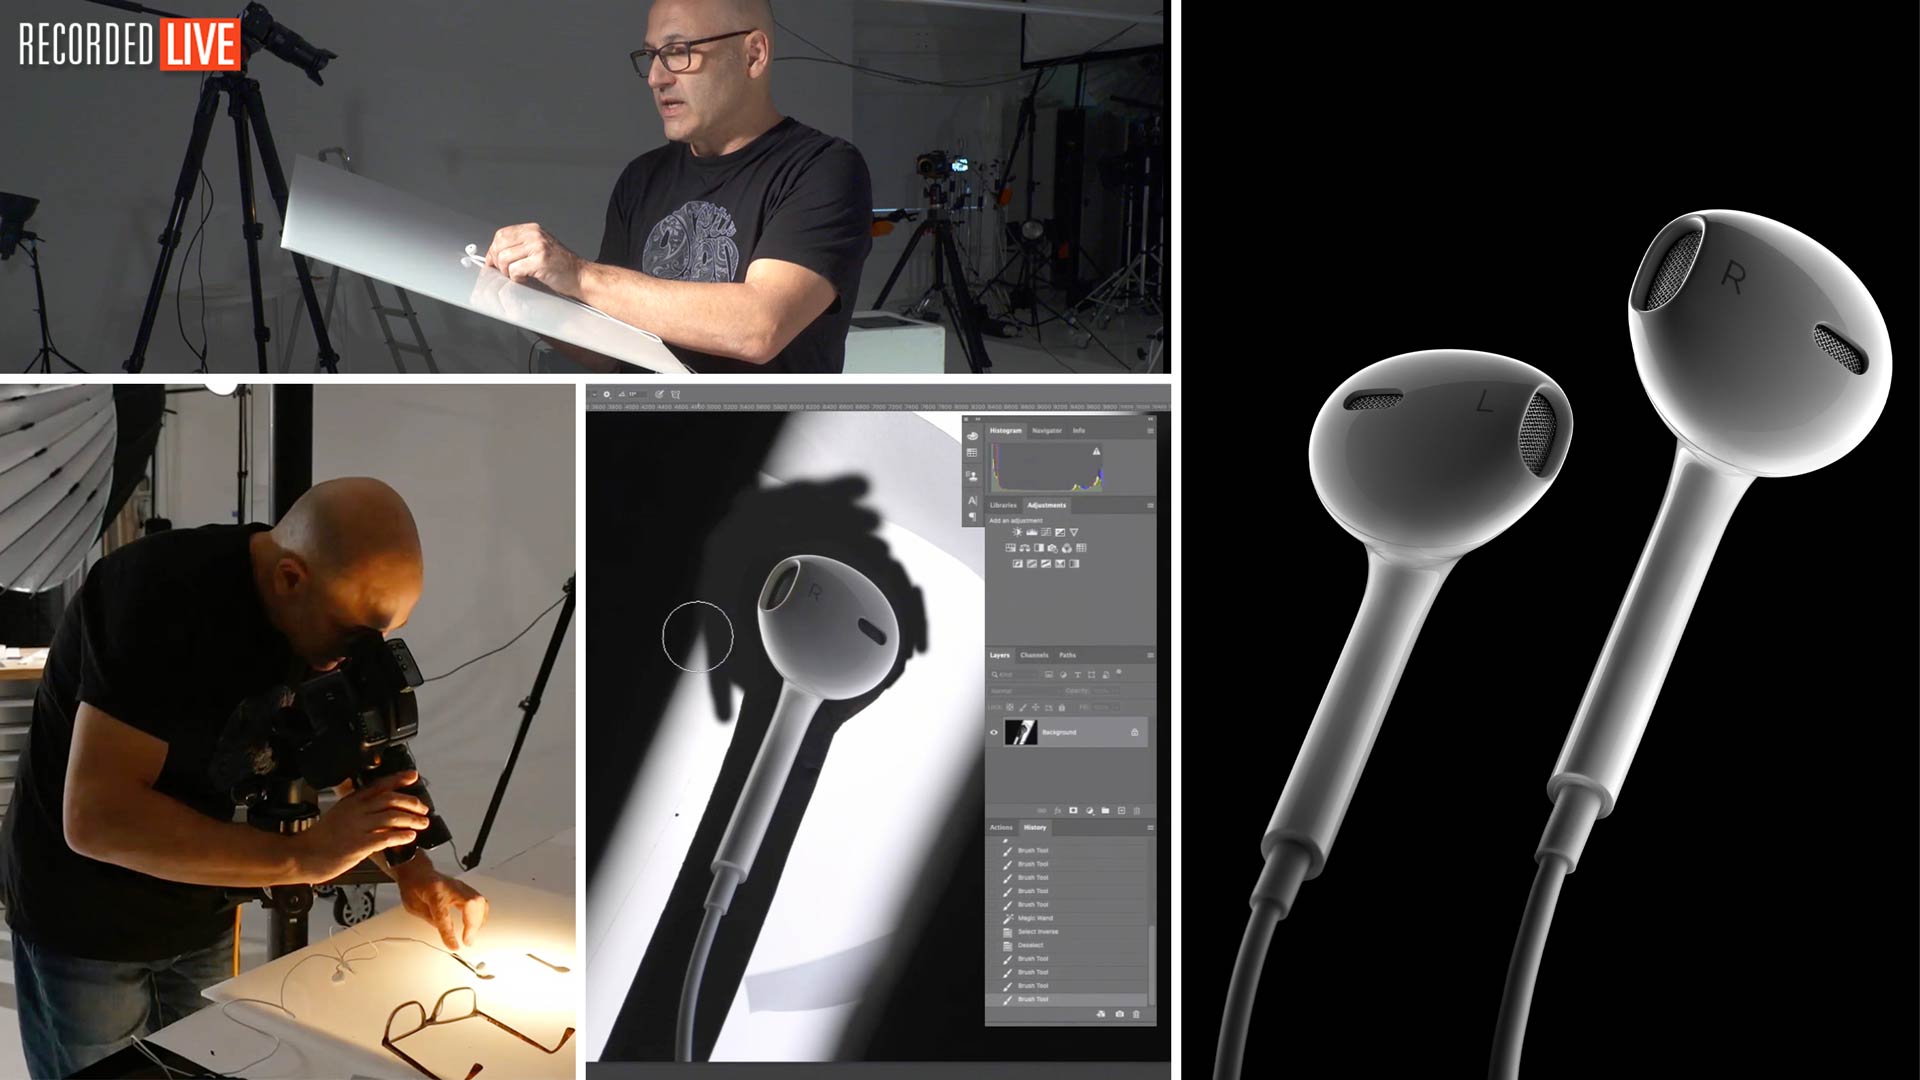
Watch Karl take on our fourth ‘Working to a brief’ assignment as he teaches you how to photograph EarPods like a pro.
You’ll try and compare two different lighting setups — one with studio lights, one with speedlights – as you learn how to create the perfect rim and fill lighting.
You’ll discover how to create and control gorgeous gradients, as well as how to create perfect black backgrounds for product shots like this.
You’ll also learn how to achieve sufficient depth of field using focus stacking PLUS see Karl demonstrate the post-production work required to perfect the final image.
By the end, you’ll be ready to capture EarPod images good enough to grace a giant Apple billboard!
In this class:
- How to photograph EarPods
- Rim lighting for product photography
- Creating black backgrounds for product shots
- How to focus stack images
- Retouching techniques for product photography
- Rim lighting using speedlights
- Post-production techniques for product photography
If you enjoy this class, try Rim Lighting for Product Photography and Creative Product Photography with Speedlights.
Questions? Please post them in the comments section below.
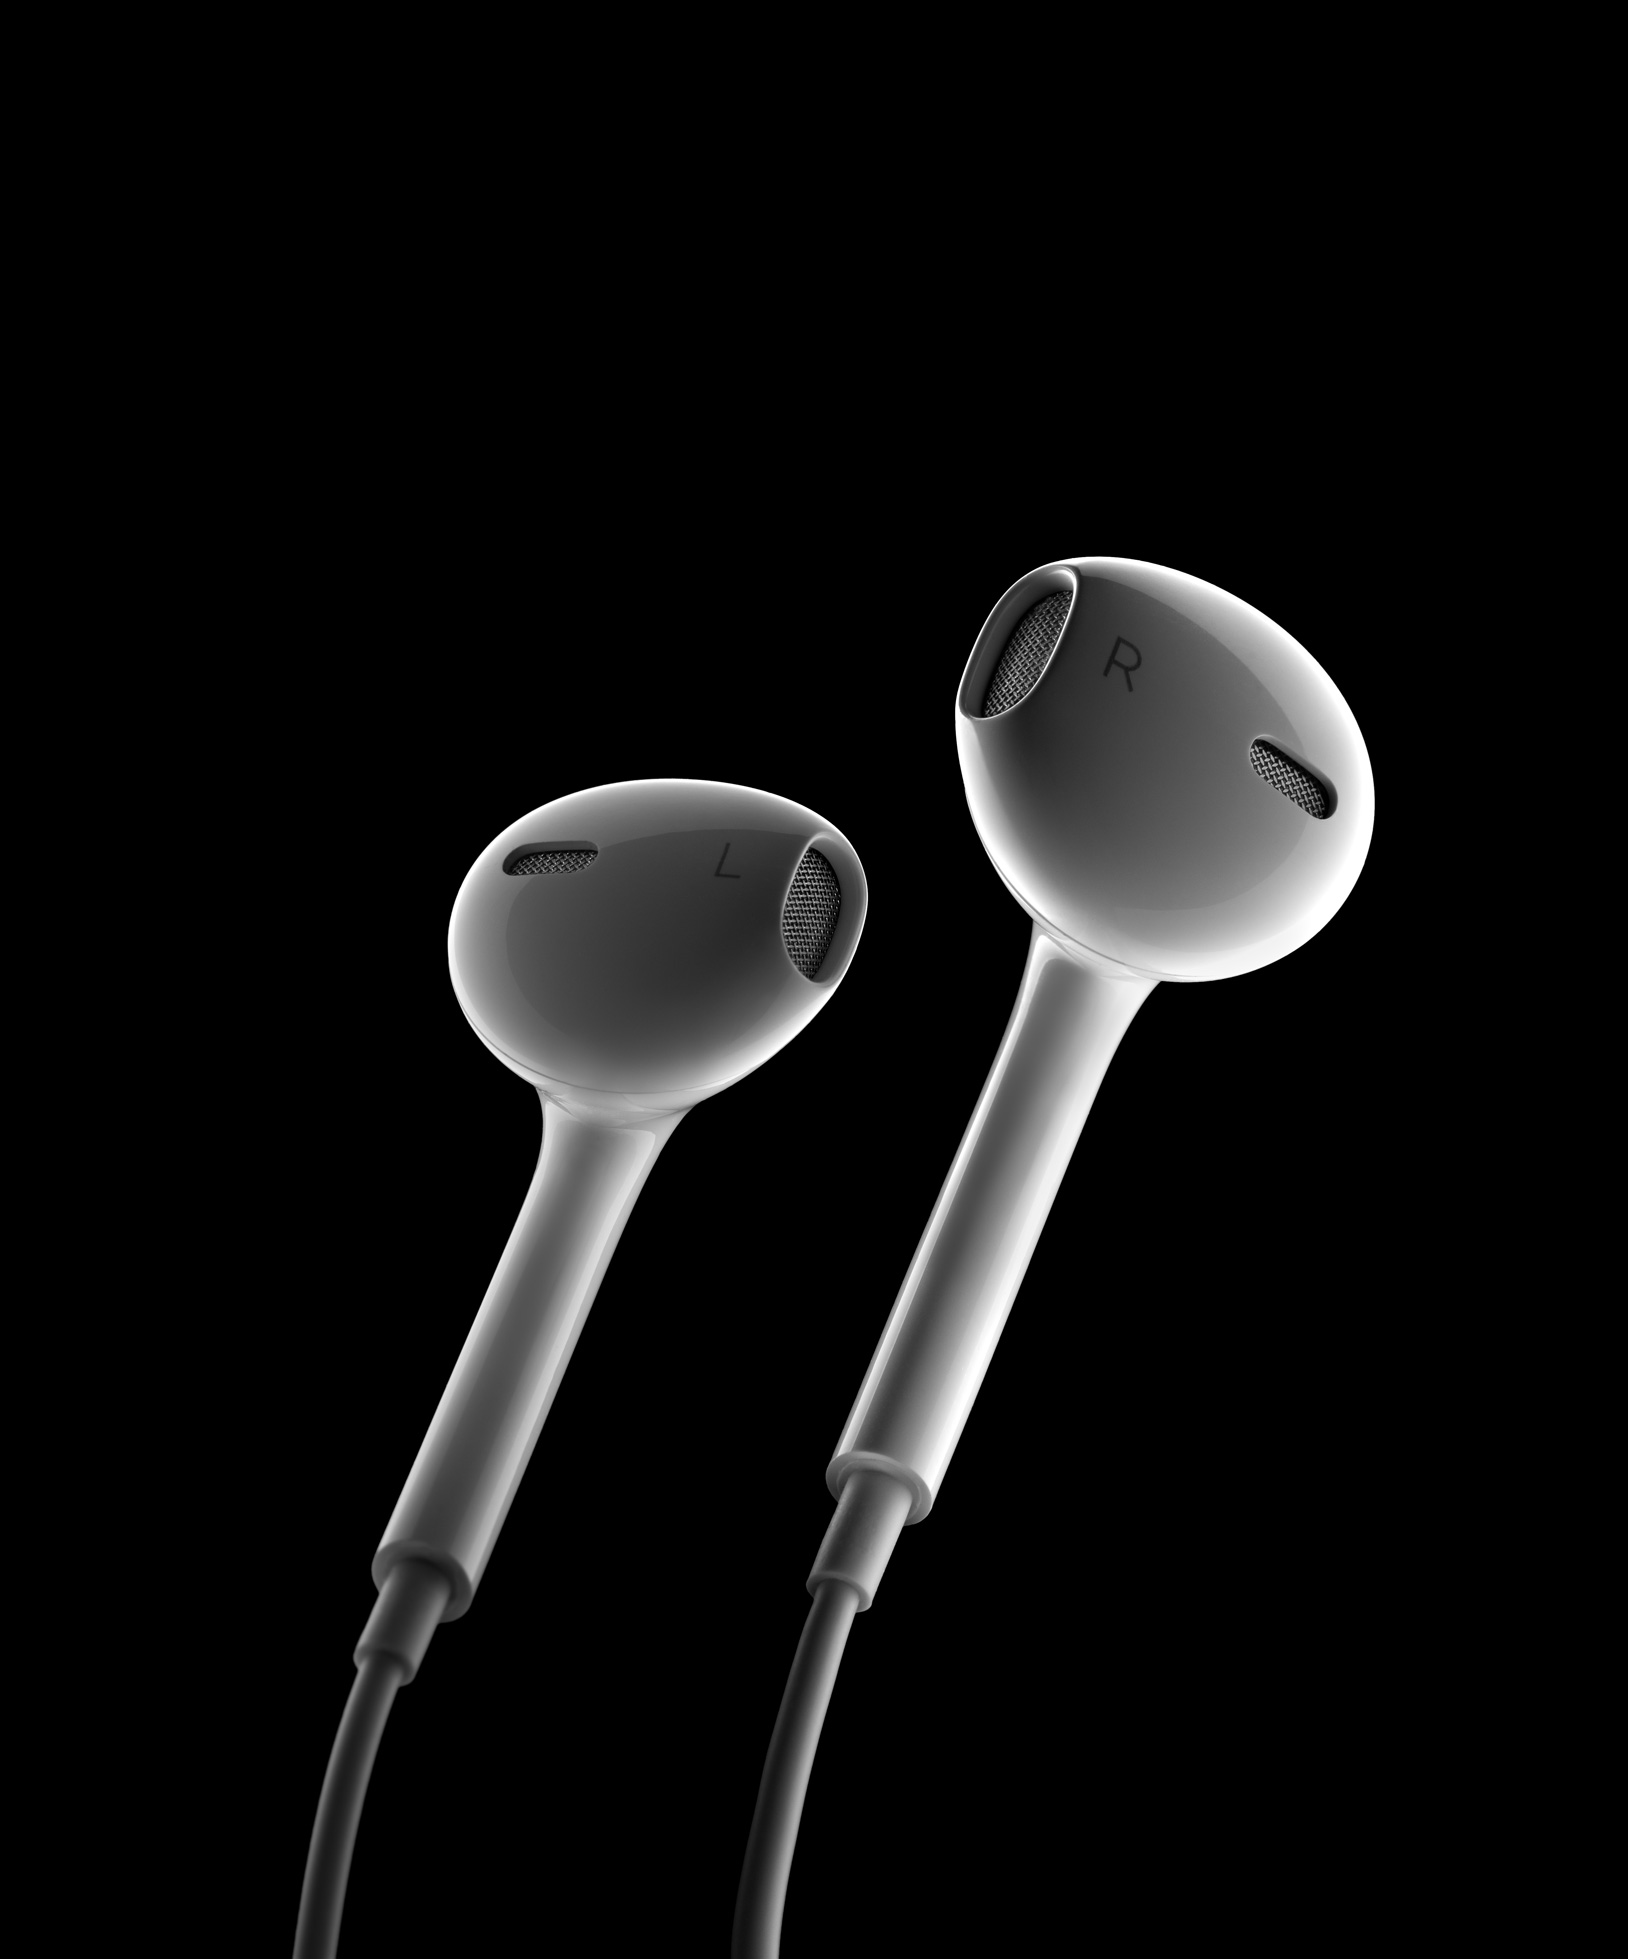
Final earphones product shot captured using speedlights.
Comments
Outstanding as always, guys. Keep them coming!
Great show yet again!
Thank you.
AWESOME!❤ THANK YOU VERY MUCH 😁
Thank you Karl and KTE Team!!! This brief challenge was really great and even better now that we got to see how you solved the problems we all ran into. Your experience and ability to think critically and creatively is inspiring. It’s easy to forget that there is more than one way to approach a shoot and watching you take such a different path really pushes me to think deeper and not settle on the first solution that comes to mind. Thanks again Karl!!
Thank you Lioju!
Thanks Karl and team, great tutorial, learned a lot. I had new some-brand pods on a shelf and just tried to recreate what you showed. I came to realize, that the black paper around the round ear piece top part wasn’t doing anything apart from reducing flare, meaning no reflection around the edge. Was too small for the height of the ear piece, so if the black refelction is wanted it needs to be bigger. Also I noticed that my fingers are way too chunky for smal things and I had the same experience trying to get the earplugs in place as shown in the video, so I went the other way – sticking the subject onto a piece of paper and then cutting the paper was much easier to do 😉
Keep it up!
Thanks, that’s a great idea cutting the paper after you stick them!
Hi Karl, fantastic tutorial even though I found it extremely frustrating to watch as you made the shoot much more simple than my attempt! 🙂
could you advise me on the perspex you use please. Is frosted perspex the same as opal perspex? Is there any difference or will both work fine to use as a diffuser like you did in this video? Also – do you ever use the matt finish perspex or would you always go with gloss?
cheers mate 🙂
Hi Nathan, the Opal 5mm is better for this. I only really use the matt when I’m including it as a background such as this https://visualeducation.com/class/liquid-art-and-motion/ so we don’t get reflections of off it.
Thanks for clearing that up, mate. Makes complete sense only using the matt acrylic when you want to get rid of the shadows. I have not watched the video you linked but I will give that a watch tonight. 🙂
Do you have a video where you discuss acrylic in detail? I ask as I am going to get a piece of acrylic (6ft by 4ft) to use instead of diffusion paper. I find the paper really fiddly and its hard to get it to stay in place. I also would like to use it instead of seamless paper for a backdrop sometimes. I mention this as I am unsure why you would use Opal over frosted or vice versa?
Thanks again, Karl.
Don’t bother answering my last comment, mate! I watched the video you recommended and all my confusion around perspex has been answered!
I have spent the last 2 days trying to work out what the difference is between matt acrylic and frosted acrylic! And after watching the video you recommended, it has come to light, they are the same bloody thing! No wonder I was getting myself confused!
Ha yes but remember there is also matt acrylic which is completely opaque such as the white or black matt ones I use for a base surface sometimes!
Oh come on Karl, just when I thought I understood the different acrylics you go and introduce a different type!! The pen tool was much easier to get my head around compared to these acrylic sheets!
Haha! Next time you use an acrylic sheet in one of your live shows, I will ask you to talk about them if that’s ok, mate?
Cheers,
Nathan
Hi Nathan, sure no problem, I can show some of the types i’ve got.
I really enjoyed the brief and it was great seeing your approaches – I went the way of wooden sticks and blue tack and the challenges around that – shooting straight down onto a transluscent material is a great idea that I will keep in mind for my current work with product shots
Cheers John.
🎉 First of all, massive well done in the production and blunder-free broadcast of this brilliant video. I can imagine that was a bit of a nightmare with multiple camera feeds working with fiddly subjects with just two people — you and one assistant, so 👏🏻 straight away.
Also, thanks for the focus stacking tips—I’ve found my focus stacks end up… poor at best but I think I’ll give it another go. This is definitely another video to come back to as there’s loadsa gems of knowledge.
Thanks again.
Thanks Philip!
Ohh boy! 😂 I feel so stupid.. gravity!! That would have saved me so much swearing and frustration if I had just shot them from above 🤦♂️ i’m blaming covid for my failing brain!
We’re all here to learn Pete! 🙂
Karl,
I appreciate you shooting this, and showing us your way of achieving the image. I, of course, glued and stood mine up to shoot, which is why I had a bit of “dodgyness” at the bottom of the round part on the front earbud. (I was in the top folder) I never considered shooting them on acrylic (which I have plenty of), so that is something I will definitely try to include in my thinking in the future. I know about shooting on acrylic from previous shoots, and watching you do it 100 times, but for some reason it just didn’t occur to me. Thanks for helping me to think in a new way.
All that being said, at the risk of being an a**, I think I have to call you out for your final image. You’ve crucified us in the past for not being “on-brief”, and your brief clearly stated that you wanted the front of the right earbud and back of the left, but your final image is the front of both… and the back of that earbud was actually the harder shot (for me). If we’re being honest, by your own judging criteria, your image would not be in the top folder. Please take this with the humor that it’s being written with… I just saw that and went “AH HA!!!!!”. LOL
Thanks for all you share with us. I consider your site an invaluable tool for keeping my skills sharp, and I recommend it to people all the time. Jess Moore
Ha Ha yes Jess you are absolutely right. Fortunately though I did shoot the left ear phone in my rehearsal so I could dig it up and give you both versions, I simply took the fact that I know more than the art director so I convinced him to take my advice and change the brief! 🤣. Also very well done on your image it was a great result. Cheers Karl.
So, I do have a question/idea for you.
I’ve noticed that you deal with bluetack(sp) and/or hot glue a lot. Have you ever considered using UV glue?
It was originally used for dental procedures, but has become more widely used for multiple industries. The beauty of UV glue is you place the glue exactly where you want it, and then place your subject, and nothing happens until you apply UV light to activate the glue. And then it is locked exactly in place almost immediately. Literally within a few seconds it is set in place. It allows you to get positioning exactly where you want it and not worry about it locking up on you or burning your fingers, etc…
I use it for product shots all the time. It’s perfect for shooting jewelry on mirrors. I put a dot where I want the ring to stand, and place the ring in exactly the position I want and then my assistant hits it with the UV light, and BAM it’s just there. When done it pops right off the ring, and a razor blade scrapes it off the mirror with no residue. You can get it in thick, thin, and soft variants. If you haven’t tried it, you should. It might completely change how you mount objects in the future.
Hi Jessie, that sounds amazing I will look into that today! Someone else also recommended a substance called ‘Sticky Wax’ which I’ve ordered a pot to try.
…now that’s an idea.
Thanks for sharing this tip, dare I ask, where’d you get it from? Amazon?
Yes, you can get it on Amazon or eBay. We’ve been using it for the past year or so, and it has really been helpful.
karl,
i am Abdulhakeem from Nigeria. i have a canon 70-200, can use that for this shoot?
Hi Addulhakeem, if it has a macro mode/button then maybe it will allow you to focus close enough but if not then it won’t.
Hi Karl,
Could you please give us a link for more information about the translucent underlay you used for this shot.
Thanks a lot
Michael
Hi Mike, White gloss opal acrylic (perspex/makralon) available from most Sign Service companies or plastic supply companines. This is a material that you would have seen me use in many tutorials including some of the jewellery ones.
Hey Karl,
I really enjoyed this tutorial, particularly the two black masks for the camera and beneath the ear pods. I don’t participate in challenges because I’m no longer on Facebook, so I see the challenge brief on your site but can’t send it in.
I tried clamping the earpods to a boom but they still had a tendency to twist. Eventually, they settled down enough for a focus stack. The bigger issue was dust and scratches. They weren’t a new pair but to the naked eye looked clean. I cleaned them anyway, but not enough apparently. That brings me to a question:
After I tried the challenge at home, I had to photograph some Pokemon cards. In some ways they were similar to the earpod shoot. I wanted a rim light with a black background but hadn’t seen your video yet. My first instinct was to lay them down on white Lucite with a Siros beneath it. The problem was that wouldn’t get a black background if I did that. Again, hadn’t seen your video and didn’t think of using a black card underneath to both block glare on the edges and give a rim light. Instead, I set up a sheet of black foam core on a table, clamped it on one side, then cut slots in the board for my tripod legs. That way, the camera could look straight down on the card. Then, I set up four lights at all four corners. It seemed to work, so I moved on to step two.
The card was supposed to be in an block of acrylic split in two, held together by brass screws, called a “card holder”. I first shot the card in the holder but scratches on the surface made the card look scratched, which is not the point. It was a $4,000 card because it didn’t have scratches, and had to look exactly like the original. This also meant no post-processing of the card beyond exposure adjustment.
I decided to shoot the acrylic block separate from the card, then overlay the card in Photoshop. My four lights illuminated the card holder well but they also illuminated seemingly millions of scratches and dust flecks. It was a new holder but had been out of its sealed package overnight, so I broke open a fresh one, found it was cleaner, but not clean enough. I cleaned it using alcohol and a sensor wipe, then used compressed air on all surfaces. Still not clean. It took about 15 hours of retouching to remove most of the scratches and dust in Photoshop. What am I doing wrong?
My daughter noticed that the hologram foil in the card didn’t reflect the hologram pattern beneath the printed art, so I decided to reshoot it. This was a bit tricky to do because the angle of light had to be exactly right. Not only that, but several angles worked, but each reflected different colors into the camera. I could get blues, yellows and oranges, or greens and reds, but not all of them at the same time. Have you ever had to photograph something like that? I’d be curious how you do it. I was particularly worried about damaging the card because, unlike diamonds, they are very fragile. I shot eight of them, each of which was worth thousands.
In the end, I decided to blend several shots to show the variety of hologram colors reflected by different light sources. Because the card is still, it doesn’t affect the information needed to judge the condition of the card accurately. That said, it was much trickier than I expected.
The final sh
Hi Apaq, you didn’t do anything wrong. I used a brand new pair of headphones and they still had lots of dust on that took photoshop to clean up. At these microscopic levels and magnifications dust is inevitable, it’s in the air and it gets on the product no matter what we do. As for the hologram, these are very difficult to photograph because holograms are highly reflective and meant to be viewed with stereoscopic vision to be legible and 3D this of course is not possible with standard photography so it has to be shot separately to get the best out of it.
Excellent video Karl, I learned so much. For the blackcard used for rim lighting is it any special material to block all light or just heavy stock paper?
Hi TN Thanks, yes any black card will do, thick enough to block the light but not too thick you can’t cut it with scissors.
I joined a bit too late to try my hand at shooting the brief, but already learned an incredible amount by following along. It was very interesting that that I would come up with a question only to have it answered by Karl though his teaching or from a live class question, in just moments. As far as the lockdown show, I thought it was great, while the classes that I have watched so far have been wonderful with great production values the last show was like you were teaching one on one, watching you work solo, in realtime seeing the successes and minor pitfalls to achieve the awesome results was very encouraging to me, as I often am working by myself and sometimes am unclear that I’m doing things wrong, but what you shown me is that there really is no wrong just my little experiments to see what works. Thanks, can not wait for the next brief.
Thank you Christopher.