
Perfume Bottle Photography
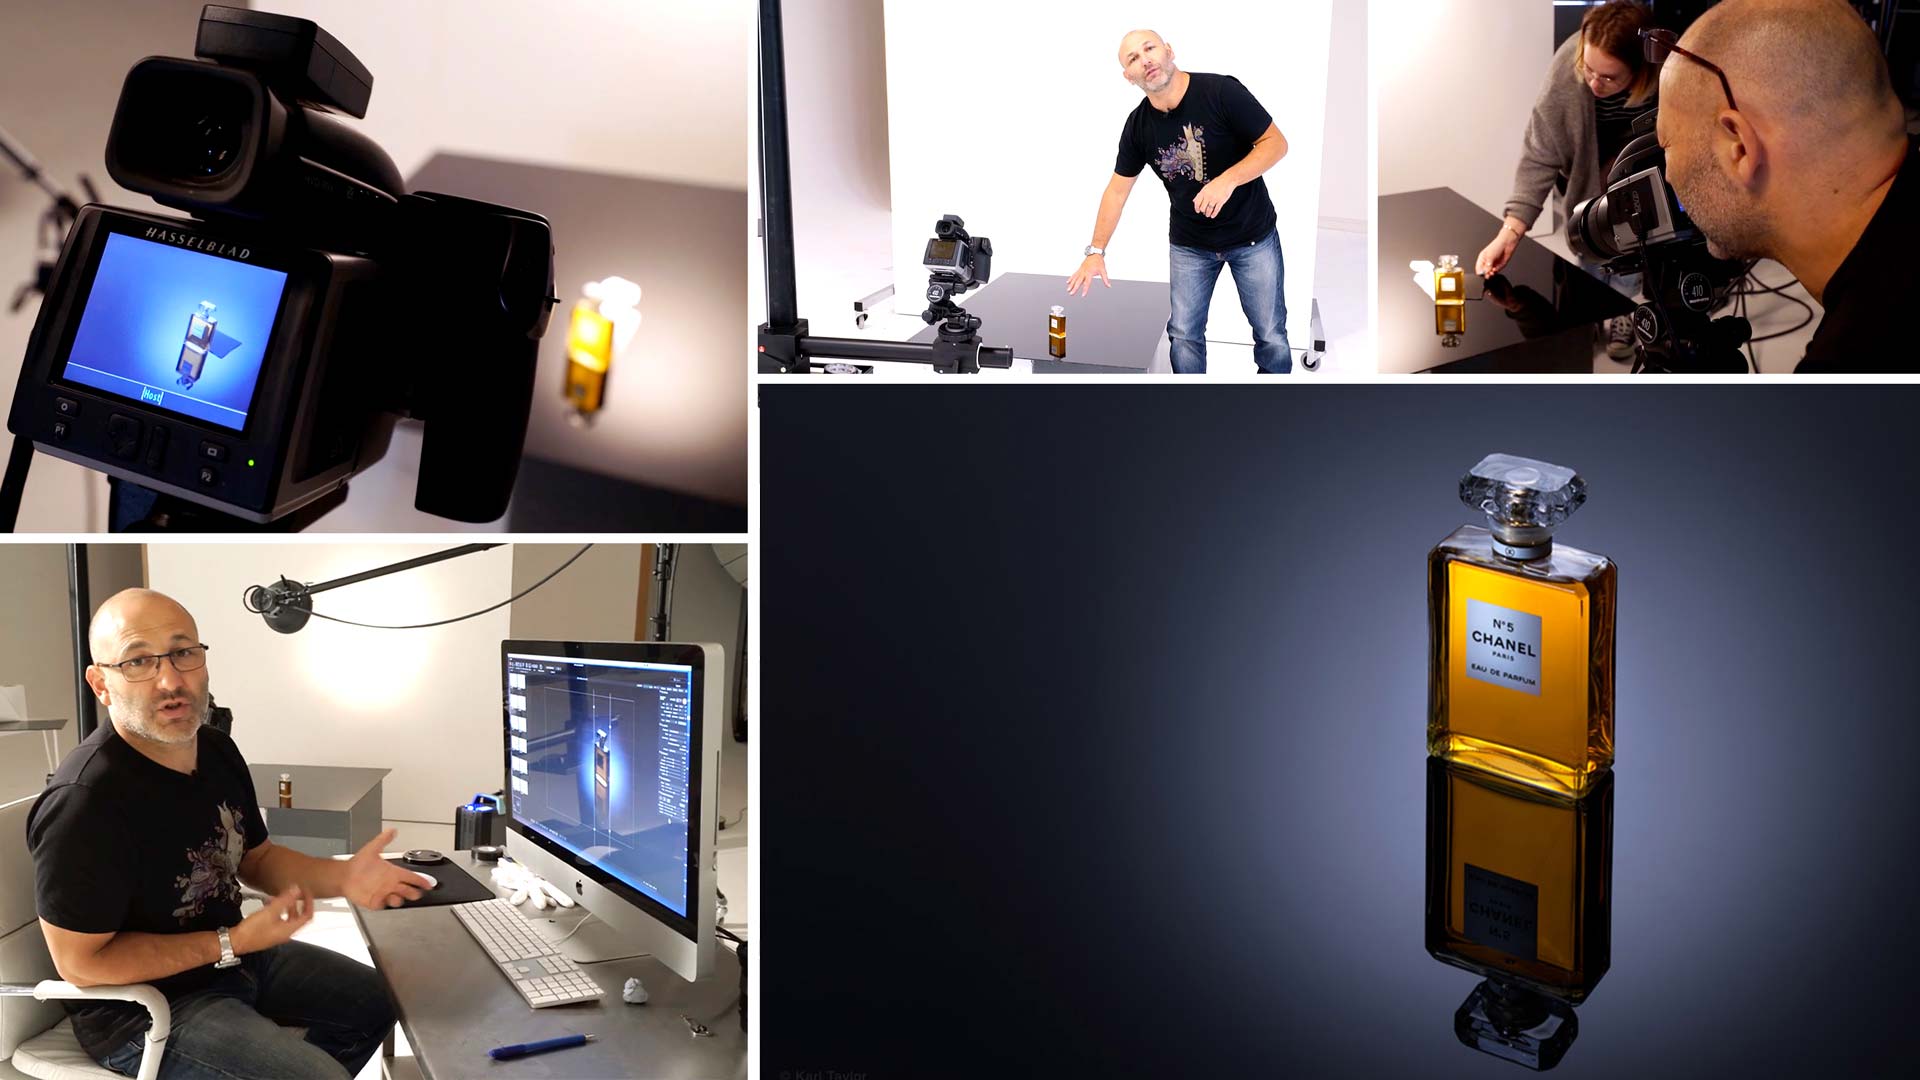
Chanel No. 5 is one of the most well-known perfumes in the world – an icon in its own right. In this perfume product photography class, Karl aims to create a series of images that are as elegant and beautiful as the fragrance itself.
With meticulous attention to detail and precise control, he demonstrates how to light this bottle perfectly in order to accentuate its key features. He also reveals a number of essential techniques that can be used to elevate the shot.
This class is a must-watch for anyone interested in product photography. Why? Because it provides a solid base of knowledge, recapping the basic principles before building to more advanced techniques that can be applied to a range of different products.
In this class:
- Product photography: How to photograph a perfume bottle
- Product photography tips
- How to photograph with multiple studio lights
- Lighting setups for product photography
- Using reflectors and flags
- Minimising reflections in glass objects
- Creating a composite image
To see how Karl retouches this shot, check out Perfume Bottle Photography | Post-Production for this final image.
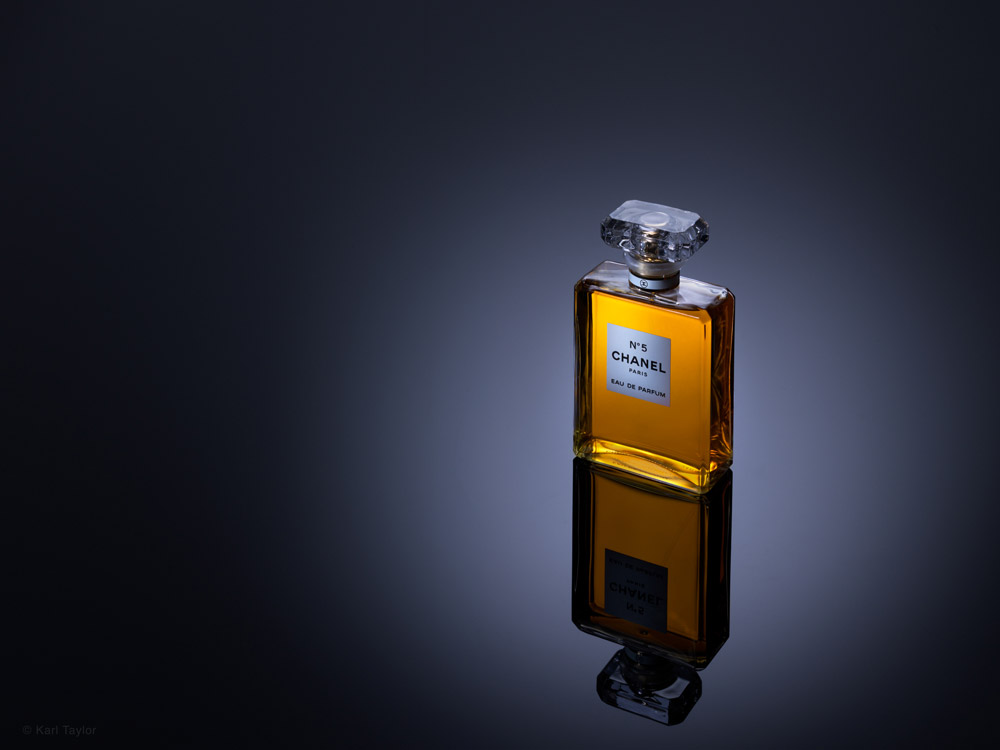
© Karl Taylor
Comments
Great Work. I like watching your videos.
Even on the same type of shoots you mention small things that are so new that make a huge difference. It is those super small things that make the product pop.
Jared
Thanks Jared.
Brilliant tutorial Karl, thanks .
Thank you Neil.
Thanks Karl.
Kind regards,
Sorted!
Hi Karl,
Great tutorial as always! If I may ask, how have you constructed the plain ‘wall’ on rollers you use please? Is it a couple of sheets of MDF skimmed or painted. But I cannot see how you have allowed for the ‘wall’ to remain upright and on wheels. Have you used a frame behind? What would you suggest on how to build one of these please Karl. I have just secured a small studio space but the walls are not smooth (breeze blocks painted white) and as you mentioned a smoother surface to a paper gives a better finish.
Kind regards
James
Hi James it has an entire metal square frame and then an internal stud work wood frame and then MDF panels on both sides painted. I wen’t to my local metal work shop with a basic design and they built the whole thing except for the MDF panels which we attached.
I think the idea to shine a light through the lens is a great idea.
If it’s do dark, you can also stick a LED light on a UV protection cover that you can temporarily screw on the lens. Less hassle and more precise if you do this often.
By the way, I haven’t been as excited about photography as I am right now in years, so THANK YOU!!
Hey Karl,
Another incredible session. I love your creativity in doing the paper cutout!!
In regards to the polarization, what did you use for that? What filter? I usually see ones that are screwing on the lens, but you used something different… Thanks!
Hi Marius, thanks for your comments. I use Lee filters system.
Loved it! 🙂
Great lesson karl!!
I love this kind of luxury product shots!
Thanks a lot
Thanks Javier 🙂
Dear Karl
Can we use black color glass sheet instead of Archilic sheet and what is the difference between both sheet.
Best Regards
Hi Rukesh, you can but the reflection isn’t as clean. Usually with black glass you get a double reflection.
Hi Karl, instead of using a pico light to light up the label, provided that, as in this case it isn’t transparent, I use to make another shot with a front light and I’m going to past the new image onto the product by Photoshop. Do you think is it a wrong way?
Hi Riccardo, yes this type of layering method in photoshop works well too.
Hi Miguel, I have always the same problem although I try to get the environment dust free as much as I can. The main problem, to me, is that perspex (methacrylate) very soon is going to be scratched, even though I try to take care of it. I’m trying to search for opaline black glass which is much more heavy, but much easier to be cleaned and scratch proof.
Hi Karl, I have a question. Every time I use black perspex in product shoots like this one, I keep on getting a lot of dust showing up in the photo even though i try to keep the shooting surface as clean as possible and I noticed at minute 25:57 of this video that it is showing up there too, but when you switch to the actual photo taken it doesn’t show up. So I was wondering how do you deal with this dust spots? is there something I’m doing wrong?
Also I was wondering how do you keep the surface clean? or do you also have to deal with it on post? I find really annoying that even though I try to be really careful on keeping everything clean, I keep on getting dust in the picture that sometimes its even from the cleaning cloth I used. I have to spend so much time in post cloning out this dust spots.
Also I’d like to thank you for these great courses, I’ve learned so much from these. I started following you from the Broncolor youtube how to videos about a year ago and now I’m glad I signed up for this. Keep up the great work!
Hi Miguel, first you have to make sure you studio is as dust free as possible, you can even get these machines that suck dust out of the air. Second use microfibre cloths as they don’t leave dust from the cloth, then the meths to clean. Arcylic can also become very static which attracts dust so there are ‘de-static’ devices that you can use to zap the acrylic to remove the static.
Thank you Karl! I’ll try that for sure!
Hi,
You can use an old sheet of fabric softener to remove dust from computer and TV screens, and you can also soak a microfiber cloth softener to reduce static build-up on plastic surfaces.
Do not wash with water
Erase the traces with a damp microfiber cloth.
To erase a scratch on altuglas or plexiglas, the altuglas or plexiglas is repolished with polishing paste and felt.
If the scratch is not too deep, you can also scrub the altuglas or Plexiglas with slightly wet felt powder sprinkled with cigarette ash.
Rub in circular motions.
This work is unfortunately slow and laborious.
Be careful, do not rub dry.
Great tutorial.. Keep it up