
Food Photography With Natural Light: Pasta
No studio? No problem. Try this simple shoot at home.
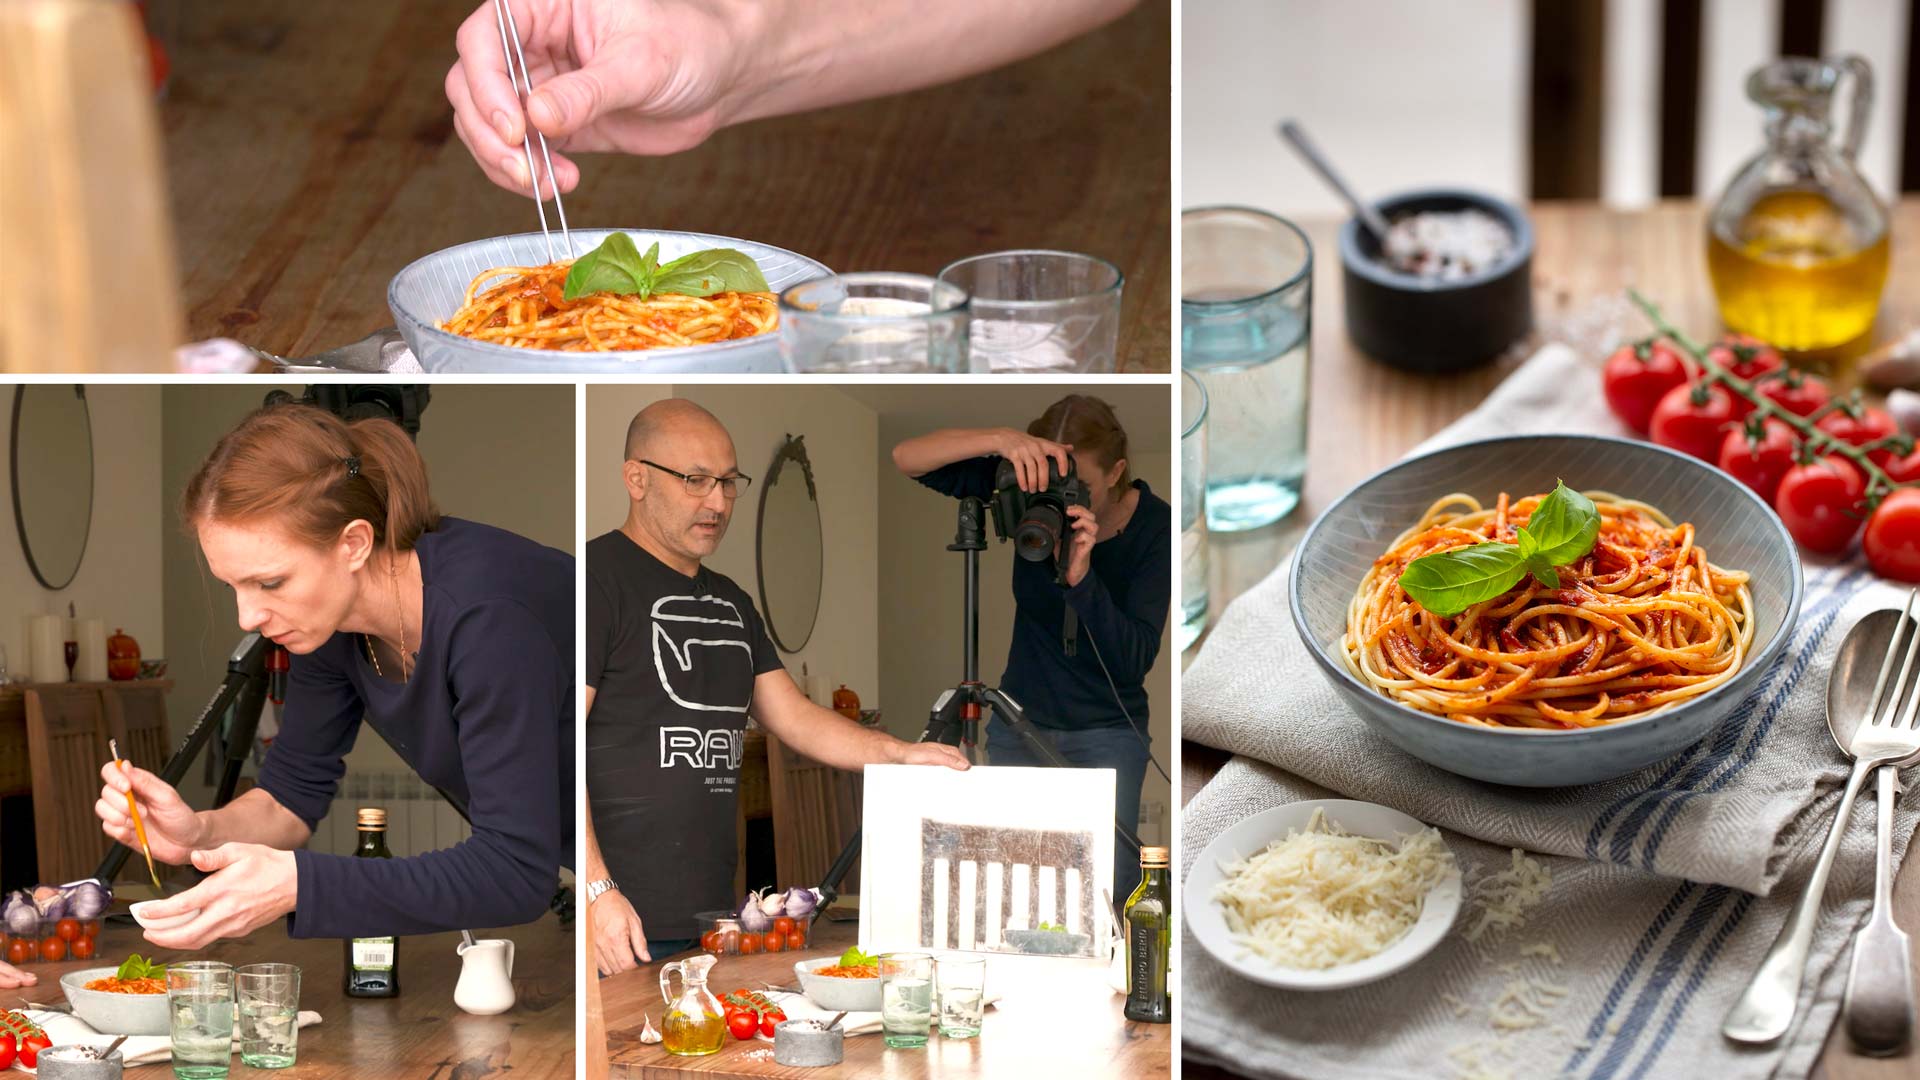
Food photography doesn’t necessarily require extravagant dishes or professional cooking skills. In this food photography class, Karl and Anna demonstrate the simplest and easiest way to photograph food at home.
Using nothing but natural light, Anna demonstrates how to style a home-cooked bowl of pasta before explaining what props and equipment you’ll need. Karl explains the lighting, the advantages of shooting with natural light, and also demonstrates how to use positive and negative fill to control your light.
In this class:
- How to photograph food at home
- How to photograph food using natural light
- How to style home-cooked food for photography
- Affordable accessories for food photography
- Food styling tips
- Camera settings for natural light food photography
Questions? Please post them in the comments section below.
Using studio lights for food photography does make it easier to control your lighting, but the truth is that amazing food photography can be achieved using little more than natural light. This is what Anna and Karl wanted to demonstrate in this food photography class — how you can photograph home-cooked food in your own kitchen with nothing but natural light.
To keep it simple, Anna decided to photograph a bowl of spaghetti, which she topped with a store-bought jar of sauce. This is a simple dish that doesn’t require a high level of culinary skills and can easily be done at home.
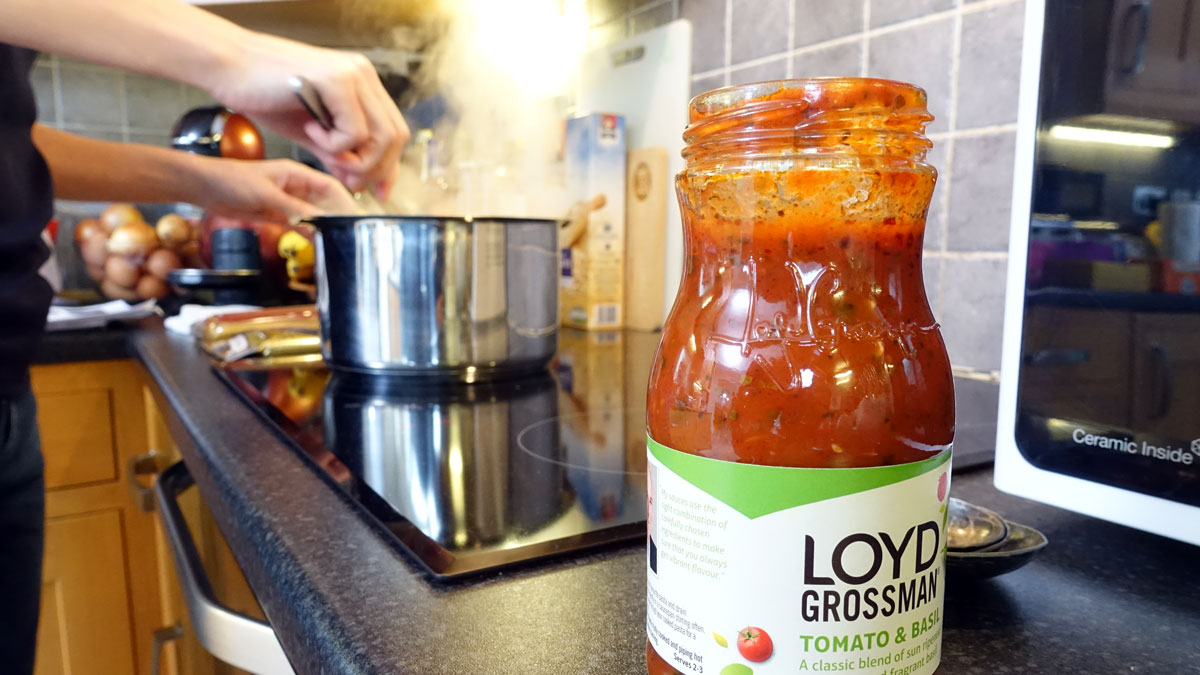
Photographing food at home can be done using simple ingredients.
For the styling Anna shot the image on the dining room table, using a selection of props and fresh ingredients.

Starting work on styling the image.
Once she was happy with the composition and styling, the next step was to perfect the lighting. For this stage, Karl and Anna experimented with different types of positive and negative fill, demonstrating and comparing the effect of each.
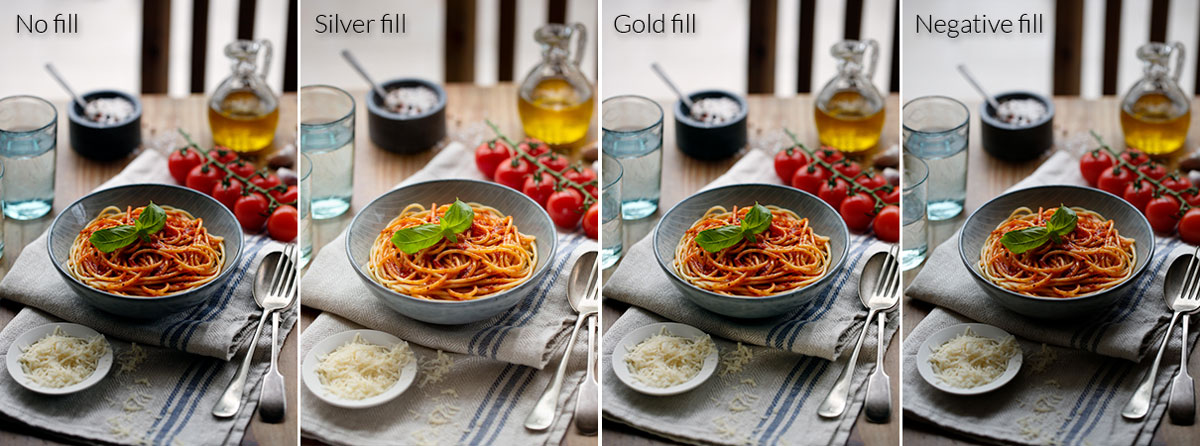
Results from different types of fill light.
This class aims to show just how simple food photography can be and is ideal for those just starting out in photography. It also covers some powerful information about how to control light – knowledge that can be transferred to any genre of photography.
The final image:

The final home cooking pasta image.
Comments
Hi, Karl and Anna!
I am a food photographer, mainly, and am writing to see if you can help me navigate an issue that comes up quite often in some of my lifestyle photos, very similar to the one in this video.
Often, when I am shooting several vertical items, like glasses or bottles, I can only get one to line up vertically, and the others end up being off center, tilted to the right or the left. I can’t seem to fix it in lens correction.
Do you have a video that addresses this issue? Or, can you help me figure out what to do in Photoshop to get all of the items to line up straight?
Thank you so much!
Allison
Hi Allison, that is called converging verticals which occurs when shooting down or up at something that has tall vertical objects or lines. Tilt and shift lenses or view cameras with tilt and shift can overcome the problem but you can also overcome the problem in photoshop if you shoot the picture slightly looser than you intend the final image to be. These two classes may help you:
https://visualeducation.com/class/practical-demonstration-on-interior-retouch/
https://visualeducation.com/class/tilt-and-shift-product-shoot/
Hello Karl,
I just joined your membership today. It’s very helpful. I have a question related to food photography. I know 100mm macro lens is the good lens for food photography. I did some research and I know many food photographer recommend 100mm macro lens. However, I am a Sony user and I just bought my Sony A7III. What macro lens for Sony A7III do you think is good for food photography? I did some research and I am considering between ( Sony SEL90M28G FE 90 mm f/2.8-22 Macro G OSS ) and (Sigma 105mm F2.8 DG DN Macro Art). Which one you think I should buy if I want to shoot for food photography? Thank you very much
Hi, thanks for signing up and make sure you watch through the Lighting Theory chapters before straying too far into other classes. The Sony 90mm Macro G is an excellent lens.
Hello,
I noticed Anna kept climbing onto the table to look through the viewfinder. Was this to see exposure in the camera meters or for composition? She said she always shoots tethered, so I was curious. I don’t remember if Lightroom shows a Live View, but I know Capture One does, which is why I purchased it recently. Great video!
Thanks, she was checking composition.
Some great information here. 👍 It seems as though you have presented these videos in reverse order 🤔
OK thanks we’ll look into that
These food photography tutorials are awesome. Anyone can try food photography. I agree… Ana is awesome…. you too Karl. Lol. Thank you!
Thank you.
Very nice indeed!
I would love to be able to pause the video and have it fully download and then watch. The video seems to stop and I need to click around for it to start up again.
Please add the Arabic translation
Hi We’d love to but unfortunately translations are very expensive and we just don’t have enough demand for it at the moment. All our videos do have english subtitles though if that helps.
I’ve come in a bit late watching this but I’m so pleased to see it was shot in a domestic setting.
Its what I’ve called ‘kitchen sink’ photography. Showing what can be achieved with what one has at home and no studio paraphernalia.
In a word; Brilliant!!
Thanks Ted.
Wonderfull tutorial we need alots of it ( Natural lights )
thanks for the Wonderfull tutorial .. i wonder why Anna didn’t use the laptop for taking the shoot .. it’s more easy as that you use tethering .
I’m looking forward to this one too!! Hopefully it will be ready soon!
Looking forward to this one!
Very exciting for this course. I often shoot food in my home studio.
Not too long now! 🙂
Teacher, when can I see it?
When Ben has edited it 🙂