
Beauty Retouching: Practical Demonstration
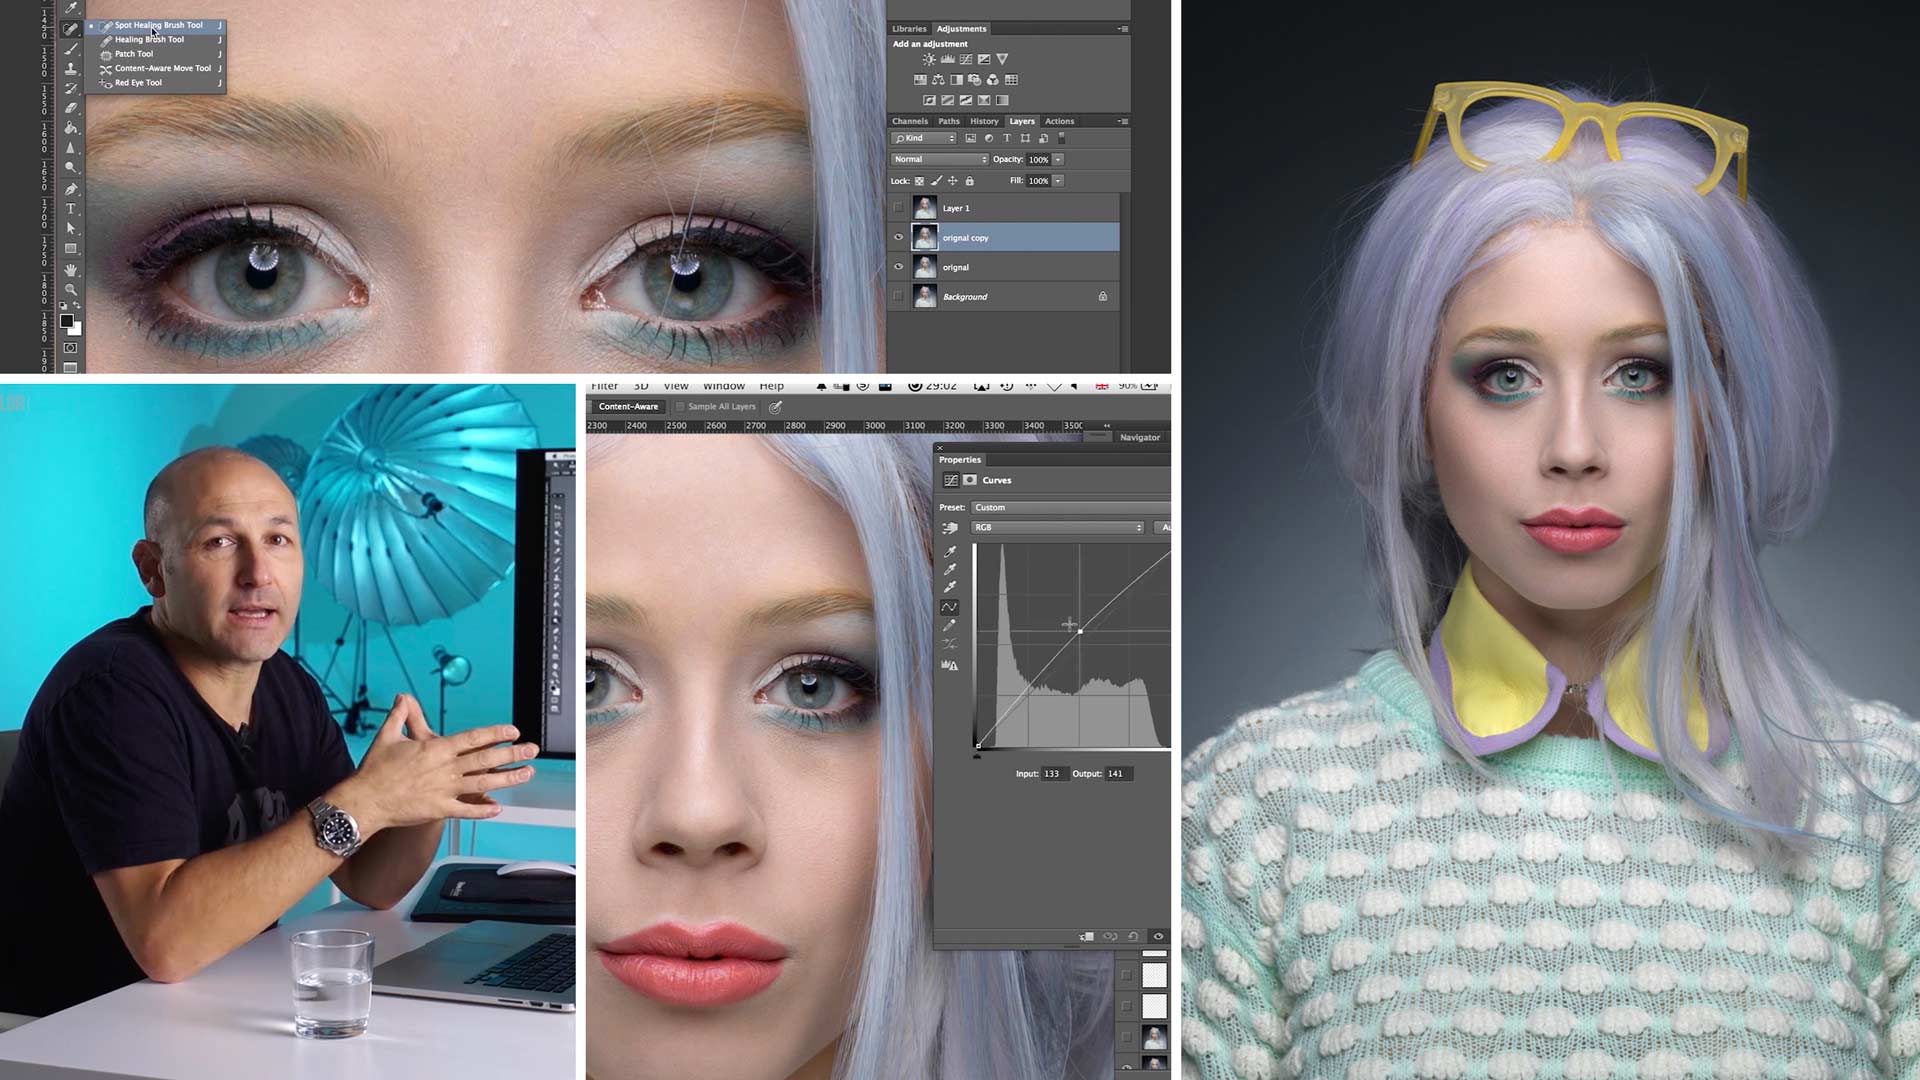
Beauty retouching can take a great deal of time, especially if you are unfamiliar with the frequently used tools and techniques in Photoshop.
In this Photoshop class Karl does a practical demonstration of a beauty retouch, explaining the most common Photoshop tools and effective techniques. He also reveals a number of useful tricks that can help optimize your workflow and save you time.
In this class:
- Beauty retouching in Photoshop
- How to remove blemishes in Photoshop
- Photoshop keyboard shortcuts
- How to use the Healing Brush tool for beauty retouching
- Using layers and layer masks
- How to use burn and dodge for skin retouching
- How to use Photoshop liquify tool
For more in-depth classes on beauty retouching, visit our Advanced Photoshop for Photographers section.
Comments
Also, I notice that at the end of the lesson when you show the before and after pictures, your skin tones barely change, whereas for me she becomes “whiter” is this because maybe I over did it with the dodge? is weird to me cause I tried following you as close as I could, trying to always keep the same values for flows, opacity, etc…
Hi, i’m not sure why that could be unless you were to send me the layered file to examine.
Karl, thanks for another Gem! really learnt a lot with this lesson. Question is it okay if I use this in my portfolio to showcase my retouching? of course leaving the Karl Taylor education watermark, just to be able to display a before and after, so I can display the skill, of course I still have a lot to learn but you know… eventually…
If not, is totally fine 🙂
Hi, thank you for your comments but i’m afraid that the image can’t be used, partly because of the model rights with Ophelia.
Really useful tutorial, and managed to pick up loads of gems that I will now use in my workflow. Thanks for the top notch session.
Thank you!
When you dodge and burn with Wacom, how do you change brush size so fast? How did you program your setup?
Hi I use the keys on my keyboard with my right hand for the keyboard short cuts and the pen in my left hand and of course if you are right handed you can swap it around. Some people prefer to assign the buttons on the tablet to do the same thing but I’m used to using the keyboard.
Would you mind sharing the different shortcuts you use and how do you make brush bigger or smaller from the keyboard?
The main ones I use for changing the brush size are the square bracket keys, when used in conjunction with the shift key this changes the softness of the brush. Other Photoshop keyboard shortcuts can be found here: https://helpx.adobe.com/photoshop/using/default-keyboard-shortcuts.html
Karl, my “flow” option at top of the photoshop browser is gone. The last time I watched this tutorial it was there. I have googled it to death and Google does not understand my questions. Neither opacity or flow show up at the top like it does for you in this tuitorial.
Hi Tamarah, please check your view setting menu to make sure you are not in full screen as this makes the top menu disappear, go to ‘View’ menu and then ‘screen mode’. On a mac computer you can just press ‘F’ on the keyboard and that will change the view mode.
Thank you Karl, I will try that.
This was a wonderful session – you are a truly great educator Karl. I admire your ability to communicate simple and useful tools in a way that is easy to follow, and more importantly, replicate on different shots.
This particular session addressed a question I had earlier in this track – regarding the level of touchups and where is the fine line between natural and “wrong”. I was amazed watching how you made changes slowly and carefully and built up over layers over time. Those changes not only retained a natural look for the model, but enhanced the natural look. As you showcased the before/after I was stunned at how good and natural the modification were. Obviously this comes with experience, but your test of “overcooking” comes from experience.
No question today – just a hearty endorsement! I still can’t believe the value I am getting from your platform relative to the cost.
All the best
Derrick
Thanks Derrick, much appreciated. Yes it can be a fine line between ‘overcooking’ and just right but as you mentioned it’s something that comes with experience. I’d also add that stepping away from the image regularly for a coffee break and coming back to it with fresh eyes is very beneficial.
Hi Karl, great work. However, after creating the curve layers and inverting the mask, the brush tools doesn’t seem to work…I have tried altering the flow and opacity to both ends, but nothing happens when I try dodging or burning. Kindly assist, thanks
Hi, this sometimes happens to me as there is a PS bug and I have to save the file quit PS and restart to fix it.
Nice work! Brilliant result. When I use my Wacom tablet to dodge/burn using your technique I keep getting what looks like pencil lines as I shade over areas. I’ve softened the brush and lowered the flow to 1 as you have and made the brush small and large. I just can’t get that homogeneous blending. Is something not set right on my Wacom or do I just need lots of practice?? Thanks!!
Arjun
Hello Arjun,
Try lowering your opacity to 50%, with your flow at 3%. That is what I use and get good results. I use a Wacom. Good luck!
Thanks!
Hi Arjun, does it give the same result if you do it with the mouse?
No. But I changed the click sensitivity of the ProPen and moved the brush around more to create more homogenous brush strokes….seems to be better.
Ok. After some experimentation, setting the Tip Feel to SOFT, with minimal pen pressure I get a predictable stroke determined by brush size and softness. However, if Tip Feel is HARDER then a LIGHT touch with the pen during dodge/burn results in pencil line stokes and only goes away with a lot more pen pressure. Now I can get back to following along with you on this tutorial!
AG
Hi Arjun, if you are using PS CC check the options at the top bar (just to the right of brush opacity and flow settings) there are some further options on how the pen reacts.
Hi, I am new with the training sessions. I am looking for a retouching session for lets say aged women. is there any video about it? I always doubt about how much to retouch. How far to go.
Many thx
Js
Hi Jesus, If you fully understand all of the techniques covered in the ‘Photoshop for Photographers’ course then you will be capable of doing the job well but how far you go with it is really down to a matter of taste. Clearly it’s not going to be believable to turn a 60 year old lady into a 25 year old but the key thing is to keep their character and enhance the beauty by taking away the main distractions that become apparent in a still photo that are not noticeable in a real world scenario.
I am quite new to all this, and find it amazing how subtle changes can make such a big difference.
Ok, so here it is. During the editing process, how do you know when to stop? I have trouble with this. The perfectionist in me takes over which is not always good. I do some edits and think it looks good. Then if I study it too long I think it doesn’t look good. I go back and forth and almost can’t decide. It’s not the same as upgrading your level of a technique where past work isn’t at the standard now because I still faced this before with editing.
Hi Geoff, that’s a very good question. I always find that professional retouchers go too far because they are also striving for ‘perfection’. If I use a retoucher I know that they are going to be doing their B&D and colour work on many different layers so I always request the layered files back. I also do my own retouching work in this way and then you have the option to reduce the opacity of the Burn or the Dodge layers to take some of the perfection away. I also don’t often use the Visual Aid layers because they help you reach perfection. It is a matter of practise and having an eye for what you think looks good and real. I’m aiming for realism and have learnt to retouch only what is necessary if necessary at all. The other important retouching technique is ‘fresh eyes’. Do your work, walk away make a cup of tea and look at it again in 15mins and what does your first impression tell you.
Excellent advice Karl, thank you.
Hey Karl how did you made the background glow even? As I saw this image on your website & it’s perfectly even.
I think I selected the background area from the other side and flipped it over.
Thanks a lot Karl for this tutorial is very useful and for all the details that you mentioned, Im following the tutorial y practicing however when I tried to create a new layer after a series of step for example you finished the eyes /make up retouch you create a new layer ; what is the command for mac user to generate this new layer that contain the previous retouches, without compress the previous adjustment layers ? ..Im going to layers — combine layes,… but the result is not the same because the individual retouch layers are not available anymore.
Thanks
MAG
Hi Maria, Command, Alt, Shift, E. You need to have the top layer already selected.
I didn’t get that moment with hue/saturation if compared to burn and dodge. With burn and dodge to reveal a darker or lighter layer you work with black color to do this. But, with hue/saturation it is the opposite.
Before that moment I thought I understood the basics, and now I’m in doubt. So, what do you do when you work with hue/saturation? You draw that effect on top of the layer underneath?
Oh, sorry, didn’t pay attention that with burn and dodge you reveal using white as well. At some moment for some reason I started thinking that black meant “negate” and that it removed a mask from a layer underneath.