
Sunlit Shadows Cosmetics Shoot
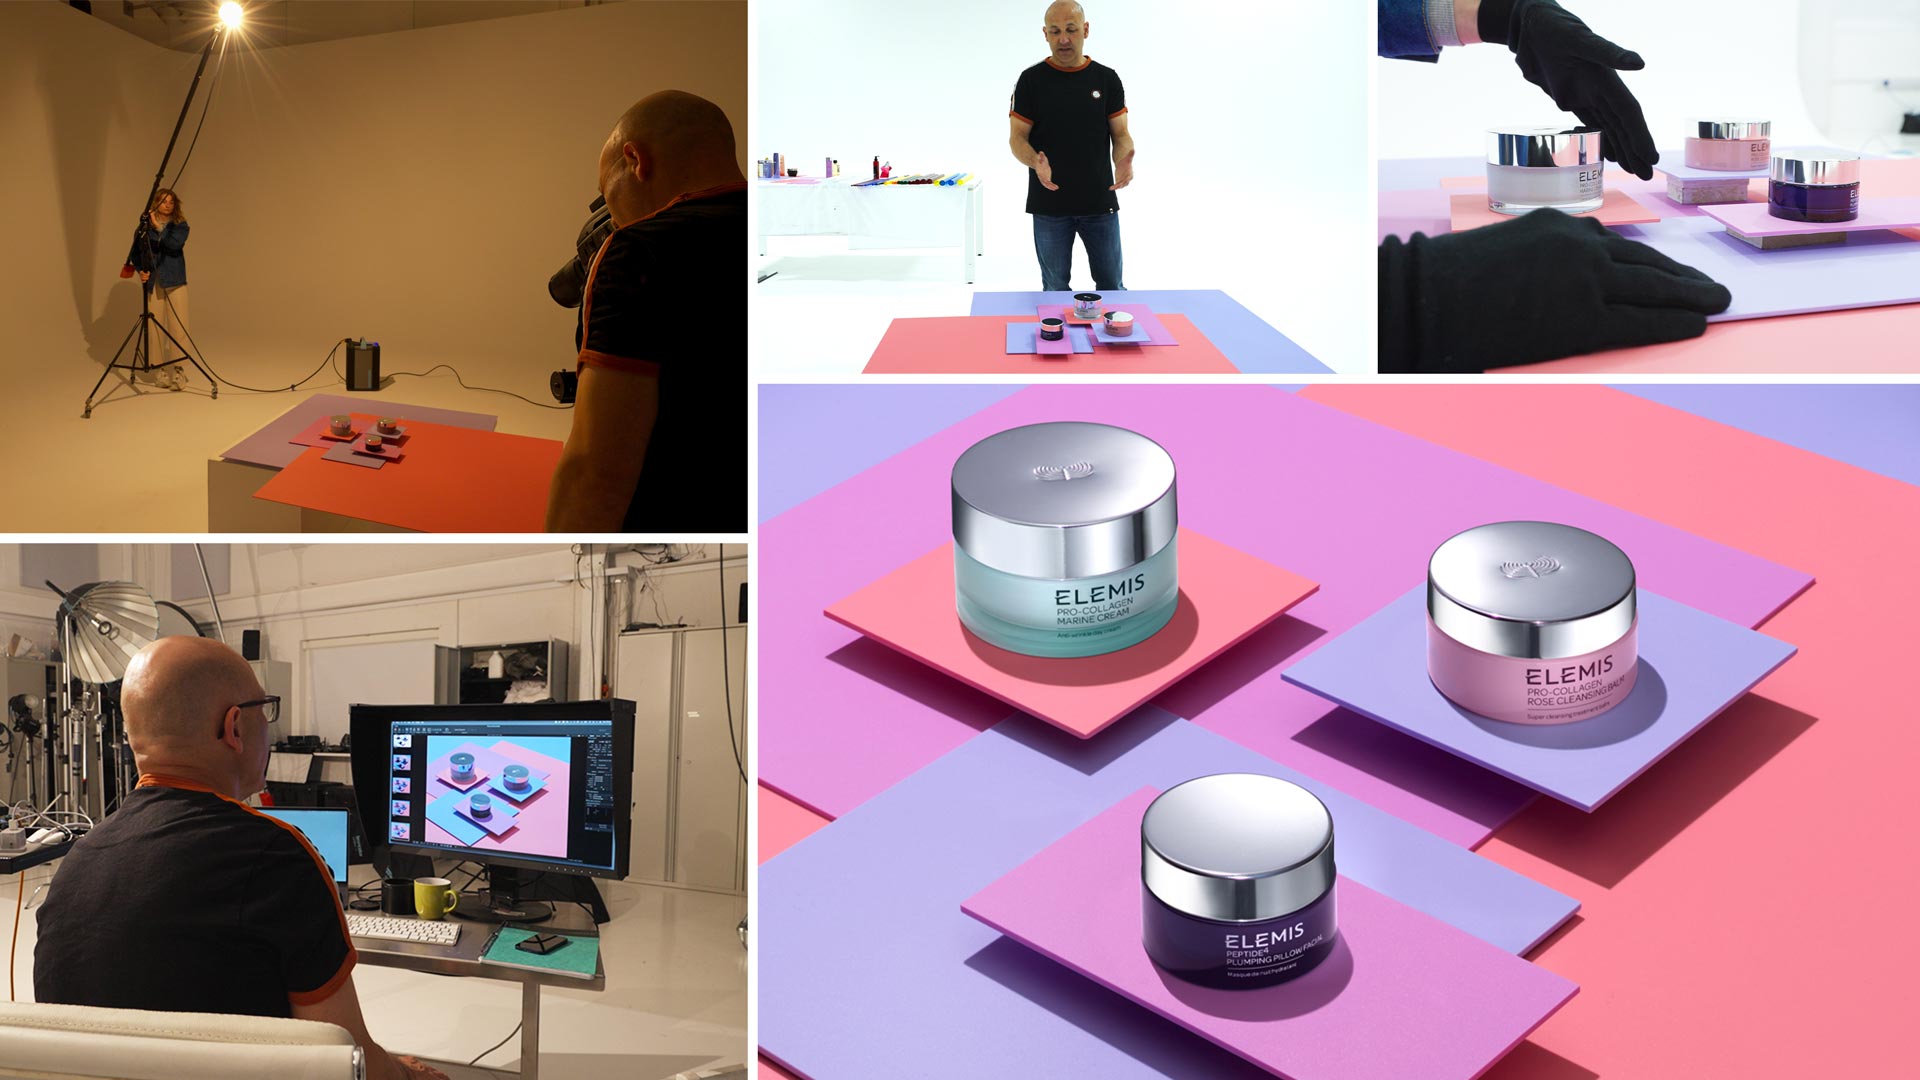
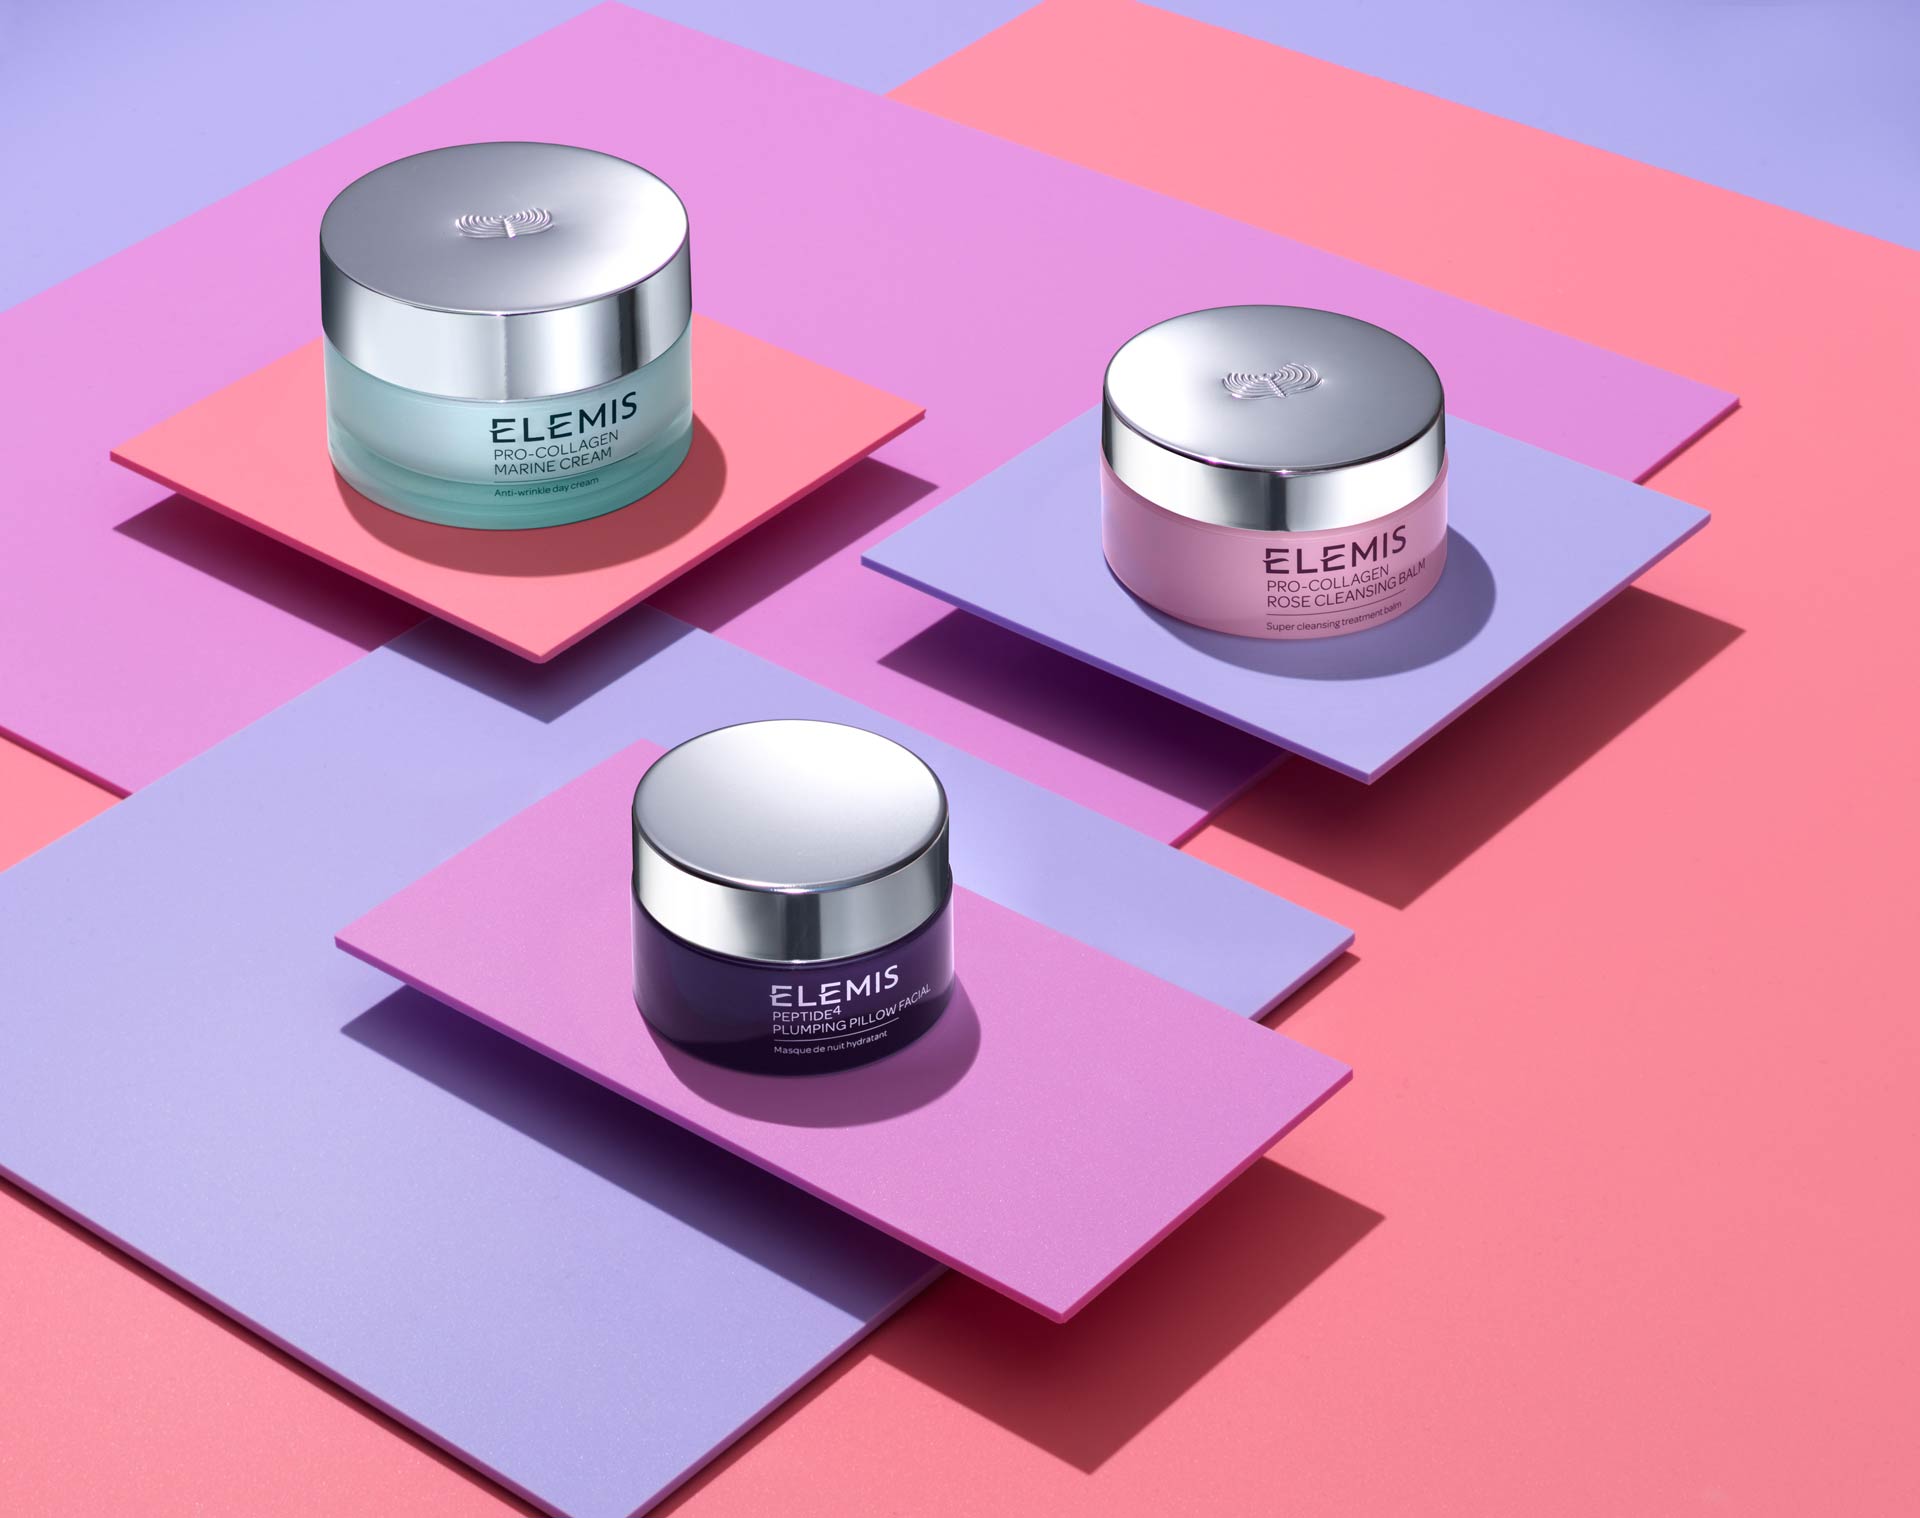
Cosmetic products come in all shapes, sizes, and textures, so every shoot requires originality and creativity. In this class, Karl experiments with a variety of lighting setups to produce an eye-catching, colourful, graphic arrangement of three Elemis face-care products.
Commercial clients often underestimate the difficulties of shooting variously textured products. In this case, with the glass Elemis pots catching the light very differently than the highly reflective chrome lids, Karl goes through an extensive trial-and-error process in pursuit of the best dual lighting approach.
First, he tries a number of different key lights to generate the bright sunlight effect. He then reduces shadow density using global fill lighting.
Next, he experiments with different light sources and modifiers – plus some DIY accessories – to apply gradient lighting to the chrome lids.
To solve all of the problems the shoot serves up and help produce the stunning final image, the whole team gets involved. A light gets smashed along the way, but it’s all part of the process!
In this class, you’ll cover how to light mixed surfaces, balance multiple lights, and create interesting compositions using techniques such as depth, colour, light and shadow.
To find out how Karl brought all of this work together in post-production, check out the Photoshop class.
In this class:
- Styling cosmetic products for photography
- Lighting setups for cosmetics photography
- How to use multiple studio lights
- How to apply dual lighting effects
- How to create gradient lighting
- Using fill light to balance shadows
- How to use a scrim
- How to use a tilt-shift lens adapter
Questions? Please feel free to post them in the comments section below.
Comments
Hello, I recently subscribed. It’s the first course I’ve looked at. It’s great to be able to observe your entire work process, thanks Karl
Hi, thank you for joining us and we’re glad you enjoyed this class! Lots more for you to enjoy and lots more coming. 🙂
It’s amazing. I learned a lot from Karl a few years ago but gave up the subscription because of the cost. Now I have some product photography to do and just resubscribed. Without a doubt Karl’s videos are the best ones there are. Thank you, still learning a ton.
Hi Karl,
Thank you for learning everything .
Thank you.
Hi Karl
What are the colored backgrounds made of?
Hi, in the UK it is called Acrylic, this was matt acrylic.
Hi, Karl…
I have one more question…
My studio (apartment) has 9 ft ceilings, and they are white, but not fully white. More like eggshell or cream. I mostly shoot on a table that is 3 ft high. Can I use my ceiling as a bounce? I’ve not actually tried it yet, and I will, but thought I would ask you, too, since I’m not sure about the fact that it’s not true white.
Thank you.
Hi Allison, You could definitely use your ceiling as a bounce it would also make a very good bounce for creating gradient lighting in the same way we use a scrim – but bouncing it off a white panel instead of shooting through as scrim – using it in that way would be similar to how we light cars in the ‘automotive’ section, however I would recommend you paint it pure white first for best effect otherwise you will have a noticeable colour balance shift.
Hi, Karl,
Thank you for the message. You tried the flooter at around 22 minutes in. I watched again, and you didn’t actually add another modifier to it. For some reason, I thought you added something over the top of it.
But, what is ‘flood mode’ and is it unique to this particular light/modifier?
Thank you!
Hi Allison, the flooter is a fresnel lens modifier to create a spot light that can be more concentrated to a spot or more spread out which is called flood mode. It simulates sunlight very well and I use it regularly for a variety of shoots from fashion or as a background light. You can learn more about some of the specialised modifiers in this show – https://visualeducation.com/class/precision-lighting-live/
This is exactly what I was wondering about. Thank you!
Hi, Karl,
Thank you for this video. Can you share what bare bulb and fluter lights you used, and also what the modifier is that you attached to the fluter here?
Apologies if I missed that info some place.
Thank you!
Hi Allison, the bare bulb light was just a standard studio lamp head but without any modifiers on it, so any studio flash lamp head would provide the same effect. If you need to know the brand these were Broncolor Unilite 3200 heads connected to Broncolor Scoro packs. I’m not sure when I used the ‘Flooter’ can you point me to the time in this video that happened please.
Hi Karl,
I have found a place that is doing the acrylic pieces in some similar shades has well has some other nice pastel colours. They are selling in different sized sheets and don’t normally cut to order but will do so for me. I have no experience with acrylic and was hoping to get some guidance on sizing. Are you able to share the sizing of the pieces that you have used in this shoot. Thanks
Hi, the sizing will depend on the product you intend to place on them and how big it is or how many layers you wish to create. It’s always a good idea to do a rough mock up with cardboard first for your sizes and then go from there.
how to get engsub for this video?
Hi there should be a langauge subtitles button on the class, let me check…. No it doesn’t appear that the subtitles and languages have been created yet for this class but they will be added as soon as we can.
Hi, Subtitles are now available in this class, please click the ‘CC’ button on the video player and you will be able to select them.
Thanks, Sara – Team KTE
Karl
I have looked at this again and finding it impossible to replicate
Please explain the colour theory.
Marine, Rose and Plum are the colours of the cosmetics
So I can see the triadic colours
Elemis Peptide and Sour Grape SA 7563
Elemis Pro Calogen Marine and Orange Fizz SA 3143
Elemis Pro Calogen Rose and Bubblegum Blue SA7490. But didnt you use Spearmint Green SA6382? This would be the natural triadic colour?
I dont get it.
Did I need to use the natural triadic combination?
This was amazing to see as I have been trying out shots of makeup and perfume with exactly these challenges. Also I have been been approaching using constant lights instead of my usual speedlights as I can work a little faster seeing the light in real time as I adjust positionings and flags, but avoiding high iso by longer shutter times.
The mix of matt and reflective surfaces and materials needs consideration and time and clients dont get it – they think its just setting up one light and taking the shot and done in 10 minutes
Hi John, yes that’s often the problem with clients!! 🙂
Hi Karl,
I just joined this class yesterday, but why when I want to access some of the classes it always said “player.vimeo.com took too long to respond”, and I can’t see any of the videos. how to solve this problem?
thank you
Hi Karl,
I’m trying to get the perfect gradient on a very long and narrow mirrored product (a lip pencil) it has four flat sides, around half a centimetre wide.
I’m struggling to get a pleasing effect of the gradient without just getting flat evenly lit surface
You mentioned here about doing it in post, would that be the best option?
Thanks so much
Hi Maja, I would do it in camera. It sounds like the difficulty is that you have a small area to light but this should still be achievable. I think this class will answer all your questions as the principles are exactly the same, if you still have any questions after watching it then come back to me – https://visualeducation.com/class/live-photography-workshop-grand-marnier-cognac-product-shoot/
An amazing class with a lot of learnings for me, sharing your thinking process is very valuable!
I am very sorry for the lamp head.
Many thanks Karl
Thanks Nicolas.
Question! Do you usually test several different light sources for a shoot like this; trying to make sure the shadows are sharp or feathered, measuring the gradient on the top of the lids, etc? It seems like a lot of time is wasted testing out different lighting techniques, but I wonder if the testing is just for the sake of the tutorial, and in the real world during a commercial shoot like this, you already know what works best so that you can streamline the photoshoot?
Hi, I already know what each on of my lights can do so much of what we do is for the benefit of the audience. But if I’m ever in need of reminding I (or you) can using our lighting comparison App which is on your ‘home page’.