
Shooting Panoramics
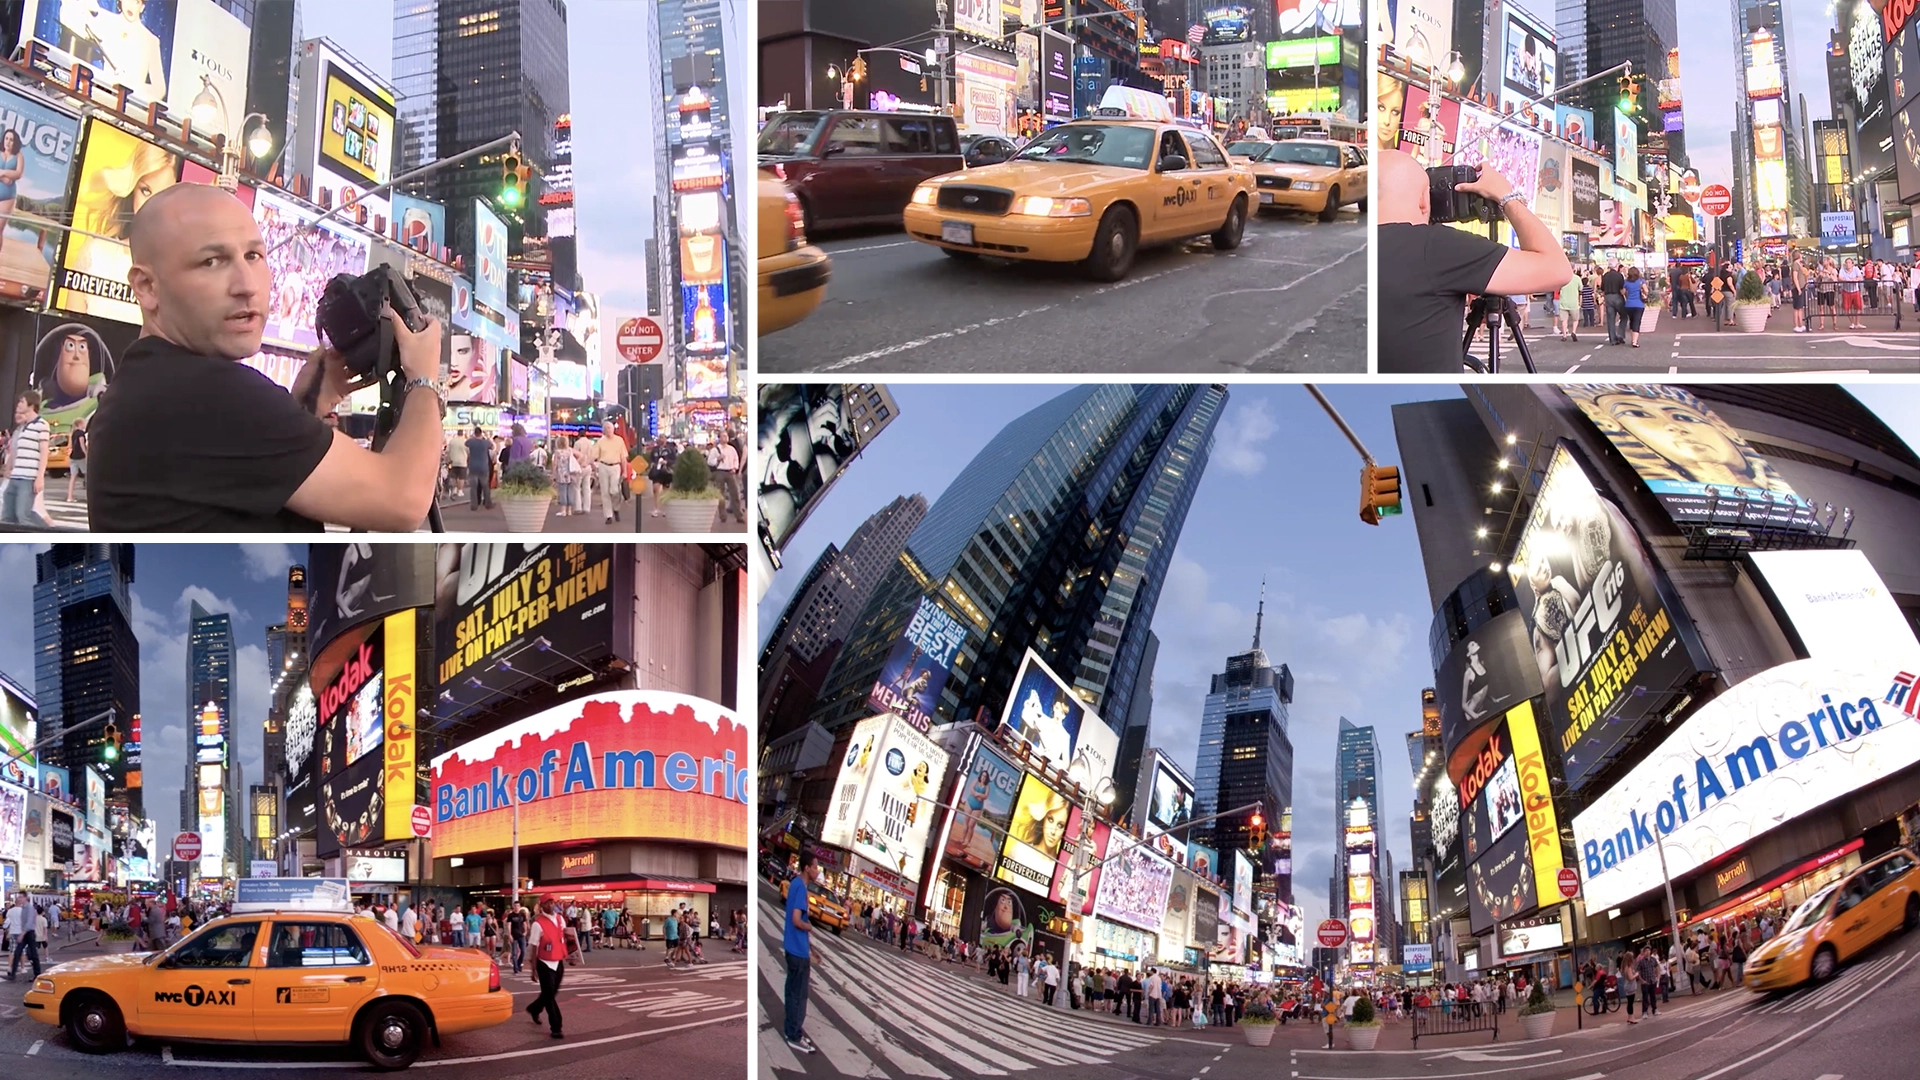
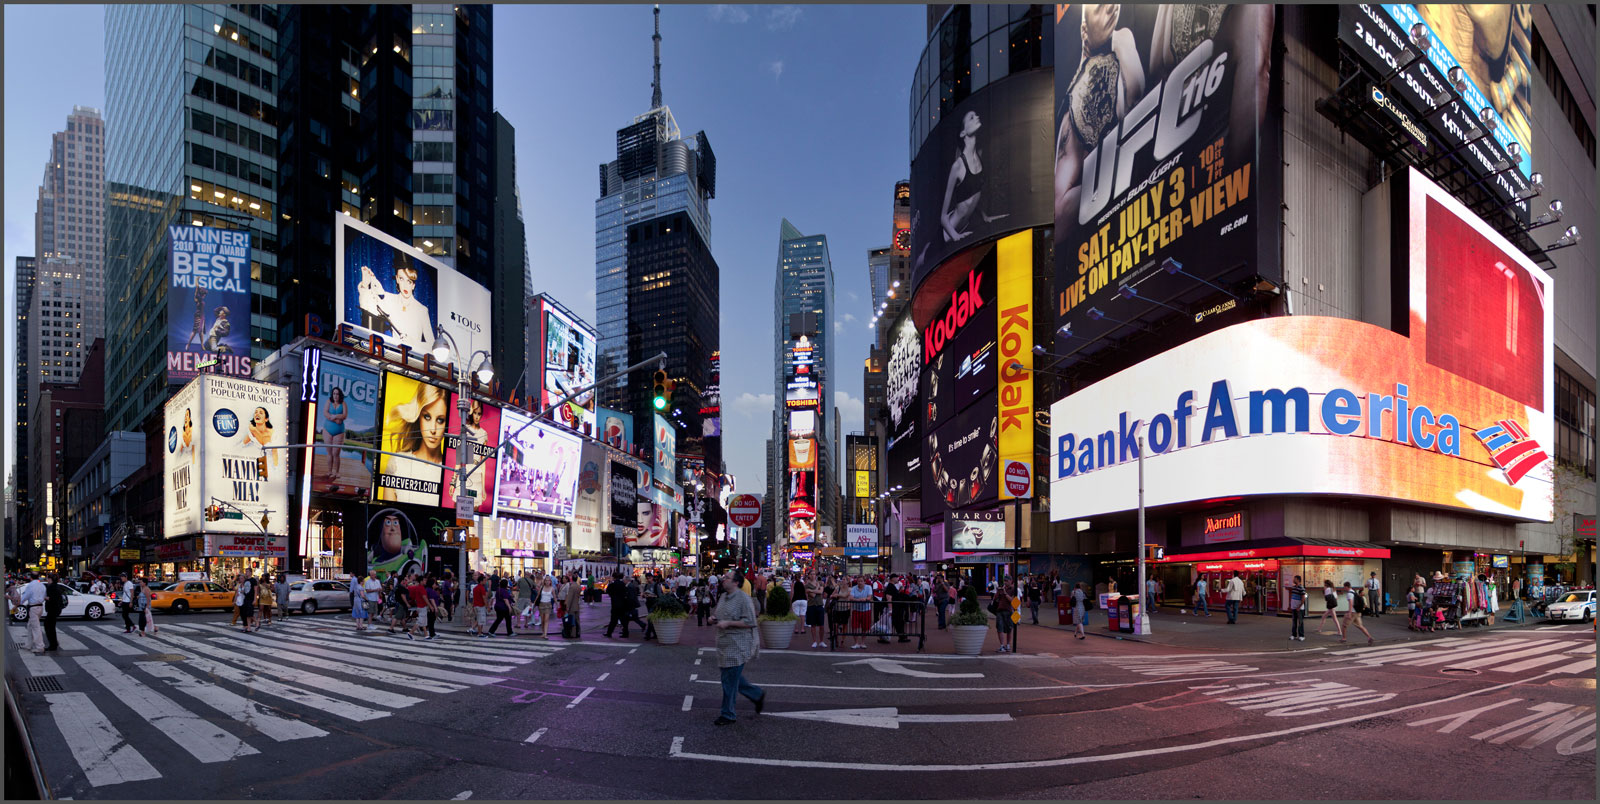
In this photography class, Karl shows you how to create a 180-degree panoramic photo from a series of stitched images.
Many cameras have built in panorama features, but if you want to capture high detail, doing it manually gives the best results. In this class, you’ll learn how to frame your image, avoid unwanted distortion and minimise blur as Karl shares his top tips for taking panoramic images.
In this class:
- How to shoot panoramic photos
- How to avoid distortion
- Image overlap for panorama photos
Questions? Please post them in the comments section below.
Comments
What about the nodal point? I thought that was critical for an accurate stitch.
Hi, I’ve never used one.
Very good karl
Thank you.
Two questions on using a tripod, while shooting panoramas.
1 Are you for or against using a L bracket, and why do you answer that way?
2. Is there any set up required of the tripod / ball head to make sure your image stays symmetrical, for an easier stitch?
(you make it look so easy)
Hi,
1. I’ve never needed an L bracket for the way I shoot using a geared or ball head
2. The most important thing is that you tripod has been set perfectly level and that the head is level, you can use the spirit level or bubble to ascertain this or you can place a spirit level on your camera. Some cameras also have built in spirit levels electronically.
Worth noting [perhaps obviously] that the camera has to be set in M with set ISO, Aperture and Speed?
Hi Ned, It seems you’ve jumped into this class in the middle of the course. Possibly since we transported all of our classes from DVD to online the order isn’t clear but this is part of class 3 and in classes 1 – https://visualeducation.com/photography-essentials/ that’s exactly what we teach and then it is further expanded upon in class 2 – https://visualeducation.com/section/travel-and-landscape-photography/ this particular lesson is part of class 3 – https://visualeducation.com/section/advanced-dslr-photography-1/ – We try to set our menu system from left to right in order of learning but unfortunately now that we offer everything for the monthly price people can choose their own order to watch things. We do however with the emails new members receive and in their home page try to guide them in the right direction based on their experience.
Hello Karl,
I’ve been making extremely large panoramics (up to 55,000 pixels wide) for a few years. When I started, I was shooting Dutch landscapes. Because of the unique flatness of those landscapes, I only rarely had to deal with converging vertical lines. Now though, I am shooting American diners. Those do have converging line problems, in three directions sometimes. So far, I have been fixing those by using the distort tool in PS. Sometimes, I also use the warp tool to reverse spherical distortion and straighten out edges. That said, while I like many of the images, some aspects of making them this way bothers me and I wonder if you might have any insights on the subject.
First, I should say that I am shooting with a Phase One XF with an IQ3-100 digital back. Or more simply, a full frame medium format 100 MP camera. For lenses, I have used almost the full Phase One range: 28 mm, 35 mm, 55 mm, 80 mm, 120 mm, and 150 mm. I don’t have the 240 mm or either of the zoom lenses Schneider offers for the P1 system.
The issues:
1) The distort and warp tools introduce blur to achieve their effect. This is because stretching part of an image to cover a larger area requires filling in the space with new pixels that add no new information. Conversely, compressing an area requires that pixels are removed, and anti-aliasing to bridge the “scar” where the pixels had been. Normally, I cannot see this, possibly because the resolution is so high but I know it is happening and it bothers me. If the images are made into prints or reproduced, are the artifacts of distort or warp tool usage noticeable or problematic?
2) The shape of a panoramic field (180 degrees) from the camera’s point of view comes out as a fan shape, with a narrow arc at the bottom and a large arc at the top. To see this, you must shoot a horizontal series (rows) and several vertical series (columns). This causes a great deal of distortion at the bottom and top of the range, leaving only the middle relatively undistorted. Undistorting this in Photoshop creates a lot of distortion also. I’m wondering if you are aware of any methods to minimize the distortion in panoramas that try to grab vertical as well as horizontal panorama information?
3) Lens choice. The advantage to using long lenses (120 mm or 150 mm) is that verticals tend to be vertical, even after stitching. Overall distortion is minimal compared to wider angle lenses. However, long lenses aren’t always practical for some subjects, particularly architectural subjects in locations that do not allow sufficient distance without occluding the view. Wide angle lenses capture more of the scene, require less stitching, and seem to stitch more easily than shots made with long lenses. That is, I see fewer failed attempts to automate the stitching in PS with wide angle shots. However, there is more distortion. I find that some images need to be stretched on one side by as much as 3x the previous width to reverse lens distortion. Do you have any comments on lens choice?
4) What is the difference between using one image shot with a 28 mm lens, and ten stitched images from a 120 mm lens to achieve the same field of view? I am concerned that the images don’t look the same and the single shot will be better because it will have uniform interpretation of the environment through the lens. The stitched image will have spots throughout the image that are not uniform because of the stitching process. I can’t see this visually but am concerned it is one of those things that reduces image quality in a non-obvious way, like inconsistent hues in a beauty shot, which can only barely be seen without using a filter to see them better.
5) The more I shoot architectural subjects, the more I wish I had a tilt-shift lens. Not sure how this would affect stitches but think the original images used in the stitch would be better. Does that make sense to you?
6) since I am shooting with a 100 MP camera, I sometimes wonder if I should be happy with that resolution and just use a wide lens instead of making a stitched panorama. I don’t usually do it that way because I like seeing all the details in the much larger images. Do you have an opinion on the difference between the default resolution of about 11,000 x 8,000 pixels versus the stitched resolution of around 55,000 x 25,000 pixels. Is that a difference that you think would matter in any specific context? I see it as useful in two ways: The first is for high resolution large scale prints. The other is to use it as a panning background in a video or as a background plate in a feature film.
Best regards,
AP
In answer to number 3 my prefered focal length for stitching image would be 80mm on MF or 50mm on 35mmFF and shot vertically. The best panoramic I ever shot though was in India of Jaipur from up on the Fort with a 70-200 at 70mm. I don’t often shoot panoramics though as most of my work is in the studio but for the odd landscape image they are useful and optically I think the standard primes are better than a wide angle but if you have things moving in your shot then stitching panoramics can be too much trouble.
Hi Karl. I’ve noticed that there were some video displays on the shot. Since these have moving images on them, how did you dealt with the stitching on top of those images? Thanks.
Hi Dagrial, I didn’t worry about it, Photoshop stitched the image and that’s what came out. In fact you can see on the Bank of America sign that it has changed colour half way through the exposure.
Thank you very much for your answer Karl. Yes, after seeing the next video I saw how Photoshop managed to stitch the photographs, very clever, I though it did it in a parallel way but it doesn’t. Also, I’ve noticed that when you have such a busy scene like this one with people moving all over the place it is very easy to have duplicated people on the shot, not only the one you erased. You must have had to do quite a few photoshop retouches to the final image. Cheers!
Hi, yes people moving can definitely be more of a problem in a shot like this. It’s a great and simple technique for landscape and cityscapes though.
Karl do you tend to use the polariser as a 2 stop filter or just to give a contrast boost in such a colourful scene? Seems a twilight photo shoot so how does this affect the polarising effect with little sunlight?
Hi Chris, mostly for a contrast boost on a shot like this and it can also be interesting how it interacts with artificial light from the display signs.
Wish I would have watched this last night. Got up @4:30 AM to drive to my hometown and take a Pan. Shot of an old mill damn. Only overlapped my bracketed images by 10%. Had to stitch images manually in PS cs2.
How critical is tripod head level in shooting Pan’s? I humped a huge old video tripod to utilize ball mount to make sure head was perfectly level.
Hi Donovan, the 30% overlap is more important but setting up the camera level does help but I’ve done good Panos hand held!
Interesting as I go through these videos how much you use the polariser. Almost seems like a standard piece of kit, used more often than not.
Hi David, outdoors yes, in the studio less so.
No worries Karl. Watched the next video and you’ve answered it already. Cheers.
Hi Karl,
When you take your series of pictures, would you lock the exposure from the first one taken?
Graham