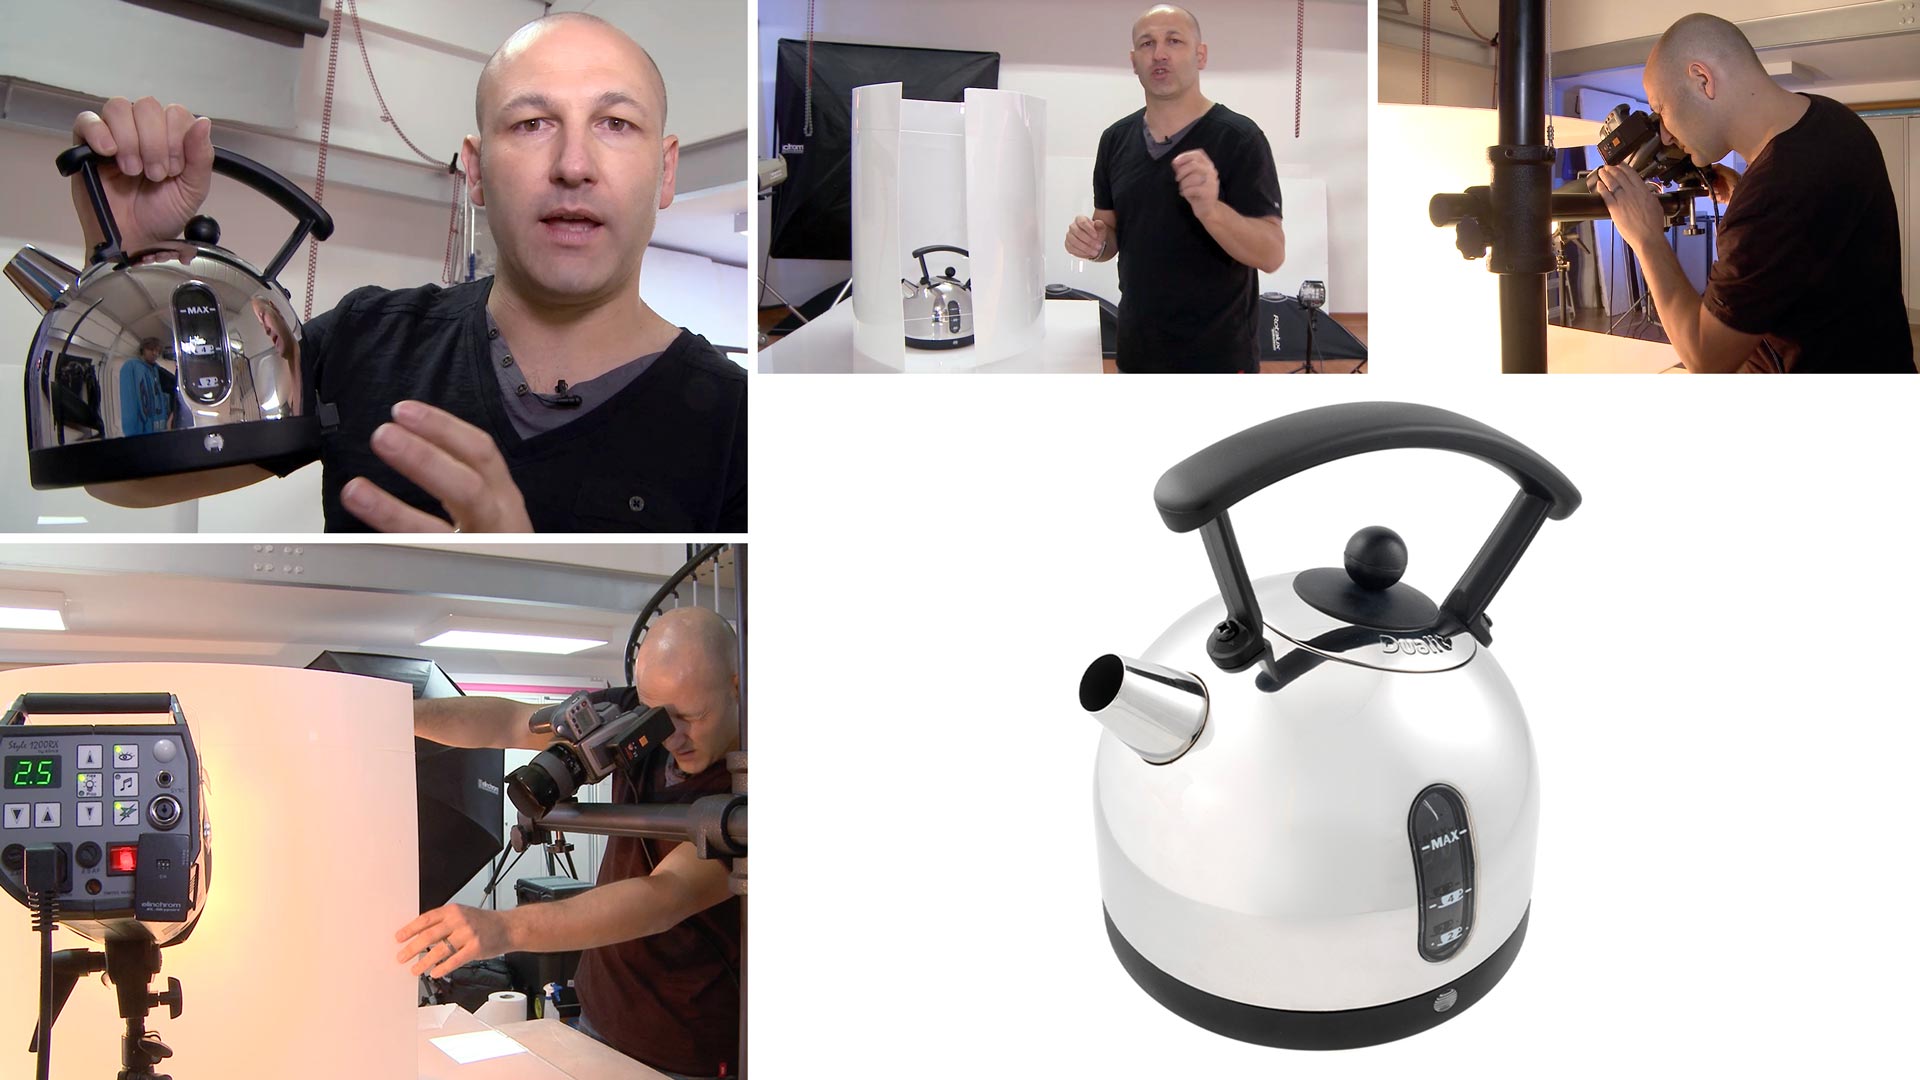

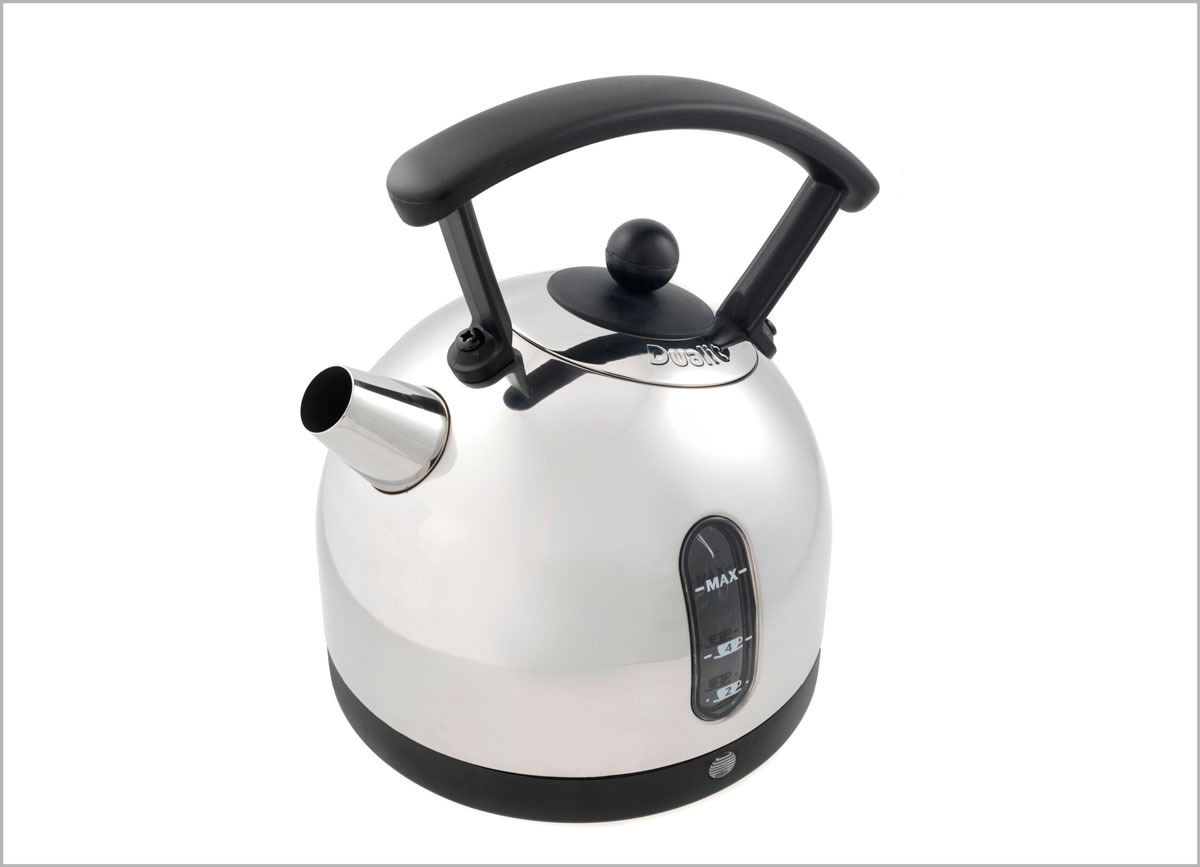
Shiny Chrome Kettle Photoshoot
Shooting curved, reflective objects is a complicated task! Retaining that metallic feeling while avoiding unsightly reflections can be a real challenge.
In this class, Karl demonstrates a simple DIY lighting-equipment solution that you can easily make yourself. Follow his step-by-step workflow and discover how he builds up his lighting to maintain that lovely metallic look on the subject while controlling and removing unwanted reflections in the metalwork.
In this class:
- How to photograph reflective objects
- Techniques for controlling reflections on shiny objects
- Lighting setups for product photography on a white background
- How to balance multiple lights
- How to control light by adjusting the distance from the subjects
To see Karl’s retouching process for this shot, check out Shiny Chrome Kettle | Post-Production.
If you enjoy this class, you may also like to watch Jewellery Photography – Rings and Zenith Watch Product Shoot.
Questions? Please post them in the comments section below.
© Karl Taylor
Comments
Hi Karl, I’ve come back to this lesson as it’s just a really great video for this type of product. I was wondering if you would use the same technique if the product was a Christmas bauble?
Cheers,
Hi, a mirrored ball ball would be just about the most difficult item to photograph to deal with reflections as it’s completely spherical and reflects everything. In this example the kettle is almost completely spherical so using this technique should be OK but you’d probably have to reduce the scale of everything. Also this might be an option for using the LightCone.
Hi. Dear Mr. Taylor, thank you for everything you do for us, for the way you do. It inspires. I am a graphic designer that tries to do some product photography too. I just love to see the creative process, the way sometimes you don’t know what to do, the way you search how to solve the problem, the way you make “mistakes” like anyone else, that shows us you are a simple man, one like us, and many of us can aspire to become like you. Thank you, that blurs the border between us and you, showing that everything is possible.
Mr. Taylor, I am a graphic designer that creates graphics for Amazon sellers. The clients send me texts, photographs and my task is to create nice designs that will sell the product. Rarely I get decent images to work with. One day I understood that I need to photograph the product myself if I want to have good images to work with. So I started my own studio. The problem is that we need to shoot the product from a lot of angles, we also need details to show the product open, closed, texture, size, variations, features etc… not saying about still life and lifestyle images. The question is how do you deal with that? I am asking because most of you work seems like a “one photograph” work… for a magazine advertising. Could you please have some advices for those like me that need to shoot many pictures of the same product? How would you deal with that? Maybe a course on this topic? Thank you in advance
Hi, thank you for your kind words. Based on what you have described it sounds to me that you need something like a large light tent that you can put the products inside and have an opening door at the front that you can close and has a gap for the camera to be moved at different heights. There are two ways you can do this, 1. You actually use a small room with all of it painted white and then you position your light facing into each white wall and ceiling (bare bulb) and then you adjust them to suit. 2. You make or buy a large light tent that is 2m cubed and then you light from outside the ‘tent’. The tent could be made of fabric or from rigid transparent white acrylic.
super tuto.
can you please do a similar tuto with cones and led lights as shown in cones advertisements ?
I have seen two short tutos with perfum inside horizontal cones and outside horizontal cone but kettle is so big !
If possible, it would be interesting to have a tuto with cones and 18″ ring flash (neewer, westcott, godox ???) as advised by v-flat team. looking how you fine tune the orientation for glow effect,… not sure ring light led is easy to setup.
Hi Karl,
Could I ask how you would photograph a black shiny 10″ metal bucket/pail with a thin handle and a shiny watering can please? I lost the definition at the sides of the black patent bucket and it was flat at the front. I need to show that these products are shiny, but in a deliberate way.
The strobe is pointing to the low ceiling (as I don’t have a scrim) and I have 2 LED lights creating the white wall. I also had a problem with the shiny top handle of the watering can.
I look forward to receiving your advice.
Hi Joan, It sounds to me that you don’t have enough lights to do the job? You also said that you are shining your lights only at a low ceiling and based on the angles of reflectance you will never get the light to hit the bucket in the way you want with that angle of incidence. I advise that you watch this class carefully to learn more and it demonstrate where and why lights need to be placed in relation to shaping, reflections etc https://visualeducation.com/class/angles-of-incidence-and-reflection/ from there I would advise that you look at these classes as they may be closer to object shape that you are photographing https://visualeducation.com/class/white-wine-photography/ Best of luck.
Hi Karl, I am quite new in product photography and in your course, could you please explain why cannot we use a light tent (instead of Perspex around the product) and illuminate with lights the same way ? Many thank in advance 🙂
Hi, you can use a light tent but the quality of light would not be the same and the gradient reflections wouldn’t be as good. This all comes down to the physics of light and you need to fully understand that before you can master light. These sections will help you immensley:
https://visualeducation.com/section/getting-started-in-product-photography/
https://visualeducation.com/section/lighting-theory-and-equipment/
Thank you so much !!!
Really love seeing this again since the light cone came out! Amazing how much diy work had to be dine before
Great , Thank you 🙏
This technique with cylinder shape around shiny product in my head for months but never try it out.
Thanks for giving a kick forward, and again if some idea in your head just try it out to see it work or not.
👍👍👍
Class video Karl .
Thank you Ventis.
Would this method work with clear liquid bottle who has a lot of shiny letters and drawings on the label? Thanks 🙂
Hi, yes for the label but you should also see the ‘clinique product shoot’ for an easier answer.
AWESOME!❤ THANK YOU VERY MUCH 😁
Its an absolute nightmare shooting such extremely reflective product, I normally use a cube to shoot and do a lot of work in post, will tryout your method. thanks for the class.
I’m curious if you use that tube horizontally to shoot other things chrome or shiny? How else have you used the tube? I saw the video where you used a cone to photograph jewelry, another interesting light tent technique. I just finished a chanel lipstick with a chrome finish, both cylinder and square, which were a challenge.. hours of subtle tweaks to position and lights and scrims. You don’t realize how fussy it is until you are working with it. I felt that photo was a success because the photoshop work was an hour or less to finish. Now that I tried once, I feel like I need to dive in to learn and better understand dealing with shiny gloss or chrome finishes.
Hi Gary, I’ve not used the tube horizontally but I use the cone alot for small stuff. Other wise it’s boxing in with scrims.
Hi Karl
Any advice on large chrome subjects suck as chrome racking shelves?
Kind regards
Paul
Hi Paul, large scrims and/or white reflector panels.
Thanks Karl, I have both so will try each.
Many thanks
Paul