


High Key Soft
The techniques in this class are ‘key’ to your success!
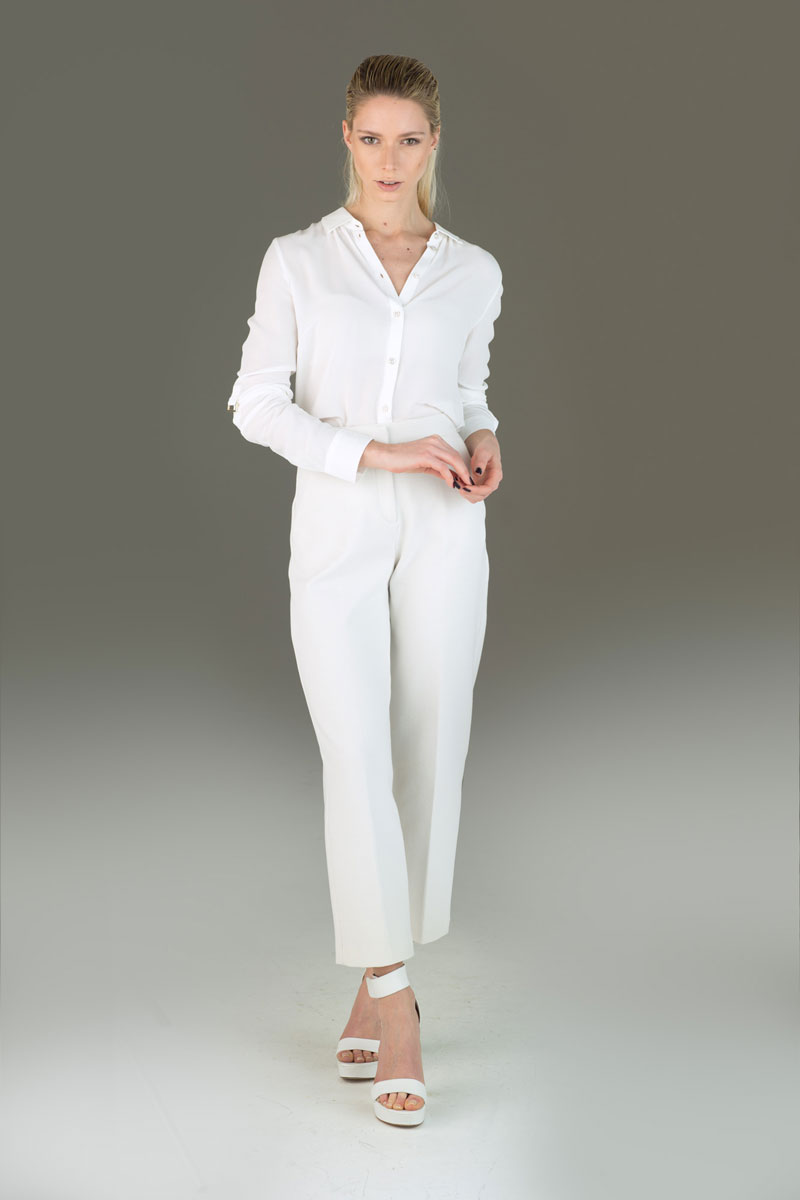
Photographing white clothing on a white background can be tricky. In this photography class, Karl shows you an effective lighting setup to successfully do just that.
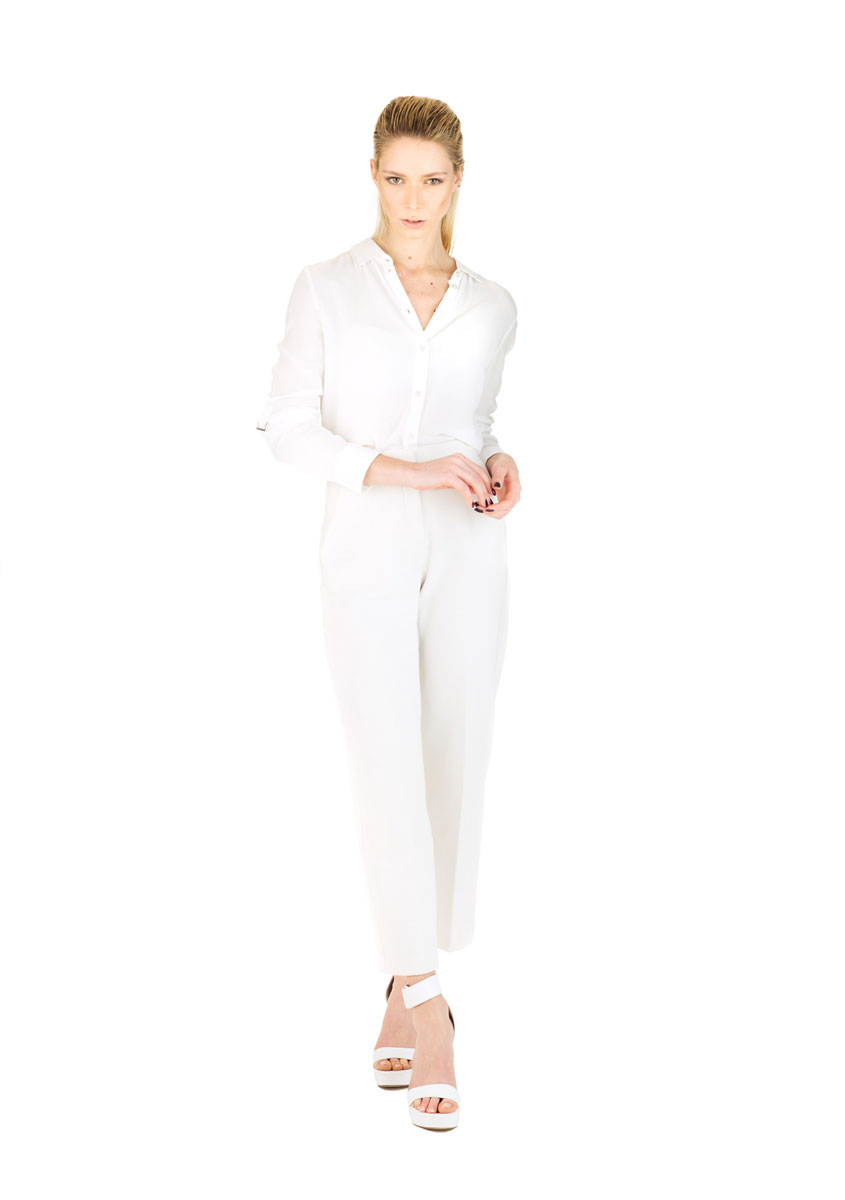
In this four-light photography tutorial, Karl uses the simplest of studio lighting modifiers to produce this beautiful full-length, high-key image. He also shares a number of useful tips and techniques for achieving a pure white background.
Karl then demonstrates another useful trick for creating a slight shadow while maintaining the high key light, accentuating the three-dimensionality. To end the class, he clarifies a common misconception about the colour white and shows you how to adjust this setup to achieve a grey background.
In this class:
- Studio photography: How to shoot portrait images
- How to shoot creative portraiture using four lights
- Affordable modifiers for studio lights
- How to create broad, soft light
- How to avoid lens flare
- How to create a pure white background
If you enjoy this class, be sure to check out Creating Clean White Backgrounds.
Questions? Please post them in the comments section below.
Comments
Well, that’s a great shot, but Karl I have a question regarding this tutorial, if the demand is to shoot a full-length shot on a coloured background i.e. yellow, cyan etc. what would be the approach for that? Especially near the feet area if the bg has to maintain the same tone overall.
Hi Rik, you should find all of the answers to your questions in these 2 classes:
https://visualeducation.com/class/live-photography-workshop-creative-portrait-lighting-2-0/
https://visualeducation.com/class/simple-e-commerce-fashion-shoot/
I love the effect of this shot. I am not sure if my space will allow me to do it justice. with that in mind, I have a couple of questions if that is okay.
I was trying to measure the total distance from camera to background and it seems to be ~18ft total. I have a space of 12 ft so I will try the shot but I am guessing that this may be difficult to capture the full length of the model. Are my measurements roughly accurate?
I was wondering if there is a photoshop module on how you manage to take the full length you captured of Deborah and add it to a pure white layer (or perhaps that is what you do as the shot is pure white?). The bottom part of the shot seems to be less pure white so I wondered about the process to process it.
Thanks and I love the effect of this shot. I’d love to reproduce is my space allows for it.
Hi Derrick, from memory I think your measurements are about right, also if you are working in a smaller space and you have a white wall and corner either side behind you then you can light into these to create a similar broad soft light on the model, it doesn’t need to be polyboards. Yes it is possible in photoshop but it’s easier to do if the model has been shot on as white as possible background and we do cover cutouts and creating whiter backgrounds in this one – https://visualeducation.com/class/clean-white-background-pack-shots-retouching/ and this one https://visualeducation.com/class/practical-demonstration-on-product-retouch/ and here is another shooting technique to get a white floor below a model – https://www.youtube.com/watch?v=YCErNYWS5CI
hi karl
I would like to know how to light a model in a soft high key to shoot a video. The model is walking towards the camera. Do you have any video where you explain it?
thanks
Hi, Let’s first deal with your requirements and then apply the physics. The reason I say this is if you understand light and you’ve watched this chapter then you should already be able to work this out yourself. https://visualeducation.com/class/introduction-and-understanding-light/ after that if we take point 1. you require soft light so this requires a very large light source such as a huge softbox, scrim or white wall with bounced light. You then say model walking towards camera so you most likely need the light full length of the model and over some distance, this then means your light area needs to be even larger so my first thought would be a large cove studio and using one of the white cove walls with several lights bouncing into it or a very large softbox moving alongside and in time with the model. Point 2. is High Key, high key simply means mostly bright and punchy so pure white backgrounds and light clothes. So simply apply the physics from what you know and learn in these courses and the answers become clear. This module might also give you some ideas https://visualeducation.com/class/studio-lighting-setups-portraits-four-light-52/
Good morning Karl, first of all thank you for these beautiful courses and I apologize if I speak little but English is not my language. About this, a further thank you for the clarity in expressing yourself, I thought I would not have been able to understand the courses. The videos are well made I wanted to focus on this video because it affects me and the white backdrop is always a challenge in commercial photography. I understand that making chapters with one, two, three and four lights is very useful.. A separate chapter dedicated to the white backdrop and the various ways of doing it, without thinking about the equipment used, would be very useful.. Thinking it as a real work on commission, full length and without post-production intervention. There are dozens of photos to take in one day and the photographer need to be able to optimize time. Thinking, in this chapter, of sets made with all the comforts, for example in a rental studio or as it happens to me, set up on site by the customer, often with little space and without assistant. I hope this does not seem like a criticism, but only a further enrichment to this already very complete course.
Hello, what did to do to achieve pure white on the floor at the models feet?
Hey Gerry, I don’t know how Karl achieved this result… But I usually can achieve this with a combination of the clone stamp tool, on a separate layer and then using the lasso tool to define the area around my models feet, and then applying a Gaussian Blur in photoshop.