
Simulating Sun and Shadow With a Studio Light
Bring your creativity out of the shadows with this simple tutorial.
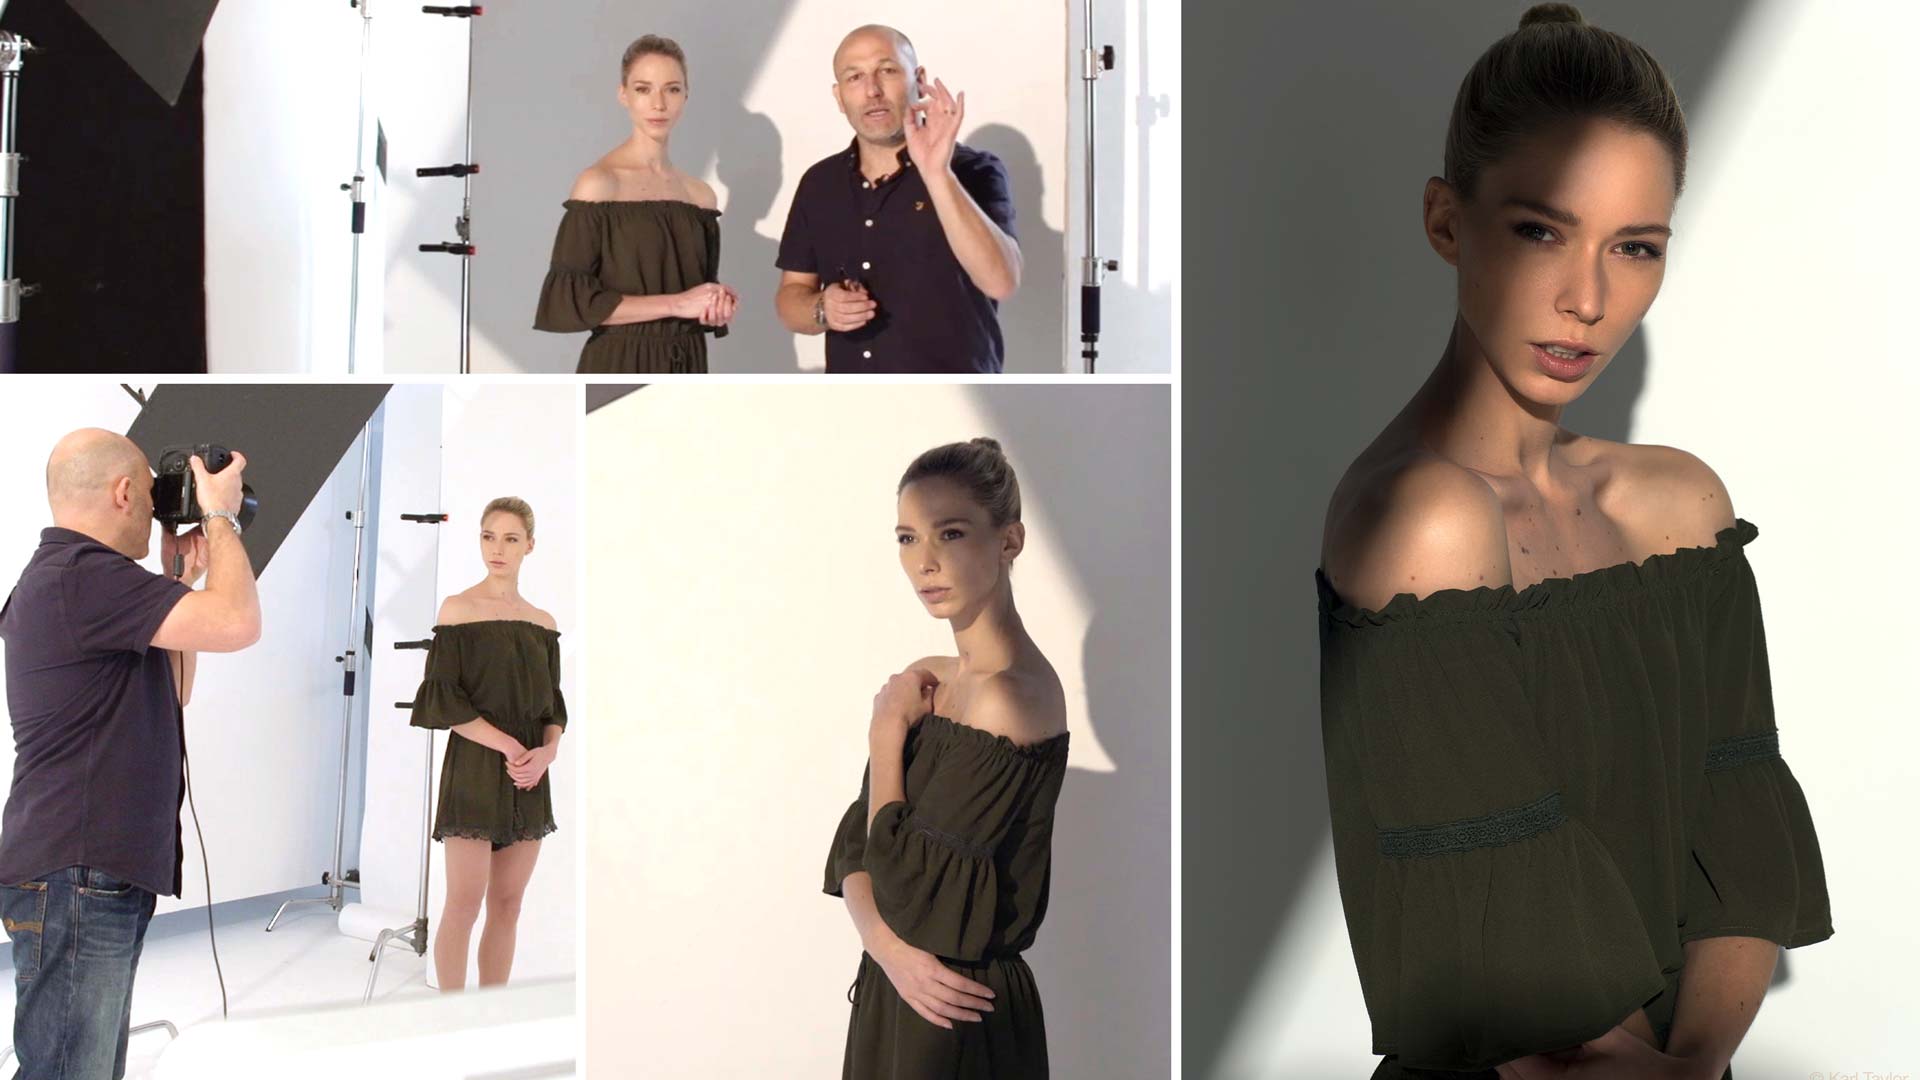
After demonstrating how to simulate sunlight using a single point light source, Karl builds on that and demonstrates how to creatively combine shadow and light to produce a stunning result. He shows you how to easily combine shadow and light in this single-light setup and shares some key tips for producing controlled shadows even in the smallest of studio spaces.

In this class:
- Creative portraiture using one studio light
- Working in a small studio
- Controlling light in a small studio
- The physics of light and how that influences shadow
- How to create a sharp shadow from a large light source
Questions? Please post them in the comments section below.
Comments
Hi Karl
Words cannot describe of how much impact you are making to us as new upcoming photographers.Your ways of explaining the physics is top I can relate even though I never done Physics at school.
Your logics to arrive to the final concept makes us to be with you all the time, it look so simple. You give us more tangible and more practical experiments in an economical way at the same time.
You have brought hope to us that it’s doable even with a small studio space.Very creative indeed.
Everytime I have a question while watching the video you lead me into the answer straight away. I don’t know how many times it happens but I ended up taking more notes which is good for my growth.
Through your classes I have learned so much things that I have never dreamed off. I have tried to get some mentors around but I did not get the support until I saw your clip on youtube and I said to myself let me take a chance on this one cause I was stucked on you tube with no direction at all. Everything there was making sense but I could get the guidelines I was looking for.
I must say you are one of the best if not the best in the world.
Thanks again
Thank you very much for your kind comments it is much appreciated. Please spread the word! Also if you don’t mind can you tell us which clip on Youtube led you to our platform? Many thanks.
Hi
Actually it was one of those advert that pops up when watching you tube. I would be lying if I can point exactly one but I just loved the ideas and creativity that was presented in that 5 second.
It did not take me much to decide to take the course.
Thanks
Thank you.
If anyone asked me, “Wow! Who taught you that?”, I can safely said, GrandMaster Karl Taylor! 😀
Ha ha thank you
This is a wonderful course Karl, but i wonder how you were able to minimize the shadow cast by the model on the background after you introduced the negative fill card?
Hi, You can see the shadow from the models head on the wall, the shadow from her body is lower down behind her body so you can’t see it. This wasn’t really a negative fill card this was more of a ‘gobo’ to create a shadow line.
Superb Karl!
Slightly off-topic but this custom made mini studio – which is an immense help for an average photographer – made me think; are you planning to create a video (or more) to demonstrate how to work with not high end technology? I can speak for others but I can assume some wanna-be professionals (like me) can’t afford a very expensive gear, especially not in the beginning. I don’t even have a full frame camera just a high end crop sensor Sony with a solid lens, my studio lights are older than my eldest kid (still work though and does the job) and my receivers / triggers are not exactly Broncolor either (Yongnuo) 🙂
I’m wondering if technology is a real limiting factor for a wanna-be-pro photographer or it’s actually minuscule compared to the advanced physic knowledge of the light or the positioning etc?
I wonder what could you do with a couple of years old crop sensor Canon and average flashgun.
Sorry for the off-topic 🙂
Take care,
Mark
Hi Mark, we do have some tutorials that use less expensive gear but as we have many professionals use this website they also like to know which are the best tools for a job and they are also not happy when we go in a simplified direction. In many cases you can simulate what we are doing with less expensive tools there are just some modifiers that might be hard to replicate. However that is why we created the natural light section and the Light Source course which demonstrates from 1 light to 4 and often the most simple of solutions. Also in our product section there are many tutorials with my older elinchrom lights and showing how with lots of ‘home made’ stuff you can get results. Hope this helps.
Hi Karl, you are using a bare bulb strobe to light the card and create the sharp(ish) shadow. And yes, a bare bulb will spread the light a lot, leading to the necessity to blacken the walls and ceiling. Any reason why you wouldn’t use a reflector (perhaps with a grid) instead of a bare bulb? Would the resulting light source be too large, for the purpose of defining the shadow? Would any fresnel or focusing modifier be helpful in this situation? I tried something similar very recently, with a Lupo 1000 fresnel LED light, but still needed the gobo to be quite close to the model/background for the shadow to bevwell defined. But I recall reading about some focusable modifiers where you can insert small gobos and project the image; wondering what the arey and how they could be used here. Cheers, Martin
Hi Martin, any focusable light with a projection attachment with gobos is a much easier solution but also more expensive, you will see me use them a lot in other tutorials here, but for this one I wanted to show how you could work with bare bulb. The physics of doing it this way always requires the smallest point light source so yes you are right as soon as you add even a standard reflector you are basically increasing the light source size by a factor of a hundred which then makes it less effective.
Hi Karl,
Just start with Your class, lessons are well done and well explained.
Giuseppe
Thank you Giuseppe. Also don’t discount starting this course at Chapter 1 as there is a lot to learn that you may think you might not need to. Most people who do this particular course say Chapter 1 opened their eyes to some new thinking.
Hi Karl i am today the first time on your education. I am from germany and try with my simple english to ask something. Why do you have no information about aperture and the flash, like f 8.0 or so? Thanks Reinhard
Hi Reinhard, thank you for joining us. In many of the modules we do where we feel it is necessary but in cases like this one I may mention it during the video but the primary focus is on the technique and understanding light. The power of the light information would be of no use to anyone unless they used exactly the same light, exactly the same modifier and exactly the same distance and exactly the same size space and color walls. The aperture required should be a creative decision based on depth of field. I encourage you to watch the first 15 chapters of this section to really change your understanding of how this all comes together.
Karl you really got my attention
thanks for the extra effort at making sure we understand what you are explaining
Thank you Aliyu.
I JUST signed up for the class. very well done
What if you don’t have a big studio, can I use 4 x 6 blackboard to block the reflection and will I get the same result?
Thank you
Stanley
Hi Stanley, yes and I suggest you watch the videos on this course starting at number 1 going forwards as it will cover this concern and any other you might have. I guarantee that come the end you will no more about studio lighting than you realised possible.
Totally awesome Karl!!!!
Some beautiful photography in this tutorial. Very inspiring ideas. Great advice using a black fabric curtain system in a studio. I’m going to definitely experiment with technique.
Hi Karl,
I noticed that you were directing the model to twist her shoulders forward. I’ve seen that a lot with fashion poses.
Could you explain why this is?
(Sorry, this question may not be appropriate for this lessson, I just noticed it during this lesson)
Hi Kryn, more often than not there is no specific reason other than I’m looking for shapes, lines or curves that look aesthetically pleasing. There is also the element of unusualness to a pose that if controlled correctly can look interesting and arouses curiosity in the viewer. The ultimate goal of any photograph is to retain the viewers interest because without that the picture is a failure. As such myself and many photographers will utilise various techniques from subject to colour to content or whatever we can to make the image more ‘interesting’.
A great lesson, indeed. I see the picture, however, with a slight rim of light running down the head, neck, right shoulder and back of the model, somehow separating the figure from the dark background. What do you think?
Great video! Would it be possible to achieve the same contrast in her face, only using black flags (or black foam boards) isolating the model from bounce lights, instead of darkening all walls in the studio with fabric?
It would work to an extent but I’d put black fabric on the foam boards as I find even black ones bounce light back in. You will still get light coming in from front though because this area won’t be shielded so a black studio would be more effective.
hello,
how called this cards and where i can buy this?
Hi Doris and thick black card would work. I was using a type of card called black ‘foam board’, if you are trying to source some it is commonly used by picture framers and sign makers.
Super setup, very well explained…
Thanks Kent
I’m very new to this and I love Your work. But what are your camera setting to do this.
Hi Stephen, I would have explained that during the shooting, however this is not really a question that is important and often one that actually adds confusion. To understand why make sure you are fully up to speed with the first 15 chapters of this particular course and if there are any questions thereafter then comeback to me. Cheers Karl.