
Rim Lighting Photography for Stunning Portraits
Discover a wonderful one-light technique for truly beautiful portraits.
Want to capture eye-catching portraits using just one light? Watch this class to learn how to achieve remarkable results with minimal equipment.
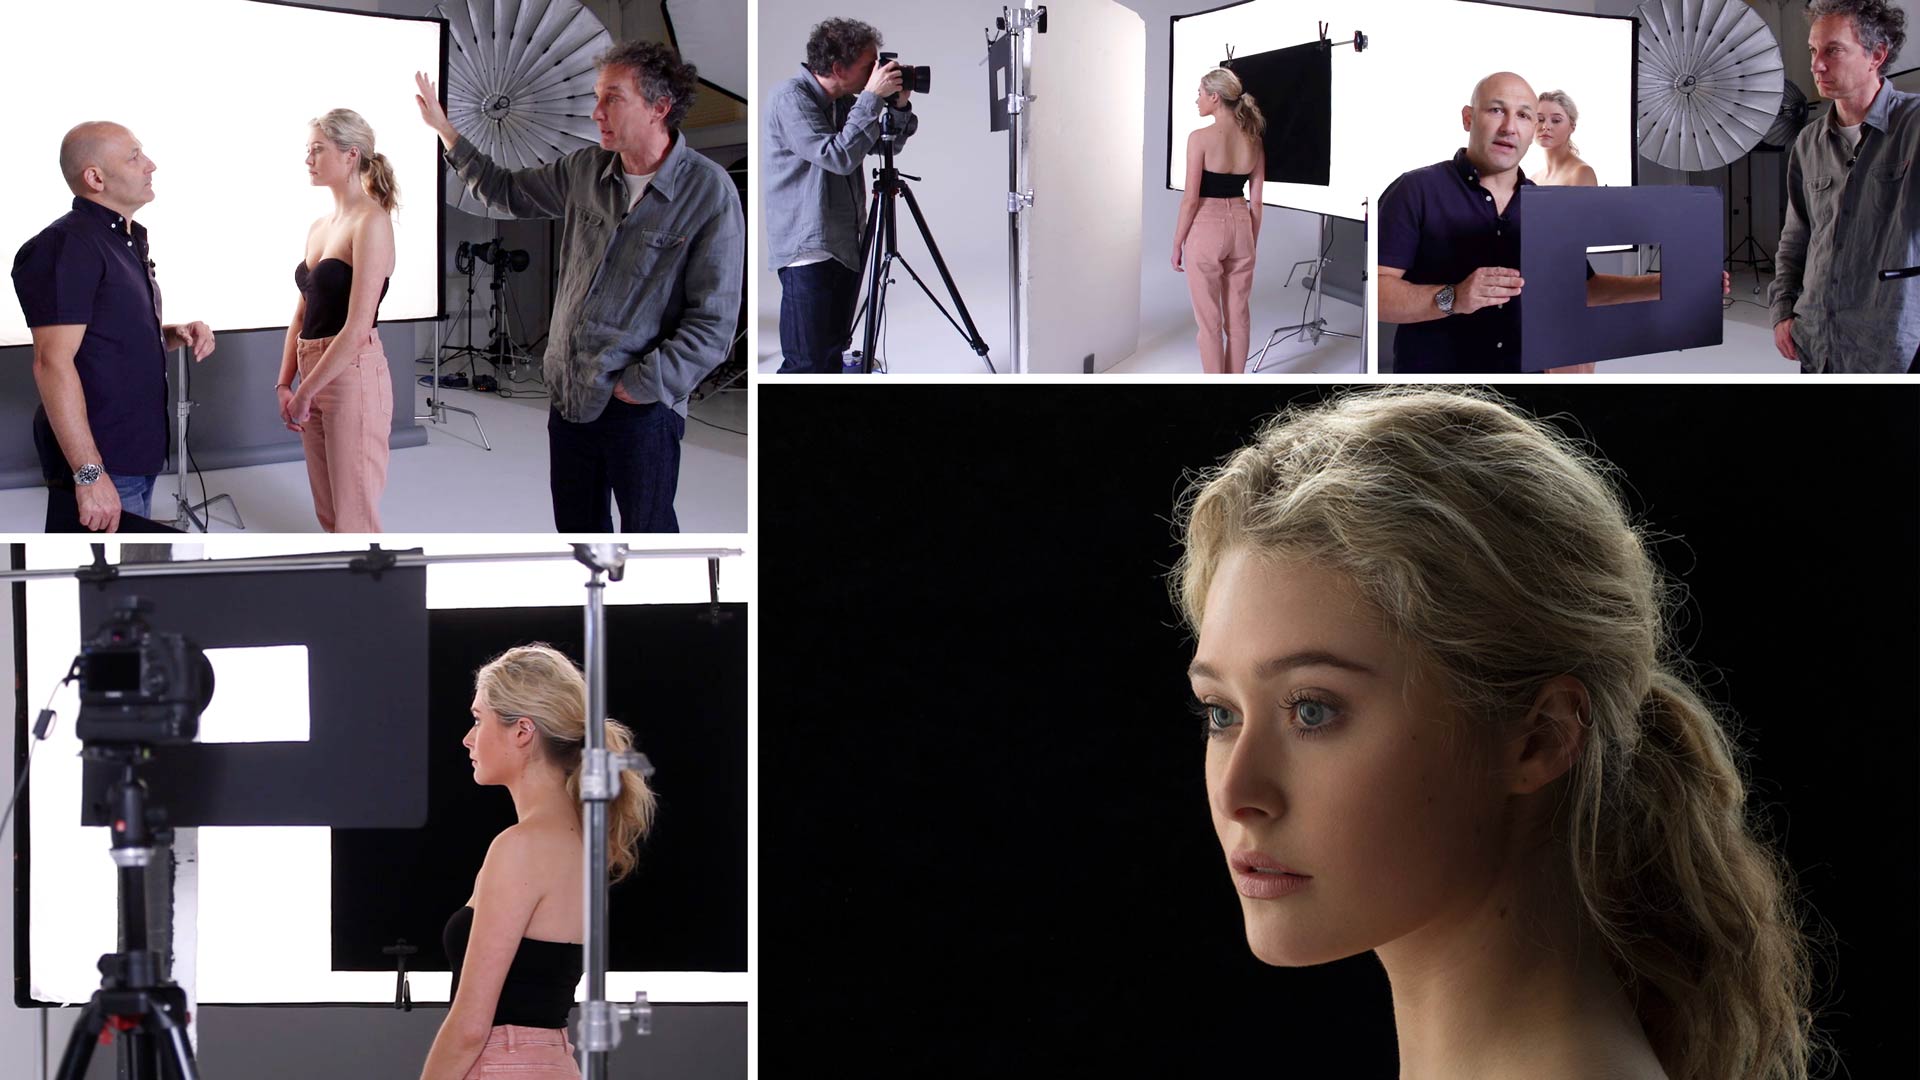
You’ll learn from professional photographers and lighting experts Karl Taylor and Urs Recher as they demonstrate how to create beautiful, soft rim lighting using backlighting – with a twist.
Don’t miss this chance to discover a super-smart, simple-but-effective technique that enables you to produce what looks like a four-light effect with just a single modified light.
In this class:
- Portrait photography using a single light
- How to use backlighting for creative effect
- How to avoid flare
- How to modify rim light
- Using reflectors and flags
- How to control shadows
Questions? Please post them in the comments section below.
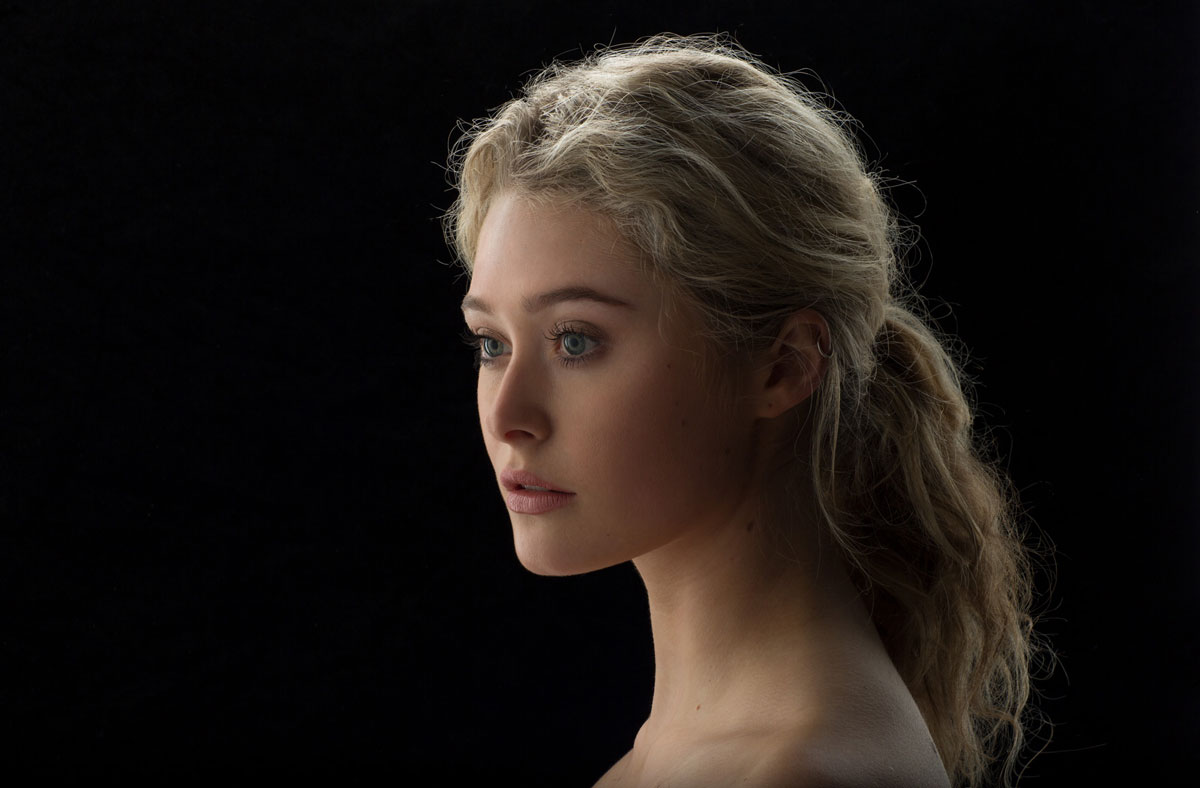
Stunning female portrait using rim lighting as a backlight.
Comments
Hi Karl, I LOVE this setup, and can’t wait to try it. The softbox you are using is very hard to find here in the States. I seem to only be able to find 2ftx3ft square softboxes. Would you mind letting me know the brand you have and where you got it? thanks!
Never mind, I found it above, thanks!
Hi, thank you. The one I’m using here is a Broncolor 120 x 180cm, Elinchrom also do a large one, I think Profoto and Westcott might also do some very large ones too.
Thanks, Karl! I ordered the Broncolor, I appreciate the response.
Love this video Karl, keep up the great work! If you are ever in Manchester working I have a space you could use if needed. I have a very specific question. Where did you get the feet for the large polystyrene boards, did you purchase them from somewhere or have the fabricated? I’ve search all the mainstream selling sites and can’t find them anywhere.
Hi thank you for your comments! I had them fabricated by my local metal workshop, some photographers use, bike stands (the ones for the front wheel).
I have tried this without the additional fill panel in my small kitchen/diner & got some great results!
Great to hear!
Hello Teacher, can you let me know the dimensions of the card that you used for the flare?
I want to do one.
Thanks so much!!!
Hi, if you mean the window mask then you need to find out the size of your sensor and multiply by 5 or 6 and cut the shape to that size.
Thanks, I’ll do it
HI Carl! Once again, Brilliant video! i have just purchased some 300w studio strobes for the start of my home studio. Its a small space.
I was just wondering. Would 300w be suffcient to fill a softbox that big and give sufficient power to work at a decent f.stop? I heard you had a 800j there but I didnt get the Values he was shooting at.
All the best.
Bjørn
Hi Bjorn, your 300s are only 1.5 stops less power than an 800. So as an example if I was shooting at ISO 100 at f11 at full power then if you were shooting at ISO 200 at f9 then you would have the same level of exposure. Also we are not always using our lights on full power. Modern cameras can comfortably shoot at higher ISOs these days so I’m sure you will find you can get the results you need.
Hi, I noticed that sometimes you like to block the light or stop the bouncing. But it will never be 100% .
I would be interested if 100% be any beneficial or would it ruin the shot. If you like to try it try vantablack.
https://culturehustle.com/products/black-3-0-the-worlds-blackest-black-acrylic-paint-150ml?variant=41147281342622¤cy=GBP&utm_medium=product_sync&utm_source=google&utm_content=sag_organic&utm_campaign=sag_organic
Hi Nick, yes I’ve seen that paint it looks like it could be very useful. This class might interest you https://visualeducation.com/class/matt-black-studio-box-workshop/
Dear Karl, Dear KT Team,
I’m trying to make my own window mask.
My sensor is 53,7 mm by 40,4 mm. I multiplied by 10 and then divided by 2. But i Find it quite big.
For portraiture, is it better to have it bigger or smaller !? Or the subject that we photograph doesn’t change the calculation.
What would you recommend for the window mask size ?
Thank you for your time and your help.
Best Regards
Simon
Hi Simon, there is no recommended size, only the size that works for you. I have several sizes and will choose which one dependent on which lens i’m using and how far away from my lens I’m going to place the window mask. As they are made from simple black foam board or black card they should only take about 10mins to make each one so I’d suggest you make 3 sizes so if the one you have already made you find too big then make a smaller one and divide by 2.5 or 3 instead, even make a drawing of it on a piece of paper if you prefer to check the size before you commit?
Dear Karl,
The draw were very useful.
Thank you for your time and help
Simon
Dear Kark,
The only light source here is a large soft box behind the model , am I right??? And what size of the window mask with window dimension is suitable to the len we use?
Hi, yes the only light is the large softbox. The window mask can be made in various sizes as long as it is the same ratio as your camera sensor. I usually have a couple of sizes for different uses as they are very easy to make. For example if you have a 36mm x 24mm sensor then you can start off by multiplying by 10 = 360mm x 240mm but that would be a very big window mask so then you can divide that by 2 = 180 x 120 and there you go that can be your first size to test.
Dear Karl,
So, in case we use a cropped sensor (1.5x to the full frame 35mm) the window hole of 135mmx90mm, but how big the size of the black mask is suggested????
TanNH
Hi, Tan what is the size of your cropped sensor in mm?
Dear Karl,
My camera’s sensor is “APS-C sized CMOS sensor (23.6 x 15.7 mm) with 24.96/24.24 million pixels (total/effective), aspect ratio 3:2 ” (Copied from Leica CL page), and the camera is Leica CL , len is Summilux TL 35mmf/1.4 (or equip. 50mm in full frame)
Hi, great so the answer is in the facts! 23.6mm x 15.7mm is the shape of your sensor, so we multiply by 10 = 276mmm x 157mm and that is also the same shape just bigger. But if we made that size into a window mask hole then it would probably be a bit big so let’s divide it by 1.5 = 184mm x 105mm – so that’s the size I would make my first window mask.
Hi, great dramatic one light set up. I was wondering if I would be able to do the same shot using the 120×180 soft box with the edge mask and having the model further away from the softbox to create the same effect.
Thanks
Andrew
Hi Andrew, yes you would but the rim lighting would get smaller. Please see this class – https://visualeducation.com/class/rim-lighting-product-photography/
Good tips if you have one light with a big softbox. I see if I can get my camera out next week to work on a project.
This is why I am a member of Karl Taylor Education. I found the solution that I wanted.
Thank you Karl
Thank you Ahmad.
i have a question regarding the “window” you are shooting through. i understood that the measure is depending of the mm of the lens. how do you calculate the measures of the rectangle window ?
Hi Johan, it is the same ratio as your sensor. So if you have a 36mm x 24mm sensor (full frame 35mm) then you could expect the same shape for your window – 36cm x 24cm divide by 2 = 18cm x 12cm
Brilliant .. tons of learning in there.
Wonderful lesson learnt Karl. Thankyou for teaching us and creating like minded people in Industry for a big boom.
Plz let me know which power output lights you use.
Hi, this was an 800J lamp on full power.
Would a similar result be achievable with a large window, or is a soft box of this size essential to create this effect?
Hi Sophie, a large window with some diffusion in front of it or on a cloudy/bright day would work if you follow the same technique we use here.
Hi Karl, very interesting video as always! Just one quick question: I understand that the “square hole” in the window mask has to match the aspect ratio of my sensor so in my case 3:2 but is there a specific size recommended for the hole in the board? Is there a minimum size I should take in consideration for the long and short edge of the hole or even maybe a maximum size, after which, the window mask doesn’t work anymore to protect from flare?
For example is a window mask with a hole of 30×20 cm enough?
Thanks!
Hi Daniele, that’s a good question! You need a few sizes simply because sometimes they benefit from being at different distances based on which lens you are using and the lighting setup. I have 3, big, medium and small. The big is around the 30cm size, the small around 10cm (long edge). My guess is the medium is 20 long edge. Make them from black foam board, a good edge and stanley blade takes 5mins to make one.