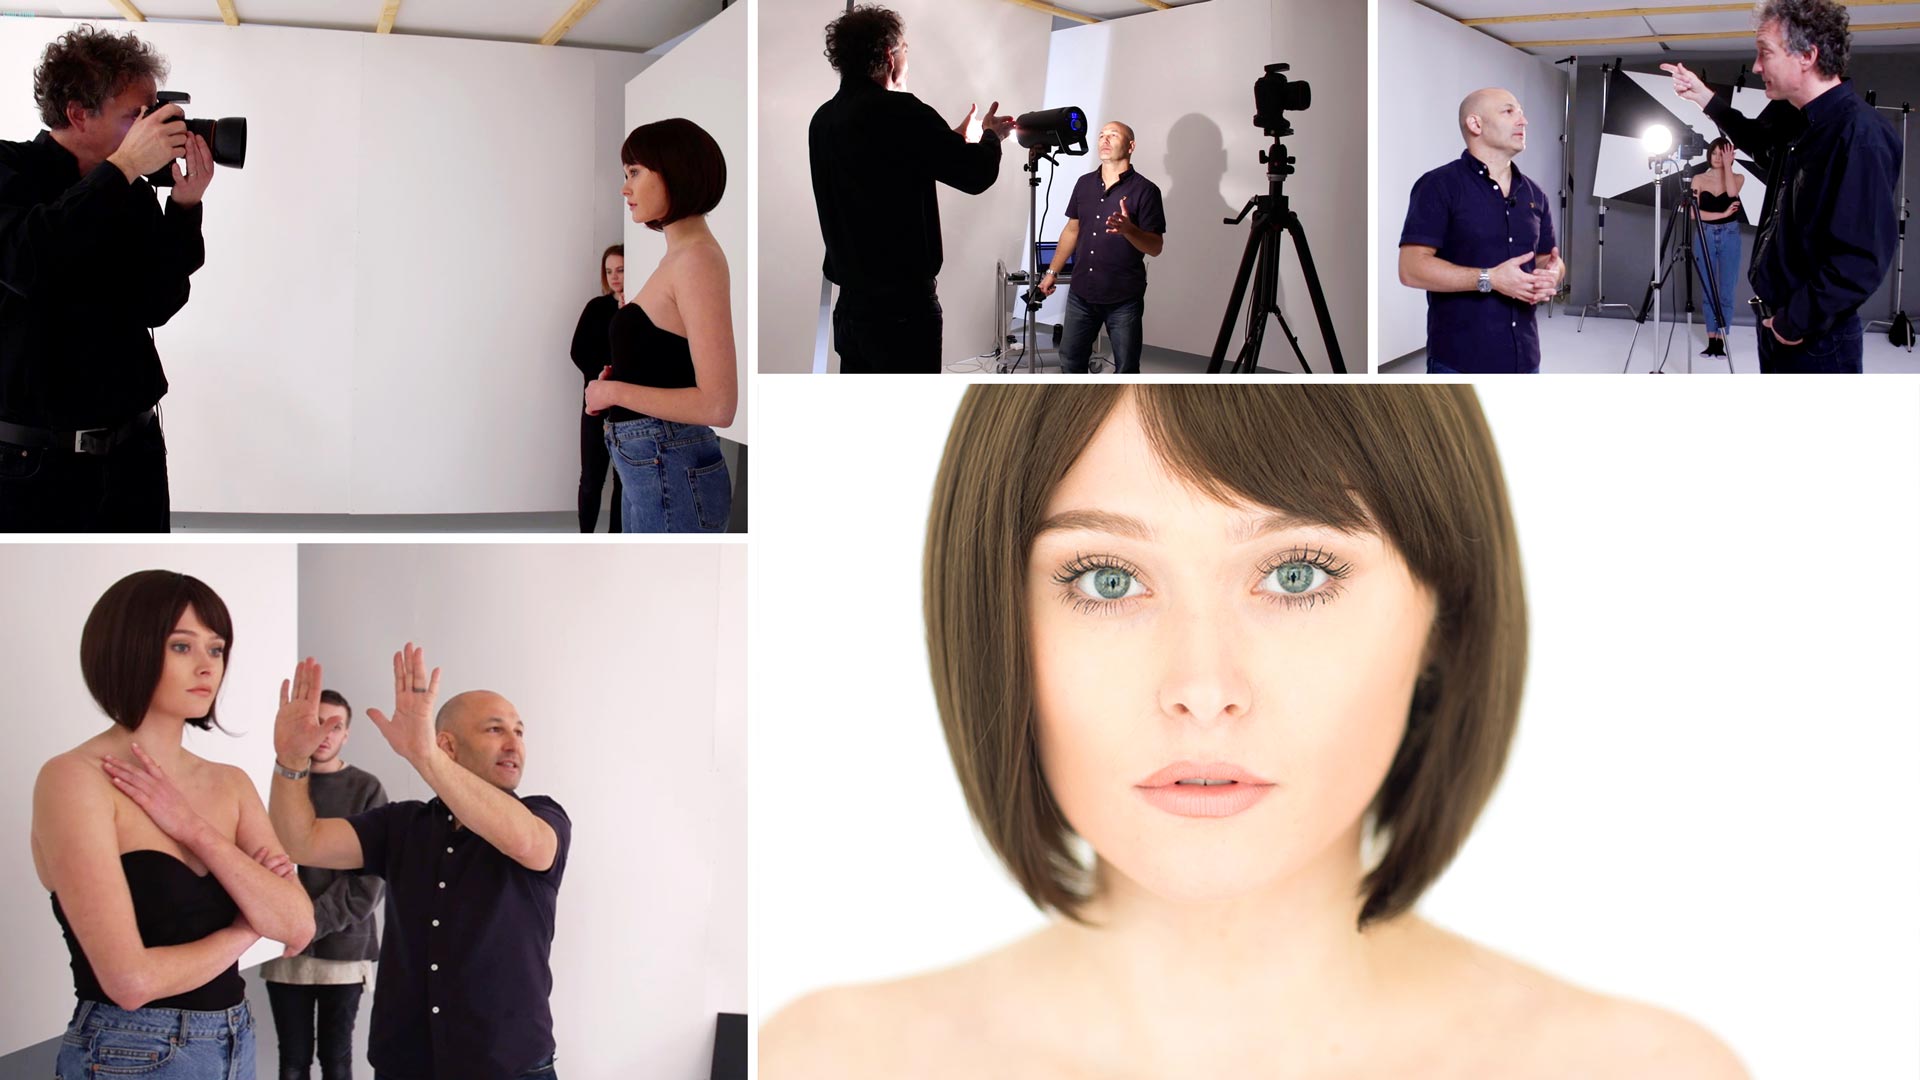

Very Soft Single-Light Portrait With White Background
Want to capture perfect portraits with minimal kit? Let two lighting masters show you how.
Watch Karl and Urs demonstrate a simple, versatile bare-bulb setup that you can use in almost any studio, large or small.
You’ll learn how to achieve an incredibly soft light with absolutely no shadows, and discover why a white background is perfect for a high-key portrait like this.
You’ll also discover how to use negative fill to add shape and shadows to an image.
In this class:
- Portrait photography using a single light
- Using indirect light for portraiture
- Photographing in a small studio
- High key photography
- Achieving a white background
- How to use negative fill
Questions? Please post them in the comments section below.

Comments
Well done guys.
Which mode is the camera on please? On manual?
I ask you this because when I use flash (on the camera) I need to take 3-4 photos to get the exposure right, most of the times, it is very over exposed. It is easier for a one person, whereas taking a group photo makes it harder since I aim to have everyone on focus.
I use defuser, I face the flash at the ceiling, but it does not work as precise as I aim for. I get it right but I wonder why is it so hard to handle those issues!!!
Any ideas to which mode the camera should be on, and the type of the flash that you recommend.
Regards
Darya Said
Hi Darya, everything is done on manual and you should become fully competent at using your camera in manual first. If you are not already then check the ‘essentials’ section and work through these before moving onto lighting.
Hi Karl and team. I´d like to know more about the white (or black) panels you use for this shot. What material are made of? I´m from Argentina.
Hi Leandro, they are called foamcore and are used by sign making companies, very light weight and stiff. The bigger thicker ones are from building supplies companies and are often used as insulation.
Hi, Karl.. Its an eye opening setup for me. .
Sometime I do family shoots at clients place. Is this setup ok at there place for family shoots with one white background in front of single light.
Hi Vikram, you would also need the white walls and ceiling.
Hi Karl,
What are the artificial walls made of? Could you tell me, please
Best regards
Piotr
Hi Piotr, they are made from MDF.
Hi Karl and tx for this so easy and flatering light. I also like yhe retouching of the final picture. would you show us how you retouch it and with wich software? Camera Raw? Lightroom? Any preset or effect? Thanks again for… sharing. This is so great 😉
Hi Fred, I don’t remember there being any retouching on this shot. We have lots of easy to follow tutorials on retouching in our ‘post production’ section. Cheers Karl.
Was that Stifanny’s hair? Lucky she doesn’t get jealous!
I’ve got floor to ceiling windows down one side of my studio and a dark carpeted floor. I guess white sheets over them would do the job?
Hi Kevin yes that would as long as they are not too opaque. If the sun comes directly through then you could stick diffusion rolls in front as in this example https://visualeducation.com/course_video_page/indoor-photography-part-1/ However that would be creating a giant soft-box which would give a nice light from the side or behind you but it wont be quite the same as bouncing a point light source from inside your ‘white box’ which will yield different qualities because of the inverse square law. If what you meant was put thick white cloth over the windows so you could bounce the light from the inside then yes that would be perfect.
Karl, Urs. Since practically you shot in a “large softbox” how does the shutter speed affect overall? I saw you were in 1/160 sec. Would something change if you used a lower/upper speed? I can’t figure out how much the lightbulb affected the model directly and how indirectly. Something tells me that it would make no difference, but just asking to be sure. Thanks!
Hi Bogdan, you’ve been very naughty and not watched this course in the right order 🙂 Go back and watch the last 15 mins of this chapter https://visualeducation.com/course_video_page/introduction-and-understanding-light/ and all of this one: https://visualeducation.com/course_video_page/shutter-speeds-and-apertures-to-flash if you have any questions after that let me know.
Really interesting set of video tutorials on light shaping etc! Thank you!
This is friggin awesome Karl! Love the effect, and with just one light too!
Evie is quite a trooper, I got to admit.
I kinda like the black stripe reflection of Urs in her eyes. Gives her a bit of a cat-eye look.
By the way, I noticed how you mostly shoot slightly from above. Is there a specific reason for that?
Yes it’s a great simple and effective setup. Even though I’m short I still try to get elevation on a step or ladder to be slightly above eyeline or at least eyeline with the model. You generally don’t want to be looking up at the model unless you are shooting a full length wide angle dramatic shot (as you will see in many of the jumping/falling model shots). When it is more of a portrait looking down on the model makes them look a bit more innocent and wide eyed as the gaze/eyes have to open up to view you from above. There is also the aesthetic of looking down from the forehead through the eyes, nose to chin rather than from the chin up the nostrils etc. Also the closest part to the camera will appear bigger so it’s more flattering to have the forehead and eyes bigger.
I use bounce light technique. Its a great light setup to create beautiful soft light on a subject. Easy to do also. Great tutorial.
Great light
Hi Karl,
At what power is the light ? is it at his max power ? the logical answer will be that it depends on the studio size but i just want to be sure.
yes the power would depend on how far away the wall is to the model, Karl will always just take a test shot with his desired aperture and use roughly half the power of what ever light he is using e.g scoro or siros see what it looks like and adjust it from there, there is no set amount, it all depends on how it looks on the back of your camera or screen
Hi Ziv, you are correct with the logical answer or also which aperture you decide to shoot with and then you simply adjust the power to suit that. See my chapter on ‘measuring light’ in this course.
Im now starting a new game but instead of Where’s Waldo its called Where’s Ben 🙂
Nice lighting thanks again!!
I’d like to know where he is too, I have a long list of work for him to do! 🙂
Really nice result with this simple technique.Love it!
Wonderful lesson on bounced lighting (on steroids).