


Bright and Stylish
Discover this simple three-light setup that produces stunning results.
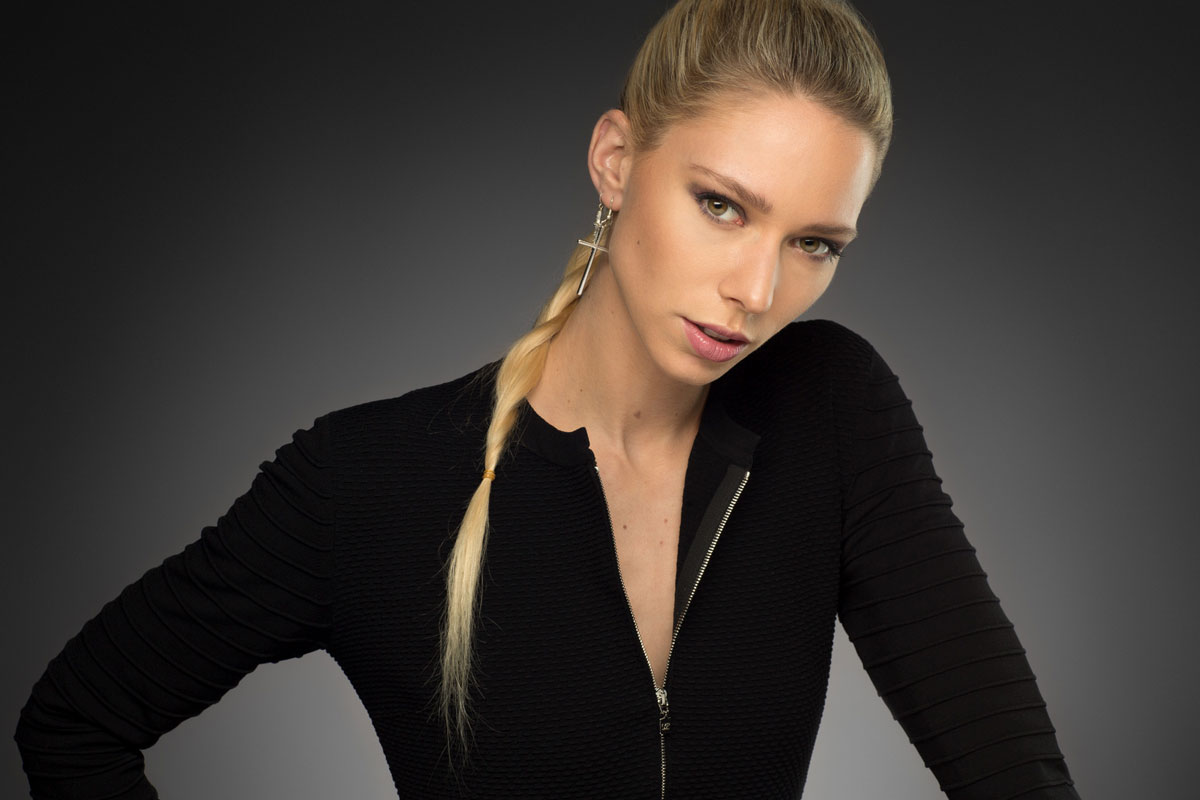
In this class, using three lights plus basic modifiers and equipment, Karl explains his lighting setup and demonstrates the step-by-step process of testing and adjusting his lighting ratio until he reaches the bright and stylish result below.
Starting with his back light, he works his way forward, perfecting each of the three lights as he goes, explaining his thought process and creative decision-making.
In this class:
- Studio Lighting: How to set up multiple studio lights
- Three light setup for creative portrait photography
- Softbox lighting setup
- Using reflectors for portrait photography
- Using subtle side lighting for creative effect
Questions? Please post them in the comments section below.
Comments
Karl,
I was also wondering could you show an example of what a flare back into the camera would look like?
Hi Artemus, you will see that in later classes in this section.
Karl,
This maybe a silly question, but why do you use a Strip box for the Key light and not an Octa box? I get the Rim light being the strip box but was wondering if a Octa could be used for similar looks
Hi Artemus, you’ll see me using a variety of modifiers throughout our classes, the first and most obvious use of different modifiers is that each can provide a unique look, the second reason for me to demonstrate a variety of lighting is to show our audience the variation in results of different modifiers. I often use the 30×120 horizontal on beauty shots (as you will see in other recent fashion/beauty classes) in this position I retain a harder light in the vertical direction down the model’s face but still soft in the horizontal direction. To understand more on this please see the lighting theory section or this class where I an Urs Recher look at and explain the effects of various modifiers: https://visualeducation.com/class/live-painterly-portraits-lighting-lessons-urs-recher/
Hi Karl, and thank you for everything.
Q. I don`t have the softbox 30X120. Can I use a reflector with the same size on each one?
Hi, what do you mean by a reflector of the same size? Which modifier do intend to use?
Karl –
I have two strobes – both Godox AD300 SKII. One is on softbox 35 X60 double diffused as a key light. Other is on a black/silver umbrella as a fill light on the right. I am using a 50mm f1/.8 and used a dark curtain for the background. I used the lights at 1/8 th of the power (it maxes out at 1/16).
But the output was yellowish – not white. and there was no separation from the background. The light was unflattering on the model. What could I have done better?
Hi Tummavg, I’m afraid without a picture of your lighting setup and the result this is virtually impossible to answer as there are too many unknown variables but if you would like to send a pic of the setup and the result by email then I can take a look.
tummavg,
The yellowish color would most likely be the Kelvin temperature which can be corrected by either using a grey card or doing it in post production. I’m not sure about the rest because like Karl stated, you would need to show a picture.
You mentioned that you would set up a flag if you saw flare in the shots from the side light. Where would be the ideal location to put a flag in that case?
Hi, the main aim of a flare blocking flag is to simply block the light from hitting your lens. A lens hood helps with this but often isn’t enough, a window mask is another great way and you will see me use that it many other classes. But essentially anywhere you can place the flag that blocks the light from hitting your lens is acceptable, it can be a small flag close to the lens or a big polyboard close to the light source as long as it doesn’t disrupt your main lighting on the subject is the objective.
I always learn something from your classes. Probably next week get my camera and backup out to practice next week. Love your teaching style.
Thank you Kenshi.
I love this look.. The subject becomes highly sculpted and looks very three dimensional. My first thought was could I translate this onto a location, at least the reflector, top and glancing light in an environment, perhaps using another light for the the background or relying on ambient light.
Hi Gary, I could replicate this lighting look if I was able to control the ambient light down to about 1-1.5 stops below. That way it would negatively affect this lighting, that’s the sort of thing I do with the ambient light anyway on fashion shots on location as you will see in the ‘Fashionscape’ series.
I’ve been watching you work with the background light for the glow and one thing it illustrates is the issue of being in the way somewhat. can you get the same results by placing it to the side slightly and placing a grid on it to focus the beam.. so it is further away from, and off to the side, somewhat like Urs used in some of the two light setups? I’m guessing the result would be different. Are there different ways to achieve the background radial glow if, due to space limitations, you have as options?
Hi Gary, I don’t like placing a standard reflector or grided reflector to the side as you get an egg shape rather than a ball. If you use two background lights though symetrically one from either side then you can overcome the problem. Alternatives are to illuminate through a background that is partly transparent such as diffusion paper or acrylic. Or use a Flooter, fresnel which will give you an almost perfect ball and you can have it right next you and it won’t hit the model. You’ll see me using the ‘flooter’ as a background light in several of our fashion tutorials.
Hi, Karl. A technique question that comes up just as I watch you take a series of shots with this model. When you’re shooting in a situation like this where neither you nor the model is moving a lot, how often are you resetting focus? Every shot? In my studio work with models, I’ve gotten in the habit of reacquiring focus on every shot and I feel as if it slows the process down to where I feel as if I “miss my moment” regularly. When I’m shooting at wider apertures, it’s a necessity, but at tighter apertures, I’m not sure.
Hi on the medium format most of the time I’m in manual focus and on Fashion shots you have to work slowly as it can only shoot about one pic per second. On 35mm with good lenses the focus is very quick and I will use the AF but one of the focus points off to one side. As the model changes pose this can be difficult because she may end up on the wrong focus point so MF and f16 if neither of you are coming off the plane of focus much will be OK but there is nothing more annoying than seeing a great shot in the results, great pose, lighting etc only to find the eyes aren’t sharp! It happens to all photographers.
It seems as though that dark, soft, ‘painterly’ style of lighting and post-production is EVERYWHERE at the moment. But, I LOVE these bold and punchy lighting set-ups which work beautifully on flawless, young skin. Do you have any suggestions for edgey but flattering light on older skin?
Hi Belinda, it will always be more difficult on older skin but it’s all about the direction of the light so it is possible to use harder light if it is from the front and not too high otherwise it will create too much texture. You might glean some useful tips from this previous live show https://visualeducation.com/class/live-broncolor-how-to-with-karl-taylor-urs-recher/ in fact I’d encourage you to watch as many of the live show replays as possible as often the audience ask useful questions that I answer too.
Superb! I’m learning so much already!
I have to thank you for helping solve a problem I was facing. @ around the 6:01 mark you were explaining the side light being colder than front light. I did notice this in my shots but didn’t understand why. Now I know. The front light shooting into the skin bouncing warm tones back as opposed to the side light skimming the skin and being daylight balanced. Makes sense!! I rewatch many of your sessions and gain more knowledge each time.
Hi Karl, in this video you mention using a grid for the background light. Can you tell how many degrees the grid is and what size reflector your using with it.
Cheers.
Hi Goodfella, the reflector was the P70 which is a standard sort of size for most lights at 23cm https://www.bron.ch/broncolor/products/light-shapers/showproducts/basic-reflectors/ There are 4 grids in the range, I was using the widest one https://www.bron.ch/broncolor/products/light-shapers/showproduct/honeycomb-grids-for-p70/ quite often I don’t use the grid at all.
Once again, the attention to the background light has paid huge dividends.