
Tennis Racket | Post-Production
This class covers the post-production process of the tennis racket product shoot.
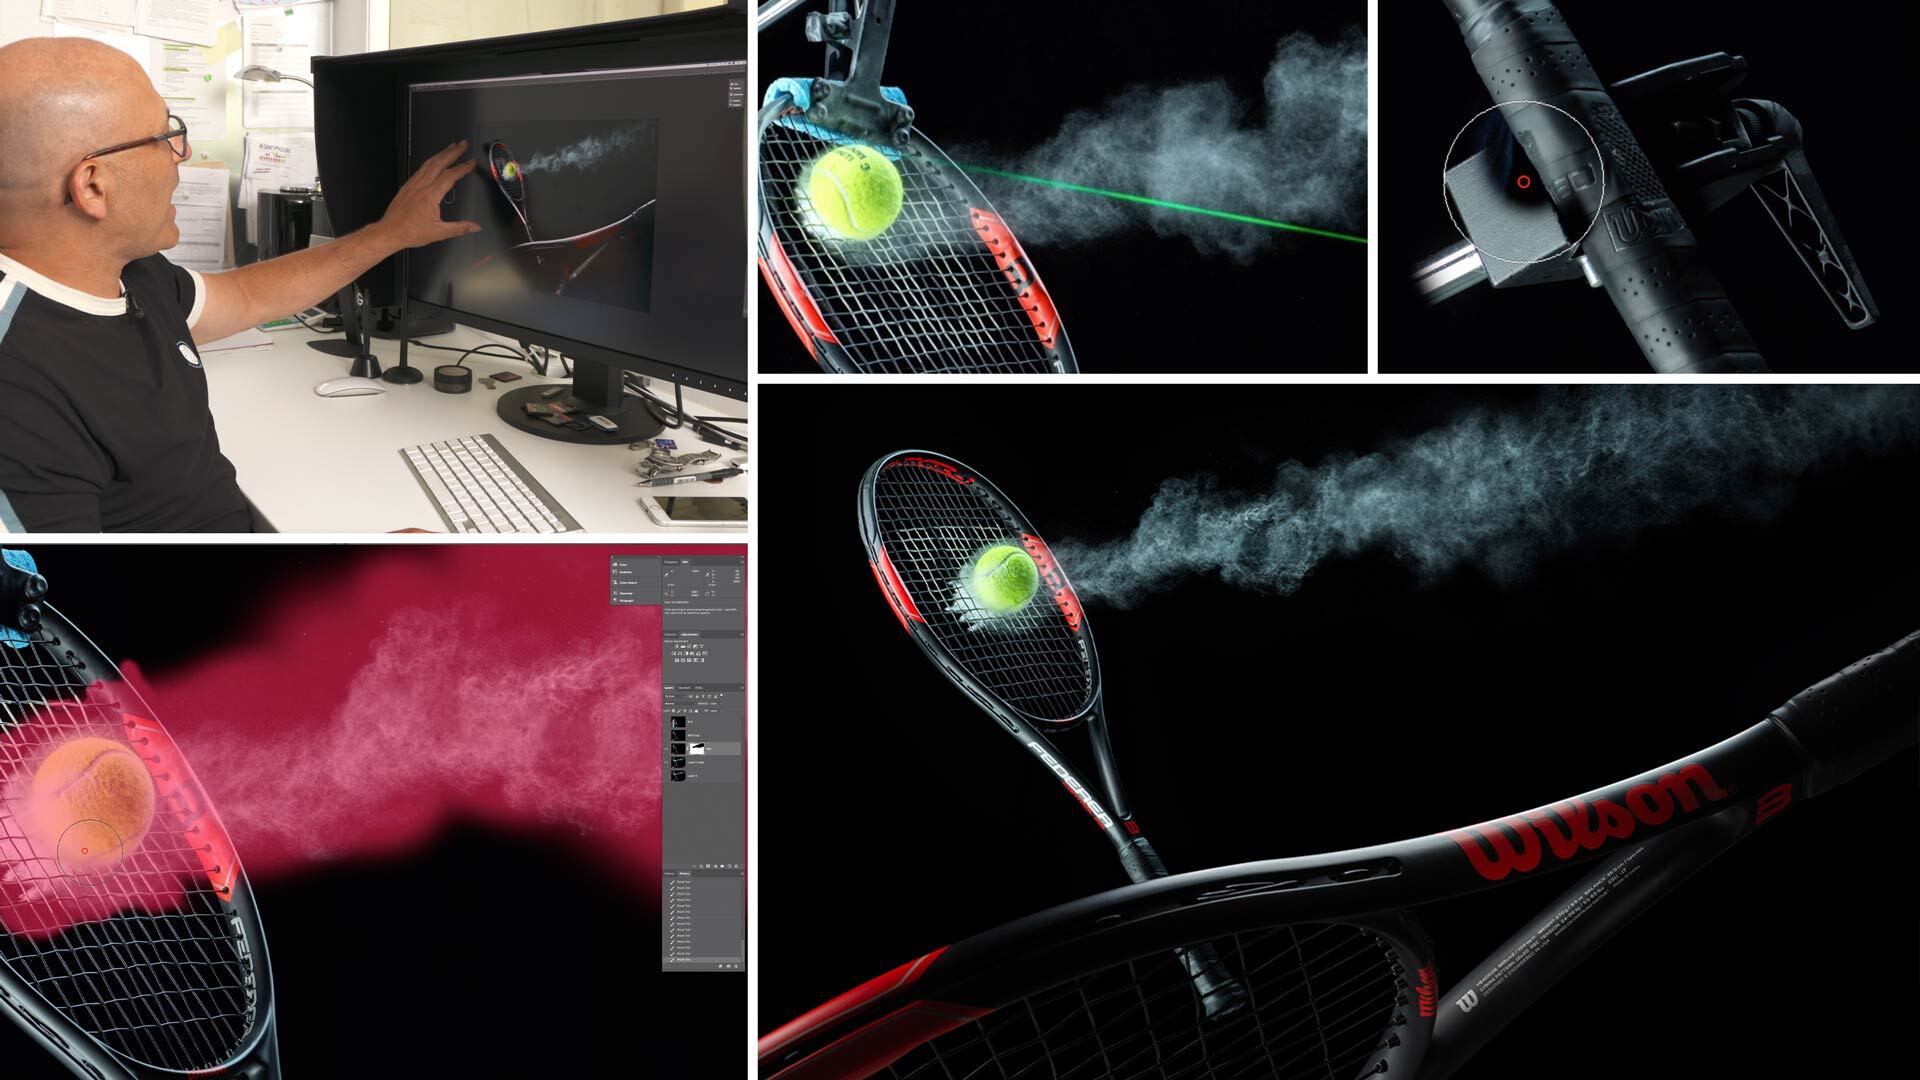
The shoot itself included many unexpected variables, which meant this retouch was slightly more complex than what was originally anticipated.
The first challenge that had to be dealt with was aligning the different base shots. Because of the impact of the tennis ball, the racket had moved slightly, which meant a combination of tools had to be used to change and adjust the shape to get everything to line up.
The next step was to perfect the powder trail. This involved using cloning and healing tools as well as adjusting the opacity to create more of a sense of motion.
Further retouching considerations including removing dust and burning and dodging.
In this class:
- How to retouch product images
- How to align multiple layers in Photoshop
- Using the Photoshop Liquify tool
- Using the Photoshop Clone tool
- Identifying areas for retouching
To learn more about some of the other techniques mentioned in this class, take a look at the following classes:
Making and Using Masks
How to Burn and Dodge in Photoshop
The Clone and Healing tools
Further examples on how to remove dust from a photo can be found in these classes:
Dior Perfume Bottles Post-Production
Zenith Watch Retouch 2 – Clean Up and Final Touches
Questions? Please post them in the comments section below.
Comments
AWESOME!❤ BEAUTIFUL!❤ THANK YOU VERY MUCH 😁
Another master-class from the master of realistic illusion…or is it the other way round? Illusory reality?
Anyways, thank you, Karl!
The phrase I like most is: “We’re getting away with that!”
Ha, Illusory reality, love it!