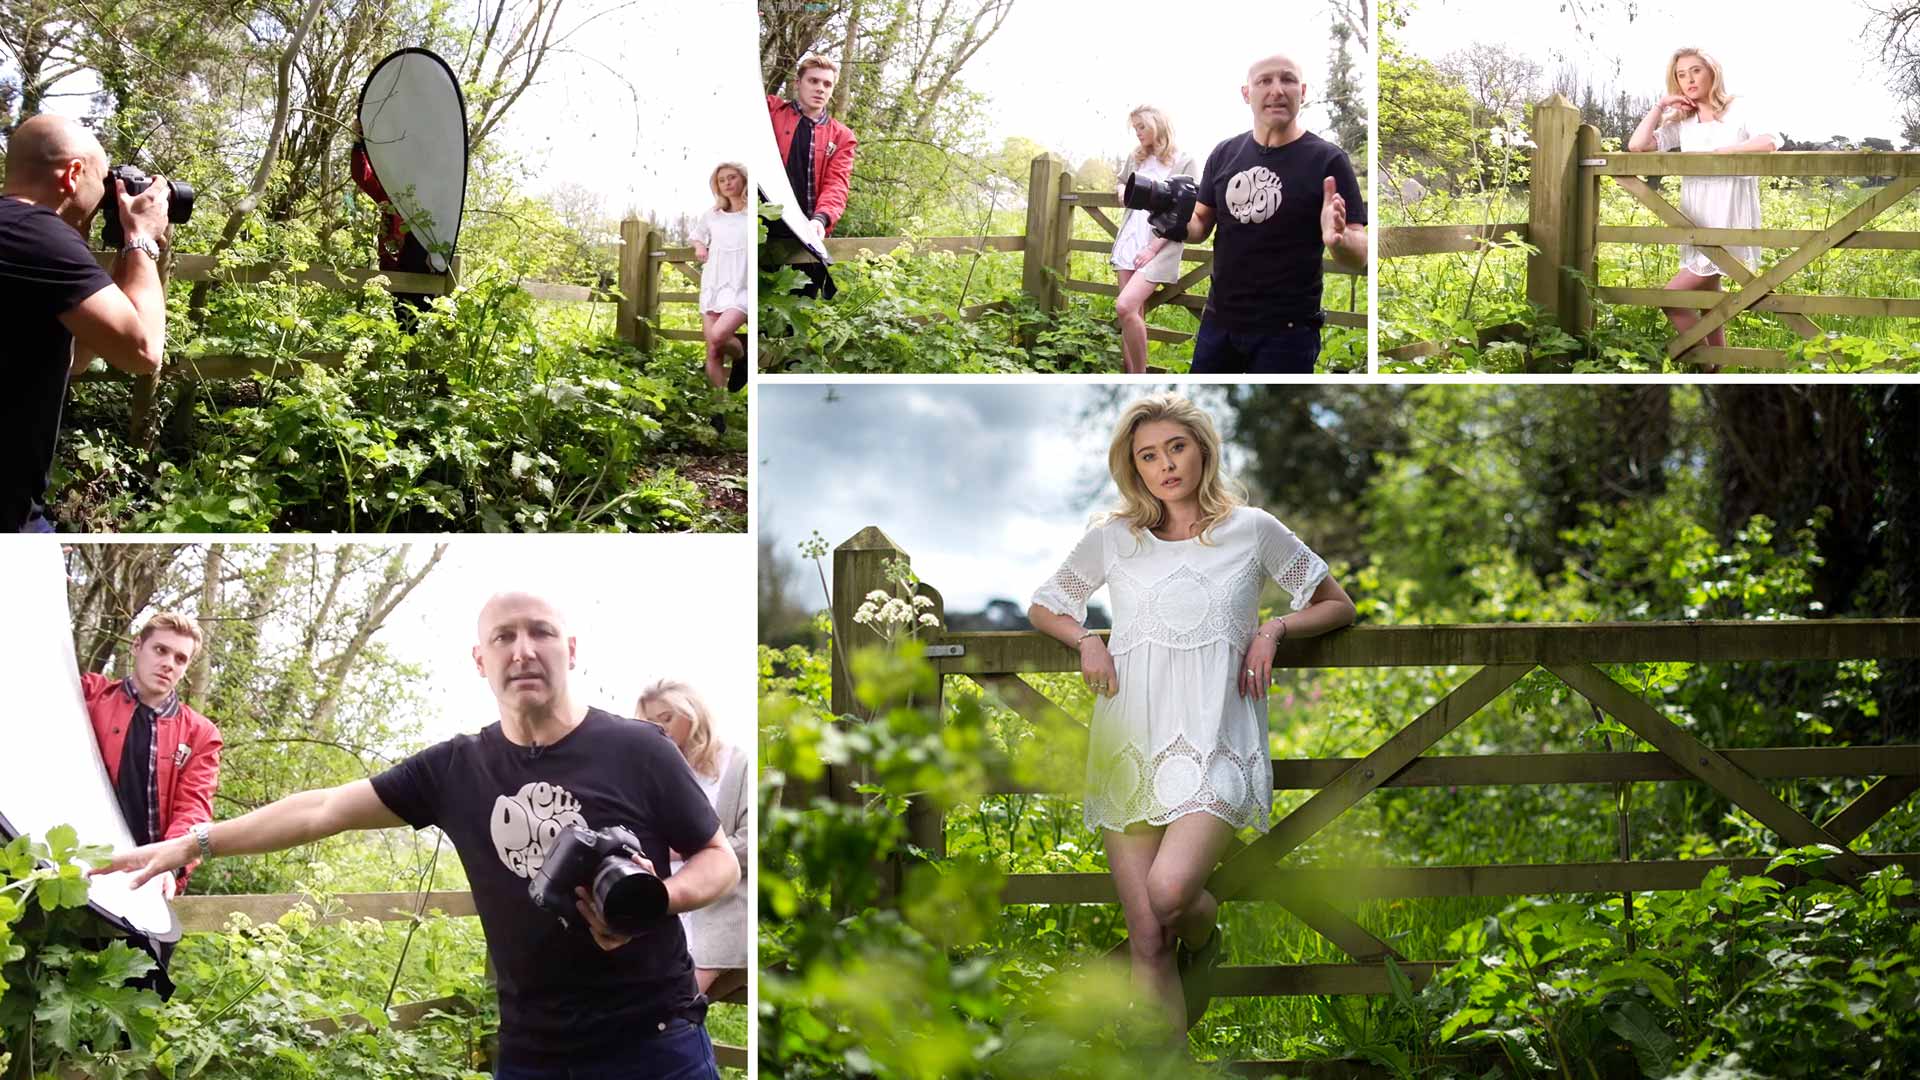

Balancing the Exposure of the Natural Backlighting and Model
Wondering how pro photographers make their natural-light portraits look so good? Open the gate and come on in!
This portrait photography class will help you master a range of techniques when shooting with nothing more than natural light.
You’ll discover how to get stunning results using just a simple reflector and natural light. You’ll also learn how to think on your feet and adjust your settings as you shoot to compensate for the ever-changing qualities of natural light.
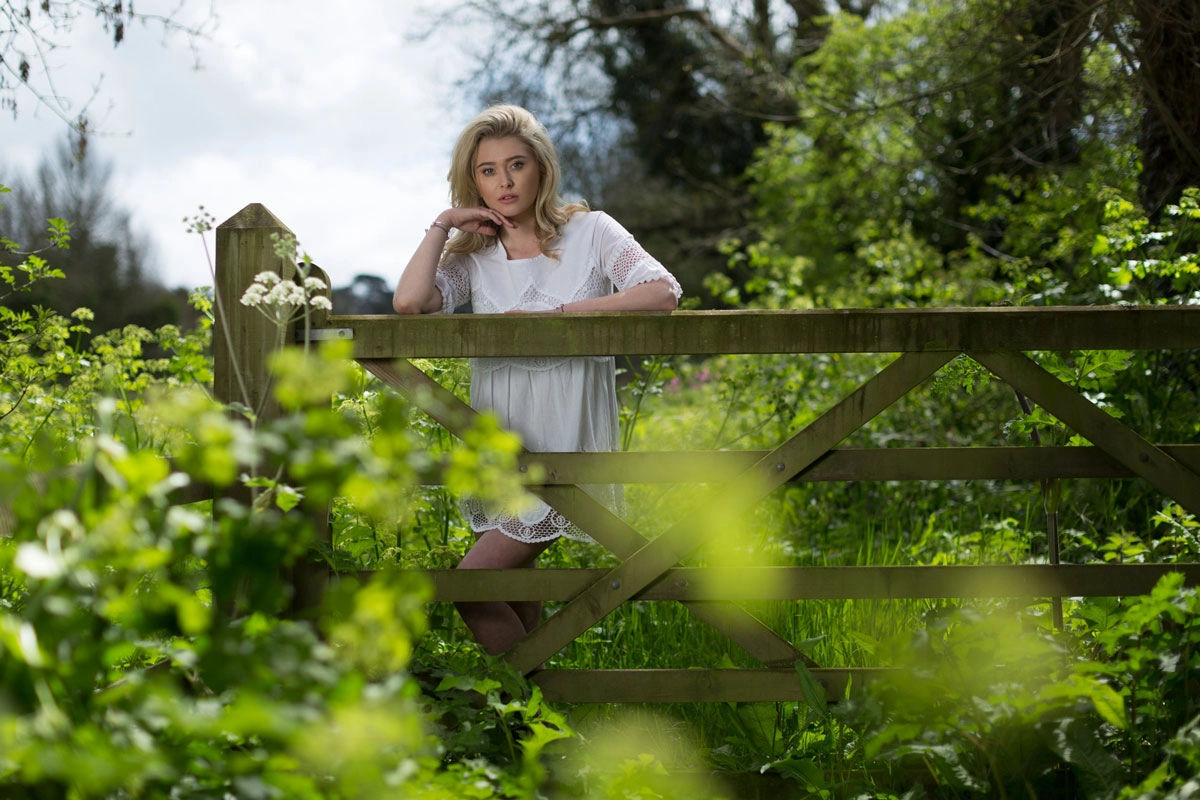
This class will teach you that with the right location and conditions, simple and affordable accessories can help you capture a magical shot like this one.
In this class:
- Portrait photography using natural light
- How to use natural light for outdoor portraits
- Affordable accessories for photography
- How to use a reflector for outdoor portraiture
- How to balance natural light
- Creative composition for outdoor portrait photography
If you enjoy this class, try Opportunity Photography and Autumnal Orchard.
Questions? Please post them in the comments section below.
 © Karl Taylor
 © Karl Taylor
Comments
Hi Karl, love the video and very interesting. I’ve taken some classes from lifestyle photographers that use a reflector and most of them never use the silver side and only use the white side. Is this a preference thing that you are trying to imitate studio-style lighting and they are trying to imitate natural reflection?
Hi, no simply a physics thing. White doesn’t bounce as much light back as a correctly angled silver reflector. On a day with soft cloud like this one a white would be almost useless and a silver won’t bounce harsh light back because it is basically a mirror and will reflect an image of the soft cloud. On a clear day with backlit sun then a silver would bounce back the sun and can be too aggressive unless you angle it or use a rough silver. White is more effective on a brighter day but I still use silver most of the time out doors but I use white in the studio as there is no general ambient light from the sky so the noticeable effect of the white reflector in a studio is more apparent.
hi,how to use reflector if you do not have an assistant?
Hi you can use a lighting stand with a reflector arm.
In the video, I took note of the results of the photos against the gate; I think that they are some lovely shots. I am impress with the image quality, but am I missing something? At time stamp 6:50 – 7:05 (in the video), you did a comparison of two photos – one with the reflector and the other without the reflector. I have to ask; were the two pictures post production or were they the exact pictures as seen on the camera? The image quality seems very clean.
Hi Nick, we generally don’t do a great deal in PS for shots like this, maybe tweak the colour and contrast a bit and that’s it.
great video and awesome photo. Thanks for showing how a simple reflector can do so much.
Cheers Paulo.
Hi Karl,
Thanks a lot for great tutorials! You do an amazing job!
2 quick questions:
1. What about focus points? do you use single point and point it to the subject’s eye? specially when doing so many shots one after each other and subject is constantly moving the head…
and 2nd. what about when subject is much taller than you? how you deal with that in outdoor? in most of my headshots (I shoot them with 100-400mm) they come out in kinda weird way, looking down to the camera… I’m 178cm, but many Americans as you know are pretty tall lol )))
Natural-light portraiture has always been my favorite style. Tnx for the inspiration.
Thank you.
Nice lesson though I didn’t care for the foliage in the foreground.
By the way, that final image is a cracker. 🙂
Hi Karl, can you treat the reflector as adding extra light like with a strobe/flash and have some control over the background ambient via shutter speed? I guess the effect is limited unlike studio lights and the reflector may only add shadow fill.
I often use the camera meter to give a ball park figure then use my eyes or histogram to check highlights don’t blow out etc but I find my Nikon tends to underexpose using the “recommended” centre on the meter. Have you found that on any cameras you’ve used?
I can often go 3-5 clicks in the overexposed zone, no overexposure in highlights, just in fact a brighter image which isn’t so flat. Seems I always have to Lightroom some shadow brightening or tonal contrast to make them pop?
Its difficult in daylight trusting the LCD though.
Hi Chris, no unfortunately not. Remember the reflector is reflecting only the ambient light in this shot so if we changed the shutter speed to reduce ambient light we would also reduce the light from the reflector. With flash that would not happen, the flash power would remain mostly the same.
Also, in regards to my comment above, this looks so unnatural as you can see the shadow on the right side of her face (which is caused by the reflector) but you can clearly see the shadow is created bottom up, rather than top-down like you’d find from the sun. Please advise as I want to understand the correct way of doing this.
Hey Karl,
I was always taught that when using a reflector as your light source, you should always point the reflector from top-down rather than from below. Please advise.
Hi Dominik, you should but I had no choice in this instance as Ben couldn’t get an angle from the light from above only from level with her.
Actually let me ask that again because I know you could rescue some shadow detail, Karl even said that in the video. In the scene depicted in this video, could a Lightroom edit of an image without a reflector get close to the final image with reflector?
Hi Justin it certainly wouldn’t have the same sparkle or quality of light.
If you don’t have an assistant to hold a reflector, can you use Lightroom to increase the exposure on certain areas of the image if your camera has good dynamic range?
Hi Justin, I would prefer to use a spare lighting stand with a reflector holder.
Thank you for great examples!
Hello Karl,
This video was really helpful by explaining the importance of the reflector.
I did not have any clue that equipment is that helpful.
Many thanks! 🙂