
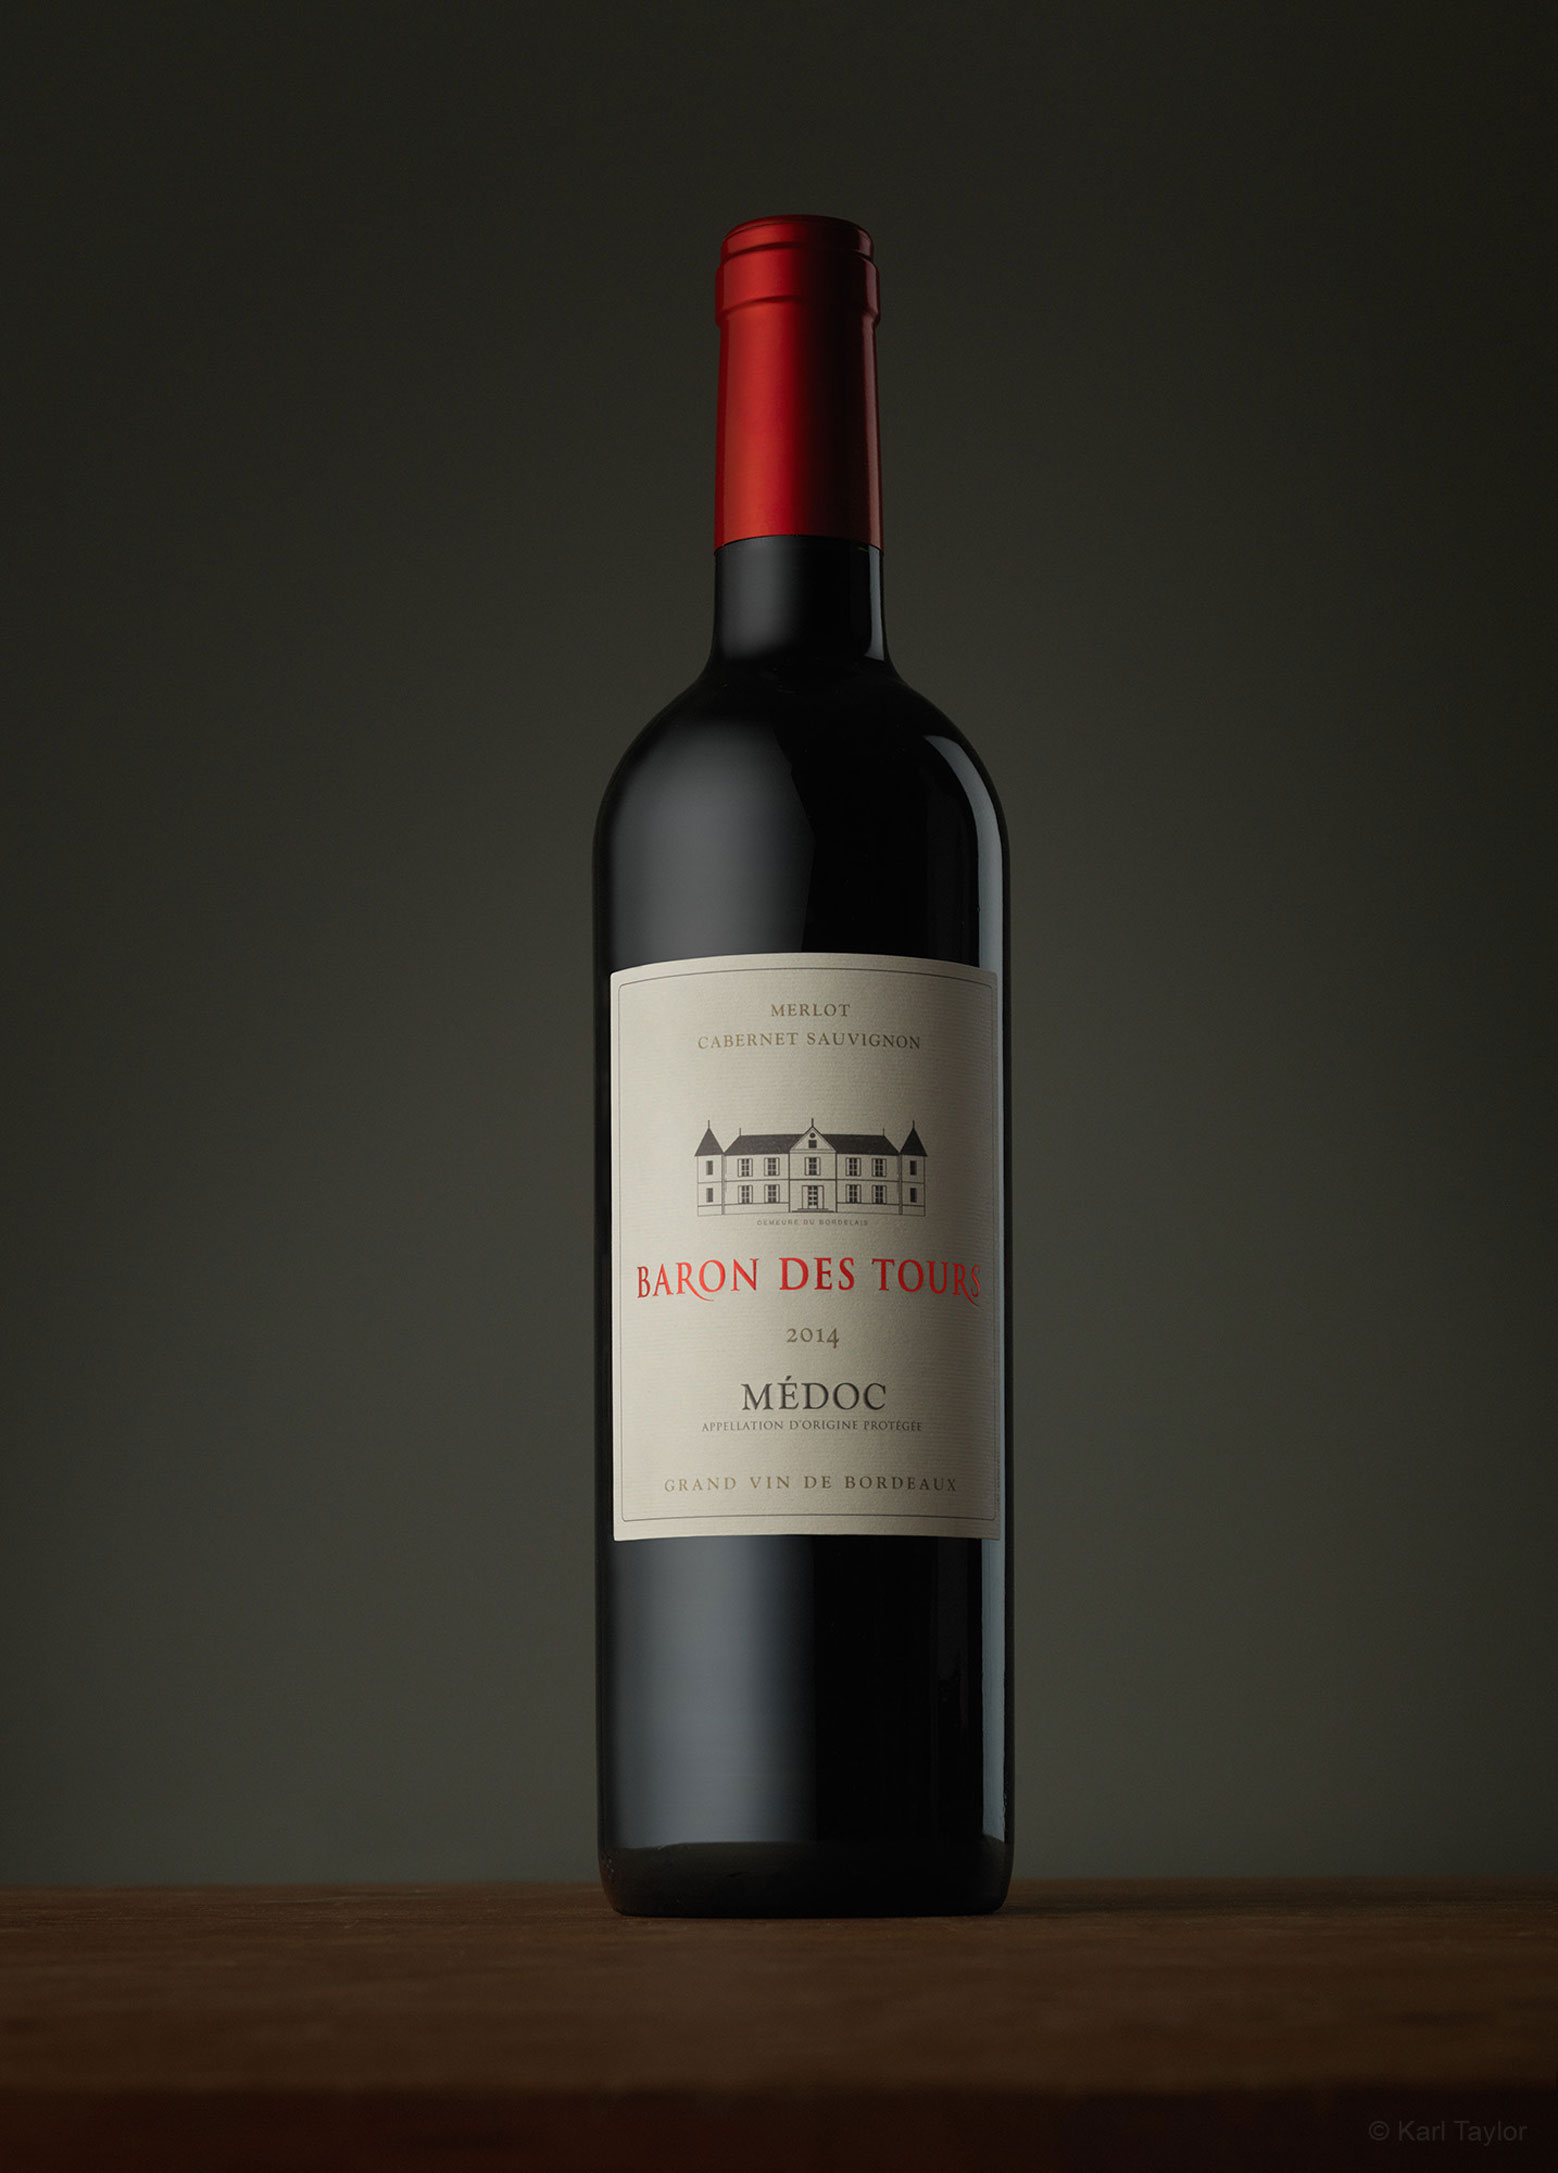
Wine Bottle Photography
Struggling to get your bottle shots right? Let Karl show you how to light them like a pro.
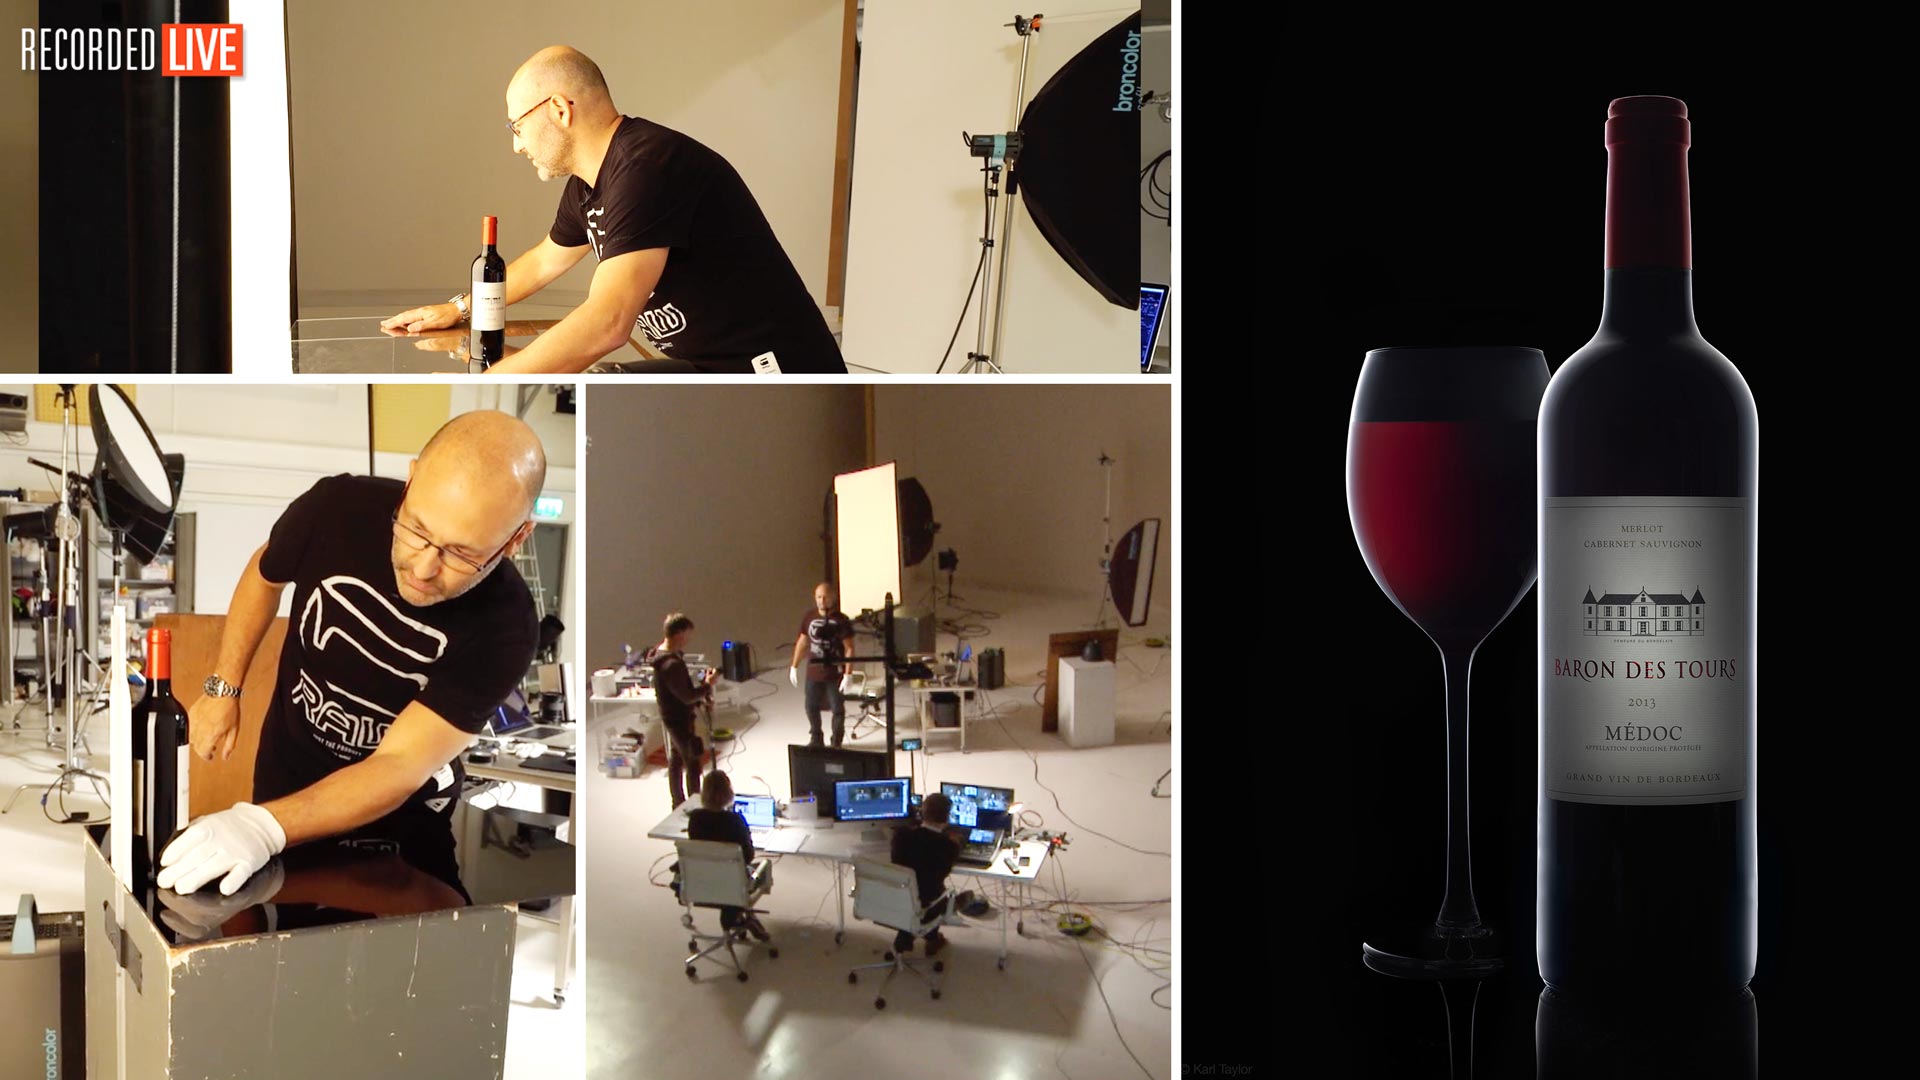
In this product photography workshop, recorded LIVE, you’ll watch Karl shoot a bottle of red wine. As he does so, he shares a host of useful techniques and tips to help you improve your own bottle photography.
Demonstrating two different lighting setups as he captures a variety of images, Karl explains the modifiers, background choices, lighting considerations and post-production requirements you need to replicate each one for yourself.
Learn from a pro and follow Karl step by step as he shows you how to achieve the perfect photograph of a bottle of red wine!
In this class:
- Product photography: How to photograph wine bottles
- Product photography tips
- Lighting modifiers for product photography
- Rim lighting techniques
- How to control reflections in bottles
- Working with composite images
- Correcting image distortion
- Photographing using coloured gels
If you enjoy this class, check out Whisky Photography or explore our huge Product Photography section.
Questions? Please post them in the comments section below.
Please note that we no longer sell diffusion material directly, but Visual Education subscribers are eligible to receive a wide range of discounts from top equipment suppliers.
Comments
Hi From New Brunswick Canada!
I have a question regarding the softbox. I am not sure what it’s called, but my softboxes have an “inner” lining that can be added or taken off. when doing this shot, (if your soft boxes come with this inner lining) do you remove it or keep it on as well as the outer “shell” and then scrim?
thank you
Hi Jacqueline in Canada! Yes the inner diffusion helps spread the light so that it is more even when it comes out of the final layer of diffusion on the front layer, generally advisable to keep both layers of diffusion even when using with scrims.
Hi Karl, when shooting a group of wine bottles (3 to 5) together at different heights and distances from the camera, is it better to light them separately with the full prop setups, background, surfaces etc and then composite them in photoshop or it’s possible to do it all in camera?
The background would be something a large piece of vinyl with prints/patterns on it.
I would love to see more product and food tutorials with group shots as that’s what more and more clients are requesting.
Hi Joycelje, it is generally easier to light the wine bottles individually and then put them together after for large group shots because if you have a group of bottles then they can block the light from each other and also pick up each other’s reflections. You might find this video useful too – https://visualeducation.com/class/photographing-in-a-small-studio/
Hi Karl. Love that diffused rim light. In regards to the size of the softbox behind the bottle, being 4feet wide and 6feet high. Does the height play much of a part? If one has a lower ceiling space I presume one could flip a 4foot by 3foot softbox on the horizontal 4 foot and get the same look?
Hi Mark, no on a wine bottle you would be absolutely fine, as long as the light is able to wrap around the bottle. You can also shoot on a lower table if height is a problem but to be honest I wouldn’t expect the light to need to get more than 50cm above the top of the bottle to be effective.
Great tips to save money and awesome techniques to get the best shot. Thanks.
Hello Karl, in order to shoot the glass and bottle in situ, is it possible to use 3 lights: left, right and top to do the rim light instead of using the single light back lighting?
Yes that may be possible, check the rim lighting version I did on the motorcycle boot in our Product section as a similar example.
Always absolutely love your tutorials, Karl. Thanks to you and your team.
Thank you Jason.
Karl, I know that soft boxes of all shapes and sizes are relatively inexpensive, but would you be able to recommend any alternative lighting arrangement in place of the soft box behind the bottle?
You answered my question in later in the show! Thank you.
OK no worries, glad we got there! 🙂
Hello Karl,
Any chance you can point me where I could find a boom pole like the one you are using to hold the 216 diffusion paper roll? I cannot find one of this length (60″) to hold the roll on a c stand just like you do.
Thank you for the advice.
Hi, you can try Manfrotto – https://www.manfrotto.com/ or https://www.essentialphoto.co.uk/
I have been shooting wines for awhile now.. taken a lot of what you have been doing in your shoots and improving my work. Gotten some great shots. I happen to be working with a vineyard and they have quite a family of wines. Whites, pinks, bright blushes and reds. I have tried photographing two bottles together and of course the bright blush bled colour all over the the pink. I tried it both together, and shooting each separately and compositing. Very different results. Do you always shoot the items separately then composite? And the same for a wine glass with a bottle. The bottle reflections are always affected in some fashion from the glass. Do you always shoot separate and then composite?
And a question about shooting those family of wines together. The reds seem to be so different to capture, so dark compared with the wines that glow. How do you approach when a shot requires both types?
Hi Gary, I can’t remember having to shoot them together but I’m sure I’d find a way to make it work but as you mentioned if it became to time consuming then it might be better to lock the camera down and do them separately. With regards the bottle and the glass together it depends how close the glass is to the bottle, if it will block some light or cause unwanted reflections. This has meant I have done both versions with glass separate and together. I will keep your comments in mind for a future live show on shooting white and red wine together in a set.
I would love to see that future live show, Karl.
These are Gold Karl, thanks! Question, still have a white wine bottle coming up soon? I’ve nailed the red wine, and keen for the next!
Hi NZfritz, thank you glad you enjoyed it, see the clear bottle class here and you can apply the same techniques for white wine or similar techniques to our whisky shoots – https://visualeducation.com/section/beverages-photography/
Thanks Karl, yes I checked out that Tutorial too. Is it possible to shoot a white wine bottle to give the same effect as the red bottle in order to have a consistent look across a brands selection? Or will transparent bottles always need to have a different look due to ‘physics’.
Thanks much, Aaron.
Hi Aaron, You could shoot a white wine bottle in the same set but you’d have to use the silver card behind to illuminate the liquid or it will look dead or off colour. You’d bounce the light off of that card from your main scrim or softbox in the same way as the whisky shoot.
Thanks so much. I’ll give it a crack and send through the results.
Since joining I’ve bought broncolor 30 x 180 + 120 x 180 + a roll of diffusion + made a 4m x 1.5m scrim frame + painted up a bunch PVC board (can’t get black Foam core here, only white) + converted my Dedo projection attachment onto one of my Profoto strobes. So, thanks for the inspiration!
Aaron
Hi Karl. I’m curious as to how you decide when to use your DIY scrim with the tracing paper vs the diffusion material on the c-stand. Is there a difference.
Hi Shana, no difference other than which is the easiest to position and handle.
I really love your tutorials. I bought a gigantic softbox like you use for this video and it’s so great, thanks for all your recommendations. If you don’t already own one, and if you love useful toys, you might consider getting a small laser cutter. You make one template in Adobe Illustrator for something like the wine bottle cutout, and then you can make a new one in 5 minutes, or change it slightly for a larger or smaller bottle. Students can usually find one at their university or local maker shop. I find them very useful and fun.
Thanks. Laser cutter, now there’s a good idea!
Hello Karl! Thanks a lot for giving us the chance to go further! Just a short question, every time that I am going to brighten the label of the bottle I am always struggling with the reflection of the snoot’s light on the up side of the bottle . Is there any way to eliminate it?
Thanks!
Hi Tilemachos, unfortunately the reflection of the snoot will always show up in the glass shoulder of the bottle if you are lighting for the label. You may try holding a flag in position but it’s probably just as easy to run an ‘Action’ in photoshop to undertake a healing brush action. This can work if every bottle is in the same place and same shape then you can automate the process in PS. The only other alternative is a light like the projection attachment, which is so precise that it only lights the label.
Hi Karl,
Really enjoyed this class. Thank you! I know you highly recommend using the larger 120×180 Soft box but I am wondering if I’d be able to get similar results with the Godox 31.5×47.2″ Softbox. Godox makes them affordable and I believe that’s the closest one in size to the one you recommend. So many things I still need to get and I’d rather spend the big bucks on lighting. Thanks again!
Absolutely, I can’t see you having any problem there, especially if using diffusion material.
sorry one last question does the softbox must be soo big? cannot be smaller?
Hi, it can be smaller as long as the light is tall enough to reflect up the whole bottle. Remember the highlight on the bottle is simply a reflected image of the light source. The physics dictates how big (or close) that light source needs to be, but with scrims there are ways to make a smaller light source appear bigger.
Very interesting tutorial as always. I am struggling to find a Picolight to buy. do you have any link to share?
Angela
Hi, thank you. Visit broncolor’s website and it should have there dealer list, or email them for further info.
I found one from Godox. It was made for video. Haven’t tested it as yet and but they recently came out with a Bowen mount attachment.