
Fine Dining Food Photography: Photoshoot
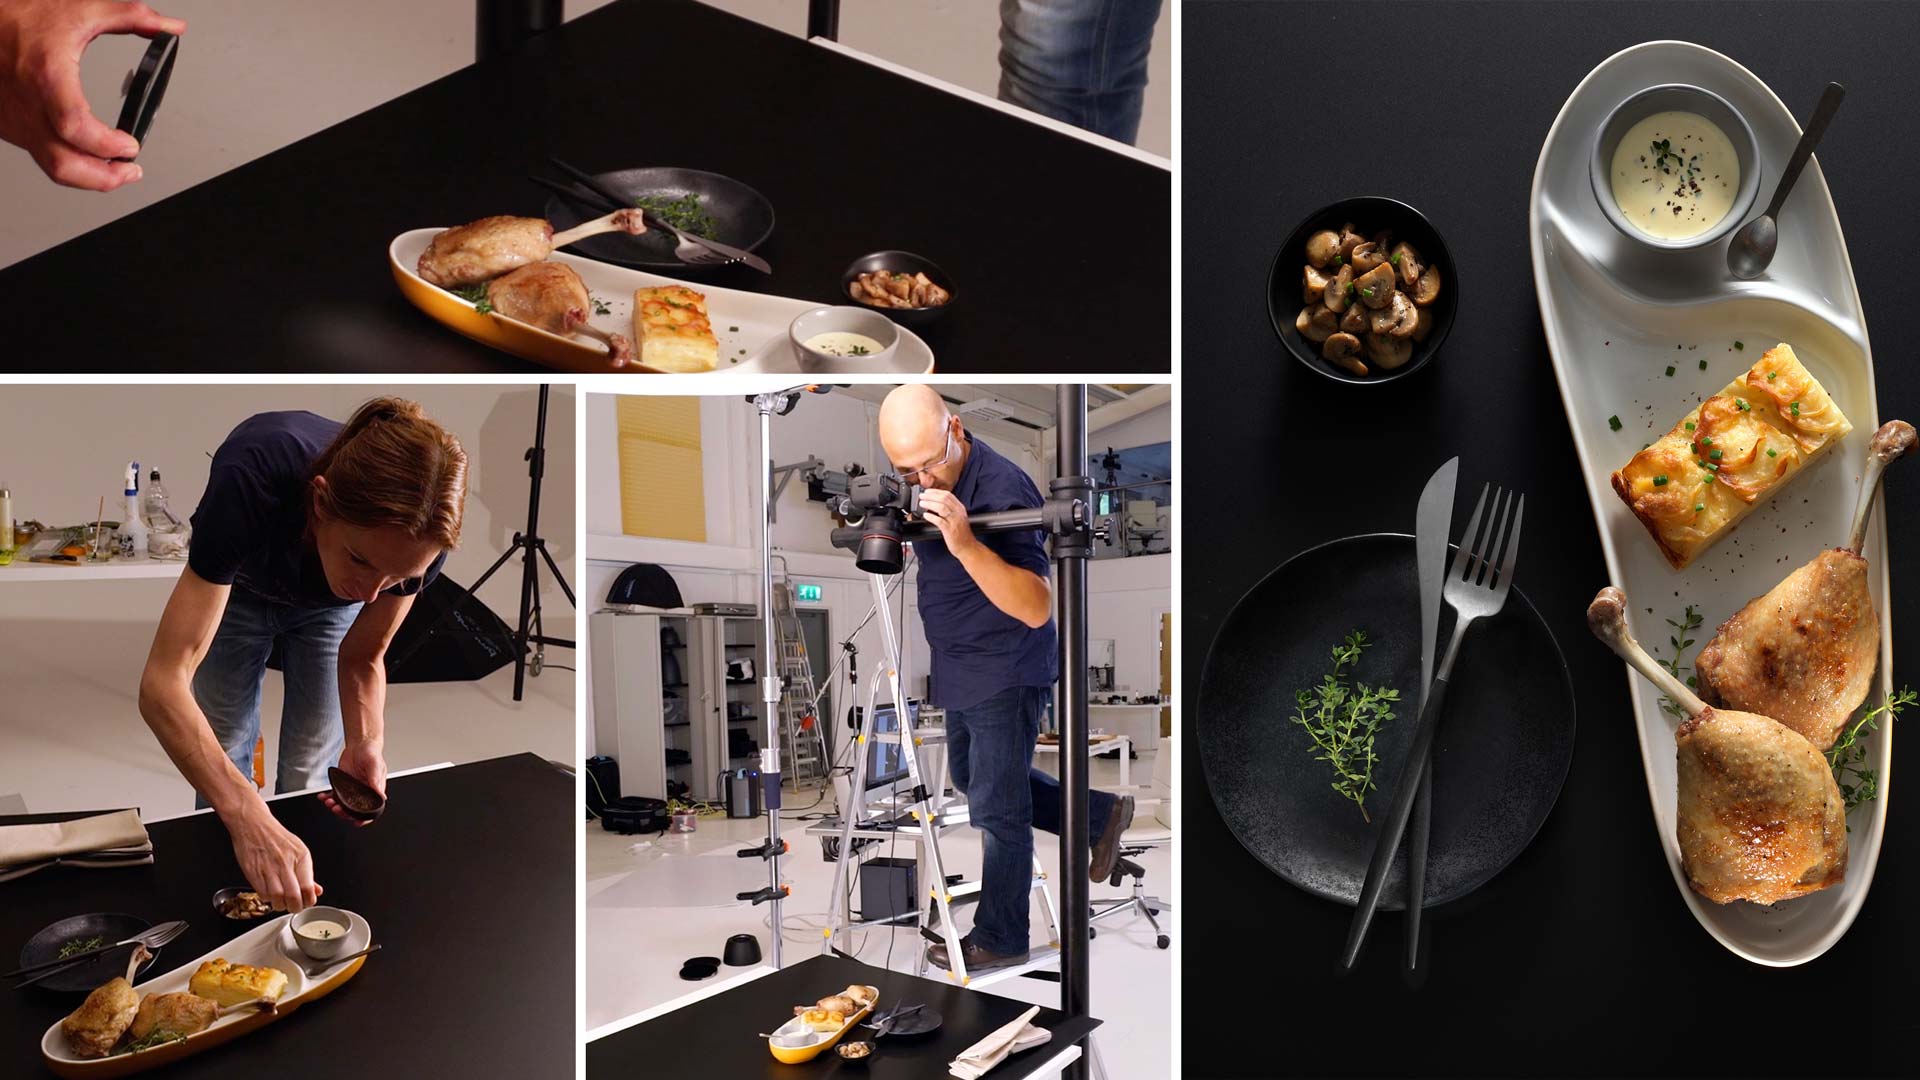
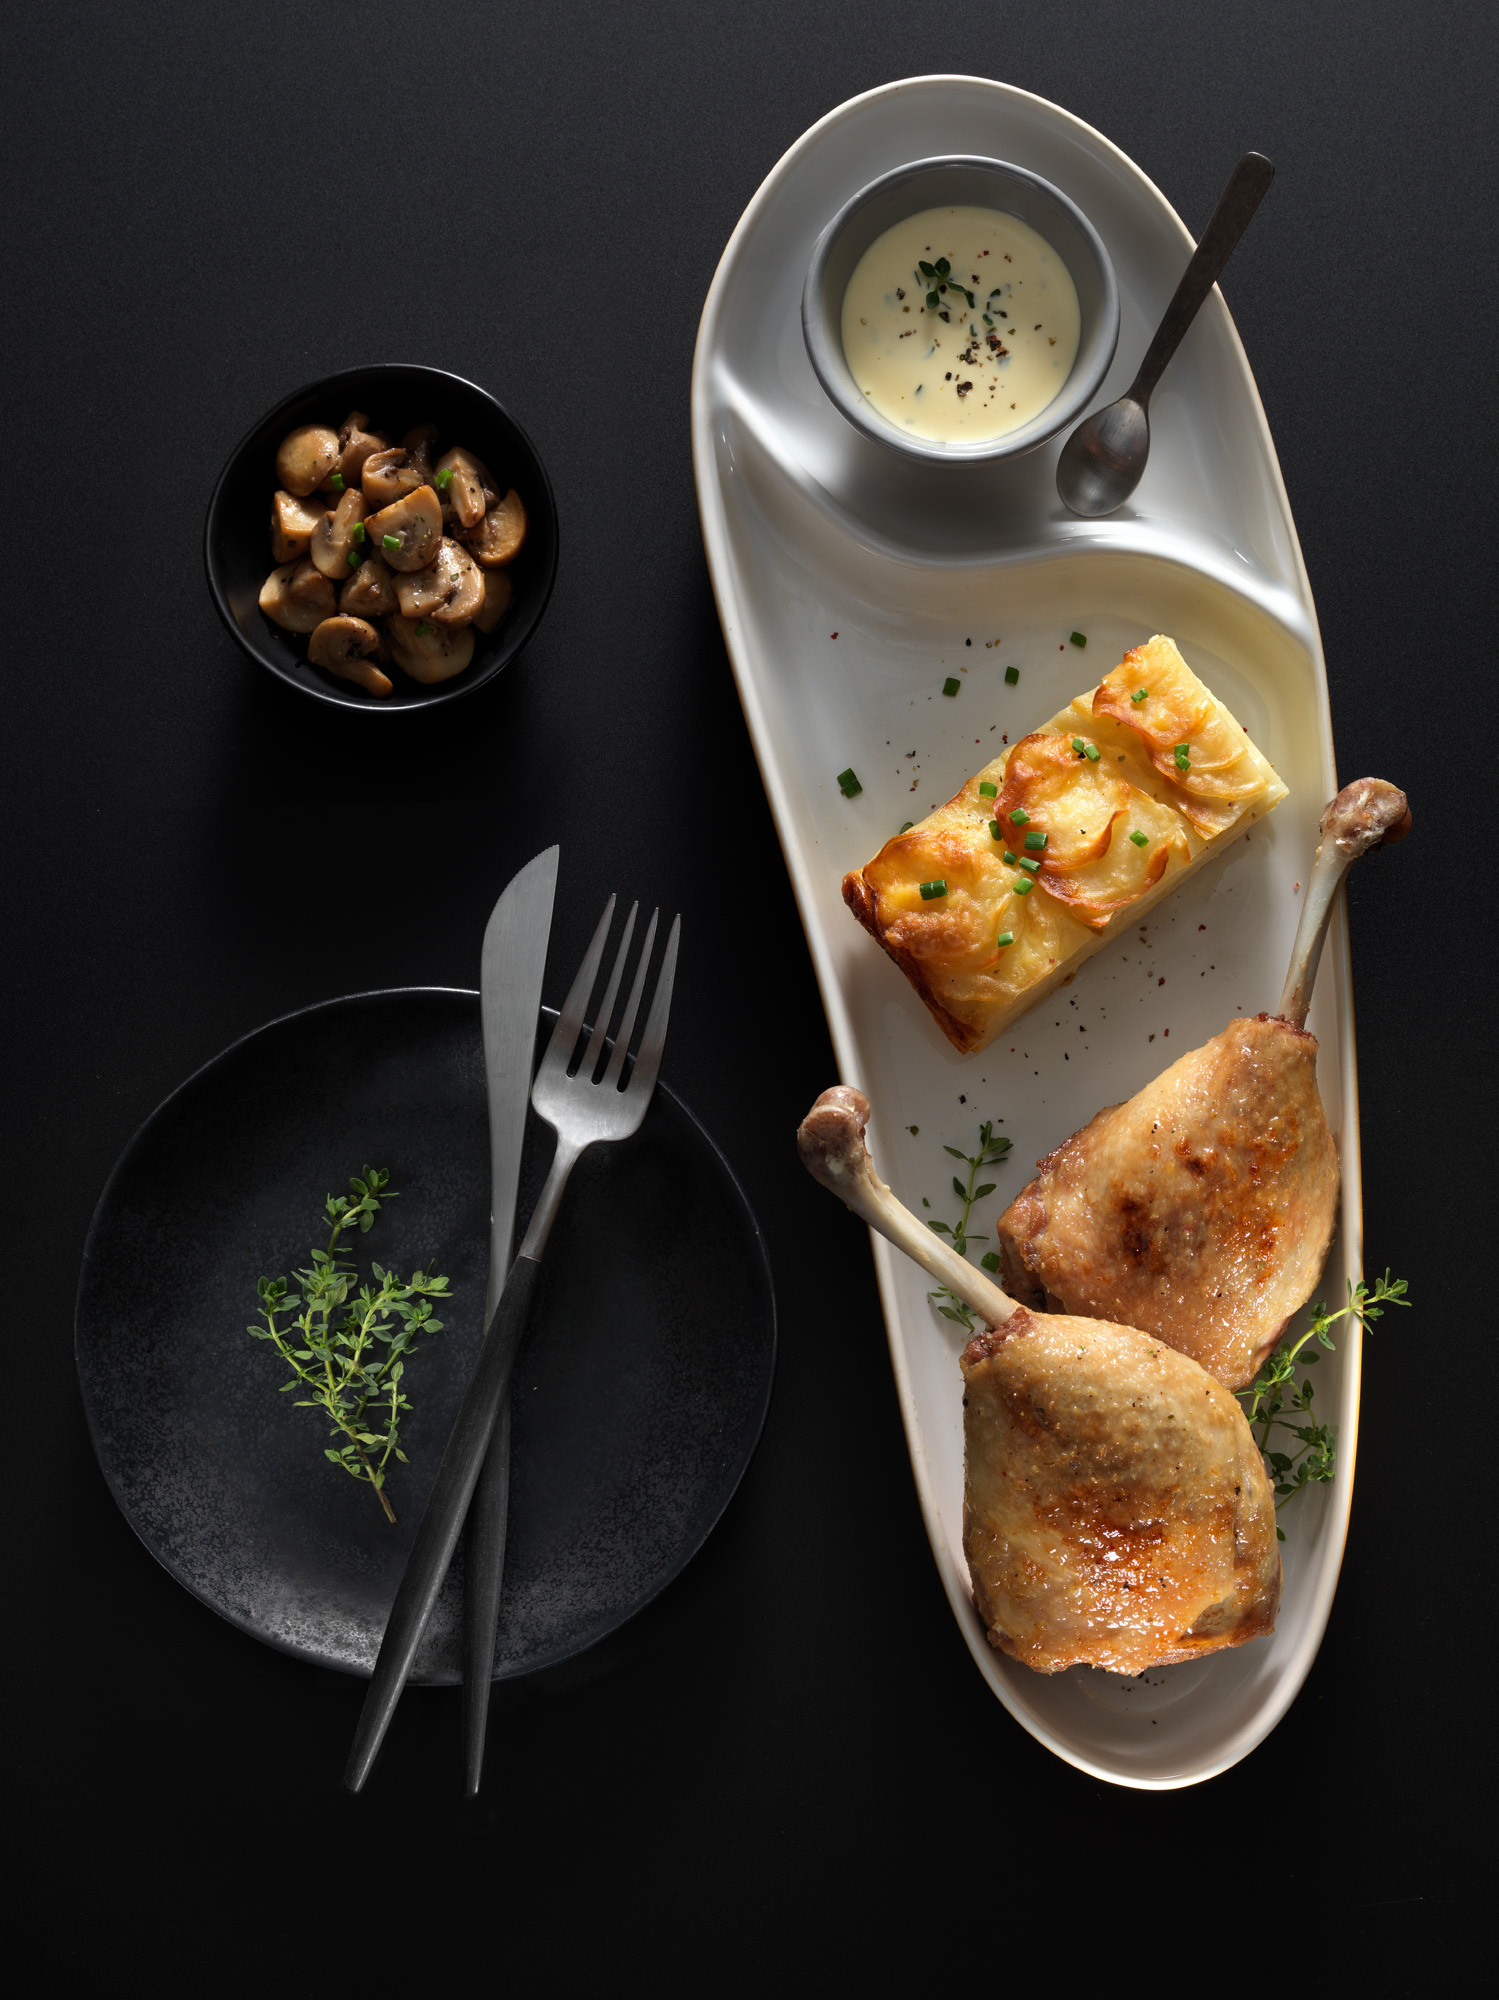
Working with food photographer Anna Pustynnikova for this series of food photography classes, Karl and Anna set about creating a sleek and stylish shot of duck leg confit for the next food photography class. Together, the pair demonstrate essential preparation, styling and lighting techniques for eye-catching food photos.
In this chapter Anna details her step-by-step styling, building up to the final mouth-watering shot while Karl gradually builds up the lighting and shows simple techniques to highlight key elements of this delicate dish.
In this photography class we cover the following:
- Product Photography: Food Photography
- Photographing food in plan view
- Food styling for different camera angles
- Photographing food using multiple studio lights
- Selecting depth of field for food photography
- Achieving focussed light with alternative lighting techniques
- Full frame vs medium format — results comparison
If you enjoyed this food photography course, watch Anna’s live show here.
Comments
What would the difference have been had you used a soft box in back as opposed to diffusing paper?and why did you fill from the top and not the left side?
Thanks!
Hi Chay, the light I created with the scrim at the back was more centrally strong (less homogenous) than a softbox and that adds a more 3dimensional quality to the light and is also better on gloss surfaces (see gradient lighting theory in portrait section chapters 1-15). The fill from above was the most obvious choice as we were shooting from above so we are looking to control the shadows inside the bowl etc which would not have been possible if we were putting a fill light from the side as that would just add shadow to the opposite side.
What are you using as the black surface? it’s not looking reflective which is what I am looking for.
Hi Tsour, this is Matt Black Acrylic.
Karl and Anna Thanks So much for the tutorial ,..I like the effort that you do to use different lights set up , using mirrors and simple tricks to improve the ambiance and mood of the composition, because usually beginners as me work with natural light and reflectors because is affordable, however is clear for me that artificial light is necessary to move to the next step as light and composition are the main components for a successful job and beautiful photo.
I would like to know why technically speaking in this case you didn’t choose soft box or octobox ? instead you use backlight and screen.
settings to shoot were f11/f16 to have more DOF and the focus was in the gratin,… you use top view angle to shoot, maybe with this angle the focus point was not so relevant because everything is in the same plane ,..but how can we know where to put the focus point to get a clear image of all the elements presents in the composition if for example we shoot in 45 degree angle or the elements are positioned in different planes ? what kind of focus do you use ? single focus point?
I have issues with that when every element have a different depth or is in a different plane I focus one thing but the other look blur,..is necessary shoot several pictures with different focus and after combined then or how to have all the scene focus ???
thanks in advance for your time to answer me.
Hi Maria, I’m glad you are enjoying the course and thank you for your feedback. When you watch some of the other food courses with Anna then you will see we shoot some of these at a 45 degree angle and some have shallower depth of field but you will notice we will always place the focus on the hero of the shot. You will also see us change DOF until we are happy with the shot. Again when you see the ‘Berries’ shoot it will become clear to you what happens when I change from the Octabox to scrim lighting. Thanks Karl.
Hello Karl,
Quick question : What did you use to make the sauce spoon stay put?
They did not have the Canon 5ds at the time you shot this video? That would have been a better comparison. But less brownie points for the Hassy. Overall great lesson.
Very expensive setup .. make it unfordable for beginner food photographer.
Hi Emmad, to do any job properly you need some of the necessary tools. We only use a couple of studio lights and in many of these food tutorials only one light and a 35mm camera so I don’t see how it could be made more economical if you want to do a proper job?
Thank you for your reply .. and, i mean is it important to own Hasselblad which it cost 45000 $ to do food photography.
Hi Emmad, no not really unless you are at the top of your game, as you saw in these tutorials we captured great shots on a 35mm camera.
I’d prefer to use a Hasselblad as the tonal range is better and for me it’s easier to work with but no it’s not really important for food photography
I thoroughly enjoyed this session. I never knew how much goes into this type of photography from the prep to the shoot. I’m glad you showed the differences between the hasselblad and the canon. You can really appreciate the quality of hasselblad with the comparison. The use of those things and the card to control the light pockets was very impressive.
That was a great tutorial, thank you both! It was very informative and sometimes funny 🙂 (but sometimes even terrifying when you Karl were balancing on your ladder)
Please answer some questions:
1. Is that picture from Canon or Hasselblad?
2. Did you have to clean that smudge on the plate seen on 21.33 ? If yes- on post or during preparation?
3. I liked the effect of scrim and watching preparation stage I’ve noticed that baking paper looks like that scrim. So if I have no scrim do you think I can use baking paper instead? Will the effect be similar or at least close to it? (I mean white parchment paper)
Hi Anna,
1. I did on both, I think the final one on my Hasselblad is the one on my website.
2. We must of cleaned it as I don’t remember having to retouch one?
3. Tracing paper will work, baking paper will probably give a false colour and I think it is too patchy.
Thank you Karl!
Which Scrimms are you using and which thickness most of them have for this kind of diffuse light.
All the best Michael
Hi Michael, https://visualeducation.com/product/lighting-diffusion-rolls/ if you want the actual name of the brand and size etc, please email us through the website, thank you.
Which dimensions usually have the backgrounds and surfaces (pink, black and grey) that you use like table?
Thank you Karl.
Hi Justiniano, about 1m x 1m is good.
Hi Karl,
3 Make-up Mirrors 15x are fine?
Maybe you told that in the video but I have some problem with English…
Thank you in advance!
But would editing the Canon photo through sharpness and tone curve bring it closer to the Hasselblad.
Another great learning video. Thank you Karl.
Hi Anne, yes it would but of course the better the original image to begin with then the more efficient you can be. Many pro’s shoot with 35mm such as Canon and Nikon too and as you will see in the other food tutorials we used the Canon, but medium format will of course be an improvement just in the same way back in the days of film we used medium format film cameras for the same reasons.
These live shows are more educational even than regular courses for me, i can see the trial and errors about shaping the light. It would be amazing to see some about other products!
Thanks again Karl !
Delicate preparation with attention to detail, and a fantastic end result.
Well done Karl and Anya!
Thank you Marcos
one of the most pleasing compositions in food photography section.
GR8 job Karl and Anya