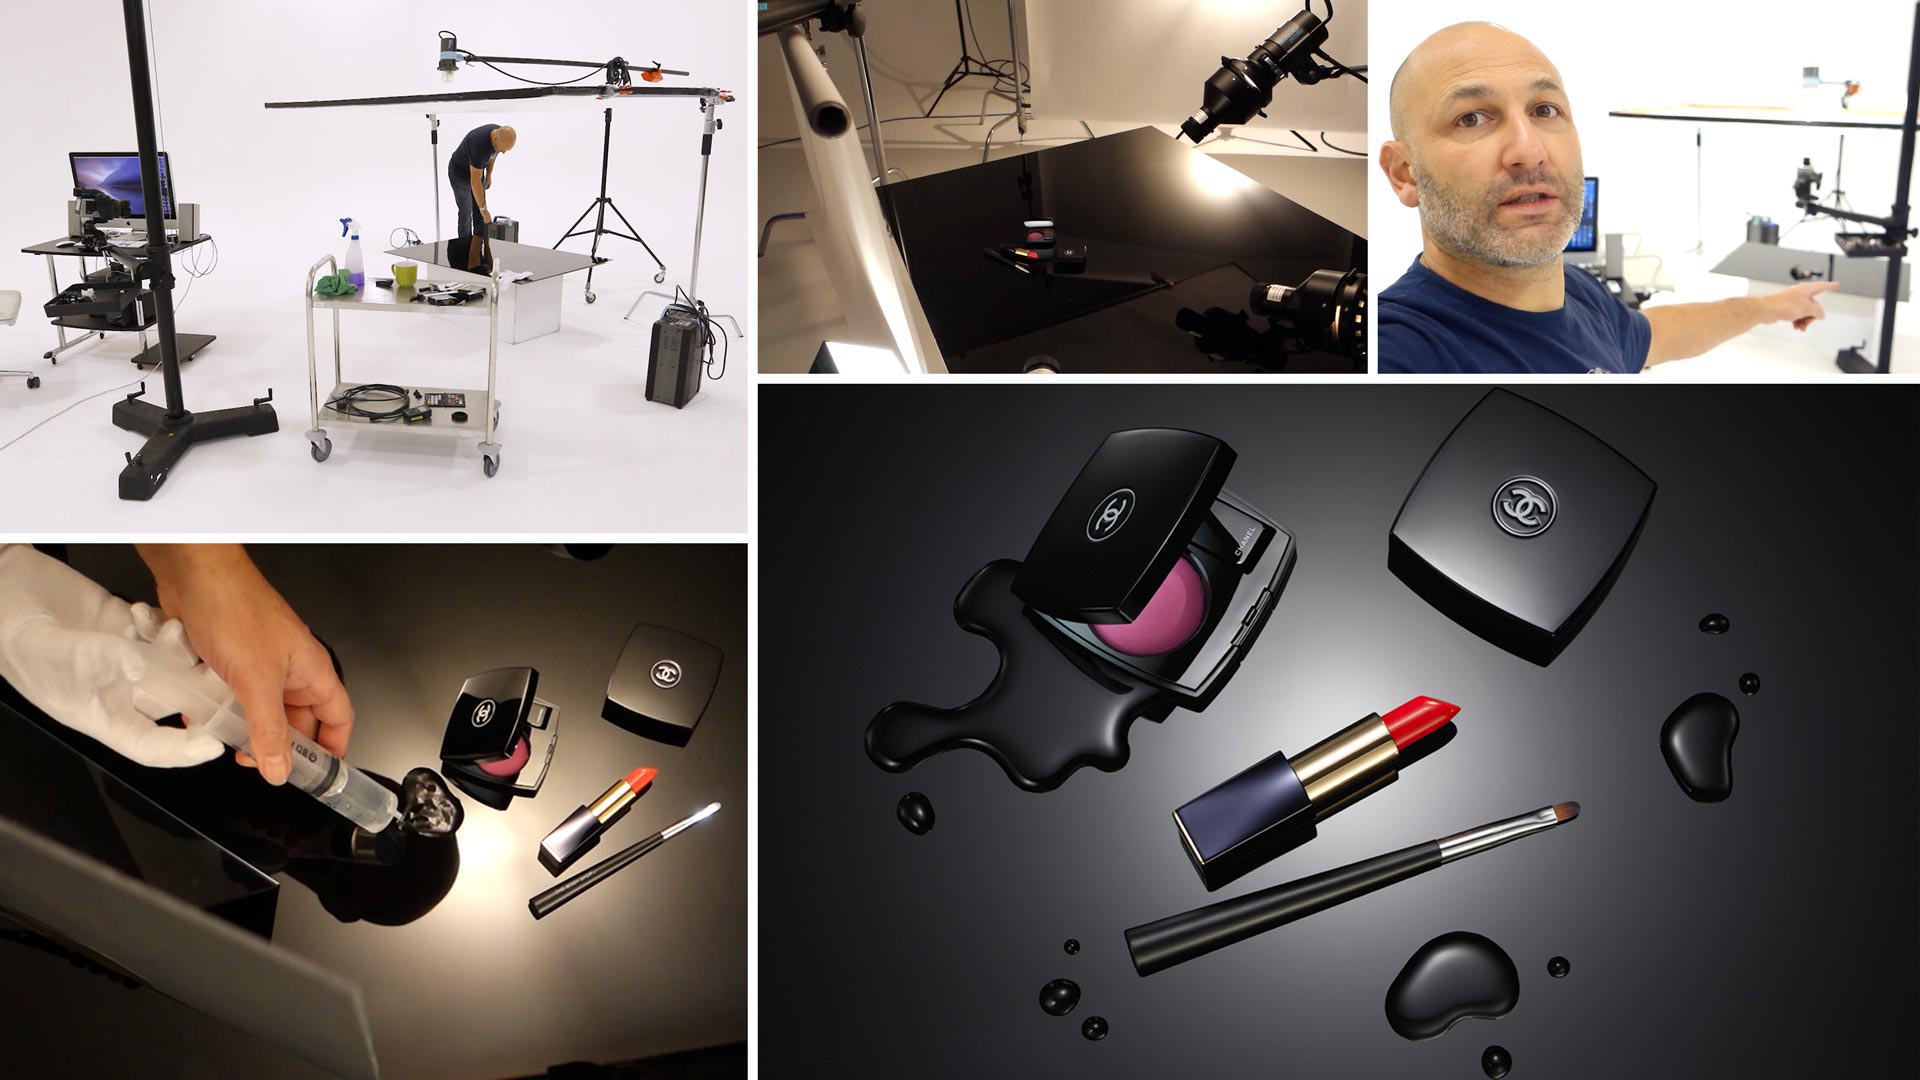

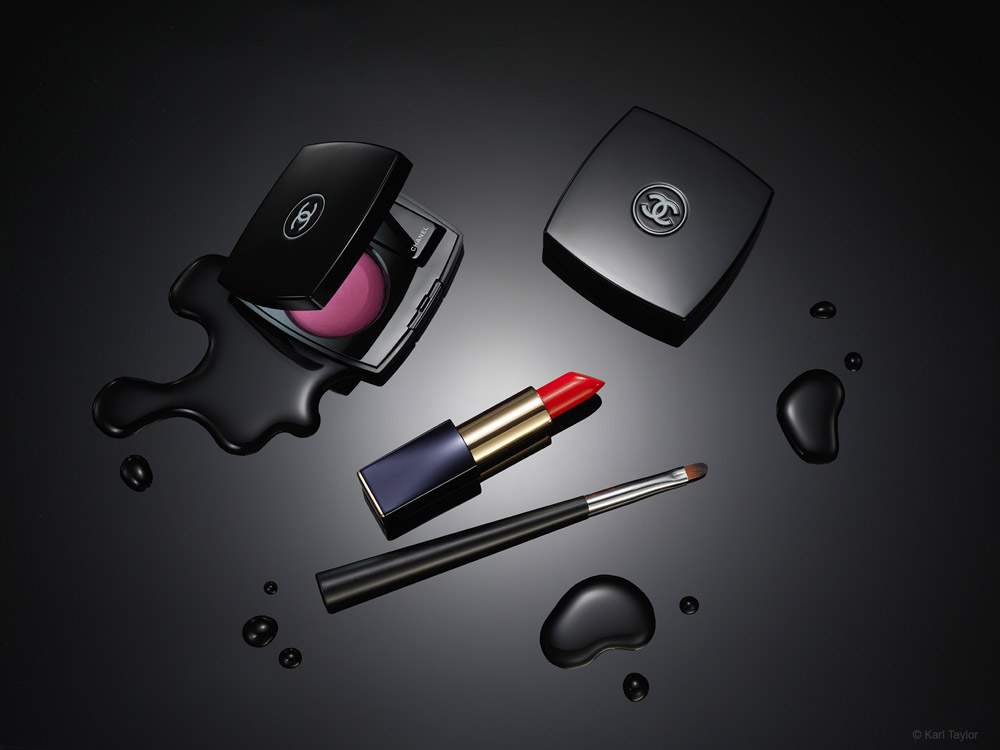
Black Gloss Backdrop Cosmetics Photoshoot
In this insightful product photography class Karl shows you exactly what can be captured straight out of camera without resorting to post-production to resolve what, in fact, are easily fixable problems.
The techniques demonstrated in this class include how to precisely control light, common misconception about lighting ratios, how to visually asses lighting requirements without a light meter and how to gradually build a lighting setup for product photography.
In this product photography class we cover the following:
- Product photography: How to photograph cosmetics
- Product photography tips
- How to photograph liquids
- Visually assessing light without a light meter
- Lighting setups for product photography
- How to achieve gradated light in product photography
Comments
Karl, thanks so much for sharing! Definitely interesting to see how to pull off this type of image with such high production value. One thing that I have been curious about since watching your videos is how you used to make shoots like this work in the days of film. It seems like so much of your workflow relies on this frequent visual inspection. Do you think its fair to say that shoots that require this much fine grained control were just not possible in those days?
Hi Nassredean, that’s a very good question. In the days of film we use to shoot this sort of shot on 5×4 inch cameras and we also used to have a ‘polaroid’ back for the camera so we shot several polaroids first and used a light meter to get to the result quicker. When we were happy with how it looked on the polaroid we would then swap the back to the film back and shoot the final shot. The process was a lot longer and the inspection was less detailed but the process similar.
Ah of course! The polaroid back! Thank you Karl, this makes a lot of sense.
Amazing job! I love the intention to get it all in one shot. Truly inspiring! I am assured this will help take my product work up a notch.
I used to make so many items myself to use in studio when I was a photography student. It’s always best to know more..
Amazing tutorial, it was great meeting you at the Metropole Hotel in London.
All the best and look forward to lean more from you.
Have a great weekend
Thank you Abdelfatah.
hahahaha, you make it look so easy, im not even think about do one of this works but this is like a tv show i can watch this all day and smile just because its amazing what you doing, and yes i learned a lot from essentials and i still subscribed because is fascinating just watch this courses, thx for share this knowledge…..
Thank you Andy.
This was an amazing shoot! Great insight to professional product photography. Some of the fun will be trying to figure out lighting with the equipment I have. If not, then I know what I need equipment wise to begin to achieve these results.
Hi Karl
I would love to see a video on home made/DIY equipment.
I think this tutorial demonstrates the value of high-end professional product photography. It shows why a photographer with 20+ years experience and all the correct tools for the job can (and must) charge accordingly for his/her work.
Whilst doing a DIY low budget version of this shot might appeal to some, I don’t think it’s necessary because this is a lesson in what it takes to be a true ‘premier league’ professional.
Thanks Mark, very kind of you to say so.
Hello Karl – Followed your video step by step but with a bit more composition because I only have 3 lights. Hope you like the result 🙂
https://flic.kr/p/21u8mcZ
It’s a good result and good practise, especially if you only used 3 lights. As you are shooting lower then you have more black reflections which have started to dominate a little so you might want to thing about shooting more from above or adding fill light into some of those shadows.
Great feedback Karl! Thank you so much. I was trying to understand why the image wasn’t popping. Now all I can look at are those darker areas. Fixing the shooting angle requires a different sort of tripod/saloon stand. I have a very basic tripod. What is important is that I spot these problems and try to work around them. I thank you for nailing the issue with this image! 🙂
Additionally – would using glucose water help control the droplets better? I used tap water and it was runny and didn’t have enough surface tension to “curve” into itself to form nice drops and rounded corners. Very unhappy with how the water turned out in the shot.
thanks again Karl it always good form to have the tools to do the job .as it gave you a better chance of getting the job done right as ex mechanic I would like to see a few sample on how you would make a few lighting for small pockets of lights, thanks again Karl for some much detail , frank garvan
Hi Frank, thank you. To see alternative tools check out the ‘Duck Leg’ food shoot in the ‘Product’ section, cheers Karl.
Thank you so much I truly appreciate all your information.
Cheers Jean.
Hi karl, I would like to understand how to stitch all the photos with theyr best part in a single one. I know how to shoot with focus stacking but with this solution I will be happy to see a lesson on mask layer. Could you do this? thanks
Hi Cristiano, you should find that covered in our ‘product’ section on the watch shoot and the extra chapter on the stacking. Alternatively head to our ‘post production’ section.
We would love to have some DIY video for such shoots..
incredible..:)
I would love to have DIY lighting arrangement.
Yes!) that would be interesting indeed!
Great tutorial/ image made with expensive gear as you said. I believe we are many of us with a tighter budget that would love an example/tutorial of an equal image done with cheaper equipment. Maybe with some DIY equipment, cheaper strobes/speedlights/snoots/grids etc. ?
Done with an Elinchrom FRX-400, a pair of Quadra 400ws heads, a few light stands and elinchrom modifiers like strip boxes, standard reflector and a square soft-box. A LOT more compositing than Karl’s shot but when you can’t afford enough lights (let alone expensive lights), you kind of have to make do.
Hope you like it. I am not happy with the water but hey…
https://flic.kr/p/21u8mcZ