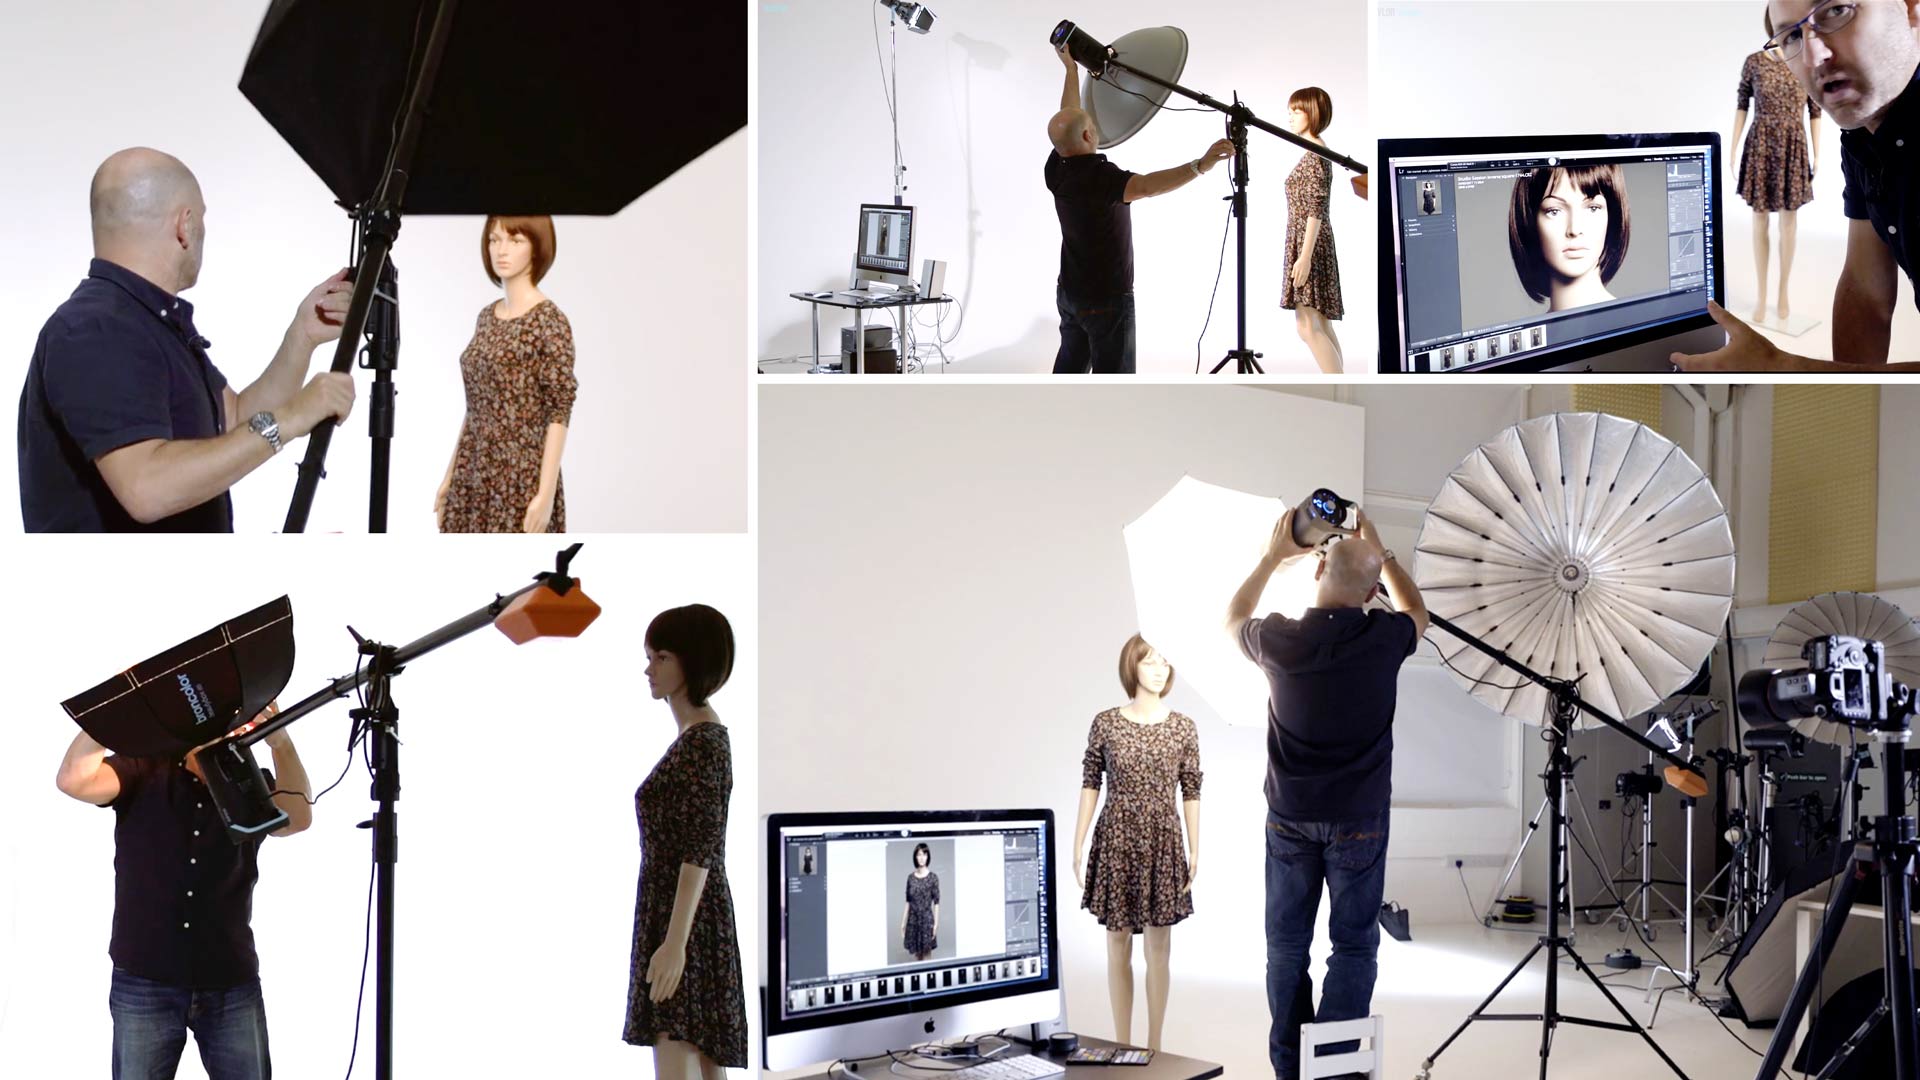

Lighting Modifiers and Their Effects
So many modifiers, so many effects. Learn all about lighting from a seasoned pro.
Have you ever wondered about the difference between a softbox and a snoot? Or whether to use an octabox or an umbrella? If so, this class is for you.
You’ll discover the crucial differences between a variety of lighting modifiers as Karl explains how they work, what effects they create, and when to use each one.
You’ll also cover the principles of hard and soft light and optimise your ability to control light.
In this class:
- Lighting modifiers
- Hard light and soft light
- Direction of light and the impact it has
- Size of a light source and its effect
- How to further modify certain modifiers
- Lens flare and how to reduce it
If you enjoy this class, to check out Precision Lighting: Modifiers and Techniques and Beauty Lighting Comparison.
Don’t forget to try our amazing Lighting Comparison Visualiser tool.
Questions? Please post them in the comments section below.
Comments
Hi Karl!
What would be a great minimum Softbox Size for my situation? I’m currently working in a 2.4 x 2.8 meter dining room photographing products the size of a toddler tricycle or smaller.
I’m willing to spend the extra cash if it means I get to work with larger products in the future, under bigger work space.
I’ve heard overall bigger softboxes offer more versatility overall.. any thoughts? Thank you =)
Hi, the biggest softbox you can fit and afford is the best and most versatile. In a small space like yours also a good white wall and ceiling can be used as bounce reflectors from your studio lighting.
Hi Karl, i have completed level one “Lighting Fundamentals” great course!! Also I want to thank you for working your tail off, you go above and beyond demonstrating everything making each part clear and understandable Top notch stuff mate.
Thanks Robert.
Hi Karl,
When we say light modifiers, are we talking about modifying the model light or flash light? From previous video, what i understood, was the primary interest of light source, is the flash light as compared to the model light and you even had the model light turned off to showcase how flash light is used to illuminate the object of interest
Hi, you need to watch this class: https://visualeducation.com/class/types-of-studio-lighting/ if you have the same questions after watching this please tell me what they are.
Hi Karl,
I hope you are doing well ! I can’t tell you what Karl Taylor Education means to me. I took my first photos ever about a month ago on my iPhone 13Pro max and everyone was saying they looked really cool so I then wanted to learn photography without doing a 4 year school and I fell on your course ! That was it. I just received yesterday all the equipment you advised me to get Sony a7R iii with 16-35, 55 and 90mm
I just wanted to share with you my first picture ever taken on a real camera thanx to your course. You are indeed right that it is not all the equipment you own but how you take the photo.
The only light used was the lamp you can see in the back. The light on the face was done in Lightroom by creating a mask with the brush and bringing the exposure up
F1.8
1/50 sec
ISO 100
https://www.facebook.com/groups/KarlTaylorEducationMembers/permalink/821812912039289/
I would deeply appreciate it if you could give me your feedback. I applied what you said in the previous video about light meters, my photo is underexposed but that was the vibe I was going for so a light meter would have done me no good here.
Have a great day !!!
Hi, It’s great to hear you have your camera and are already enjoying using it. Unfortunately it wouldn’t be fair to give one member of our platform a direct individual critique but not do it for others, this is why we offer critiques in our critique shows where the whole platform of members can benefit and learn from the shows. Keep your eye on our calendar in your home page and also our live shows page to see our brief challenges or critique shows where you can submit your work.
Hi Karl, I totally understand and you are totally right about that and I guess that would triple your work amount 😂 Have a great day and I will be on the lookout for the live critique shows.
Hi Karl, for food and product photography , which Broncolor light modifiers you would like to use, I mean whats your top 5 Broncolor light modifiers for food and product photography? and on the other hand you can make your own top 5 Broncolor light modifiers for portrait photography too . Thank you
Hi Zee, my comments on my favourite modifiers for portraits are covered in this new video: https://visualeducation.com/class/testing-and-comparing-25-lighting-modifiers/ my favourites for food as you will see in our food photography classes vary depending on the mood required but generally speaking the Octa150 is a good softlight choice but I also like to introduce hard light options too such as fresnels or barebulb. My recommendation is that you work through all our food photography classes to learn the process of lighting for the mood you wish to evoke. With photography lighting it is a lot like trying to understand which is you favourite piece of music, your choices will change depending on the mood required.
Would love to see a lighting/modifier breakdown with shooting in the horizontal aspect ratio, and not vertical framing, which limits your closeness of lights to the model. I’m very curious to see if you’d resort to overhead lighting to get the lights closer and above frame, or if you’d place your lights further away from the model and out of frame.
Hi Ty, there are many examples on this platform where I am shooting in the horizontal format where you will be able to see my methods of controlling light. I wouldn’t immediately decide to change my ideas of lighting though based on the format orientation as I always focus on the ’emotion’ I want to convey first and that will dictate my lighting direction.
I’ve been a member for about a day and so far this course is worth exponentially more than the $19 a month. I’ve never seen anyone else so comprehensively explain the difference between modifiers. No questions. Just a huge thank you.
Thank you Big White Dog, much appreciated. Also don’t forget to try the ‘Lighting Comparison App’ tool that we provide members, it’s in your ‘Home Page’ and you can compare all the lighting modifier results side by side.
I could help if you had a pdf with the photos and description (common use) of each reflectors. I would be a lot more practical with a pdf supporting the video.
It could help*
Hi Dario, we have the much more comprehensive and useful ‘Comparison App’ in your customer home page. In that App you can zoom in on the results, and choose which modifier to see compared side by side.
Hello Karl,
I really like the “window” effect of 120×180 softbox but for my home studio that would impossible to fit it. I was thinking about some more flexible alternative and the question is if I would get 1,5m wide diffusing material and simply place a light source in a decent distance from it would I get similar effect or still it would not be so even ? And secong if yes, would 0,75 stop material be a good choice ?
Thank you in advance for help.
Regards,
Jakub
Hi Jakub, if you’ve watched our Lighting Theory section videos carefully, especially the first one you will know that the softness of light comes only from the size of the light source. If you can make the difussion material as big as 120×180 and place your light far enough back to fill it then it will be similar to the 120×180 except you will have more bounce around your studio because it’s not enclosed. However that set up would actually be bigger than a 120×180 softbox so if you’re looking to save space you might be better going with a V-flat setup and firing your studio light into the v-flat for a similar effect. I show both versions in this class – https://visualeducation.com/class/studio-lighting-setups-portraits-three-light-43/
Hello Karl,
thank you for the reply. The V-flat setup is an interesting option. Now I see that probably there are already aswers for all questions I have in mind in different sections.
I think I do understand the theory of light after watching the videos but getting the feeling will still take some time and practice. I have only experience with relatevely small modifiers max. 110 cm umbrella so just wanted to make sure I make a wise choice for first large light source setup which ideally could work well for portrait and product photography and could be easily stored. I suppose that after watching product and portrait section I will have already clear direction.
Thank you,
Jakub
Sorry Karl , I forgot to mention I have four lights rated at 200 watts each. I can however combine two of them so I have 400 watts into one head. Thanks again ever so much. Greg.
Hi Karl, I hate to bother you again but I have a question concerning light modifiers. After watching for the third time , I notice that you did not mention a Magnum reflector. Is there a reason ,as I have seen them being used for some fashion work. Also if you could me some feed back on this along with a parabolic umbrella. Do give you some info on me . I am thinking of getting back into shooting again , but it’s been a long time. As of now I am thinking of shooting in my home doing heads shots and maybe some products . My space is 14×13 with 10ft ceiling . I can back up my camera another 5-6 feet , as there is a cove I can back into. I am looking of get a parabolic umbrella , but I not sure of size . They go from 28 in , 38in , 48in., they all have 16 panels. Any help would be GREATLY appreciated
Hi GregK, I don’t use one as I don’t find it significantly different to a P70 although the magnum is slightly bigger so at a closer range it will be slightly softer but it still creates a hard light effect. I much prefer the parabolic reflectors such as the Para 88cm for sculpting fashion lighting.
cc not available for this video!! in english..
Hello. All CC should be working on this video. Click the CC button at the bottom of the video player and choose your preferred language. If you’re still having problems, please let us know!
Excellent rundown, Karl. Thank you.
Will you be doing a video using the Para modifiers and even the Satellite I see back there?
I am interested in animal studio portraits and am most curious how the modifiers interact with the hair/fur.
On a side note, it would have been great to see the catch lights in the eyes of the middle modifiers.
Keep up the great work, very inspiring!
Never mind, found the Para video. Hard to find much anywhere on the Satellite, has it been replaced by another modifier? Also, didn’t see much discussion around the ringflash. Thanks in advance!
Thanks jpkincel, you will find many videos on our platform covering the paras and some explanations of the Satellite. Also try our ‘comparison app’ in your customer home page that’s a great reference.
Hi Karl,
Thank you for the video.
I have a question regarding the difference between the L 40 and the L 70 reflecters, what is the difference between the two?
And which one can be used with scrim?
Thank you
Hi Louna, the number relates to the angle in degrees of the spread of light. Either or none can be used with the scrim. Watch this live show to learn more – https://visualeducation.com/class/floating-cosmetic-product-photography/
Hi Karl,
I have a question regarding Broncolor modifiers, I have just bought a Broncolor Siros 400, and Im wondering if I need to buy the Broncolor Modifiers or I can buy other brand to use with the Broncolor Monobloc, in other word is it worth the price.
Another question what type of modifier is used to create chiaroscuro lighting.
Thank you very much you are an artist, every time I watch a video im just amazed…
Louna
Hi Louna, there are plenty of options for independent brands, I use mostly broncolor but I have a couple of independent ones including my 70cm beauty dish. The lighting style you are talking about is easy to achieve with something like an Octabox 75cm quite close to your model. Watch this show, particularly the guy in the chair – https://visualeducation.com/class/portrait-beauty-lighting/