
Focus-Stacking Cosmetics
Photographing small products often presents problems related to depth of field. One way to overcome these issues is focus stacking.
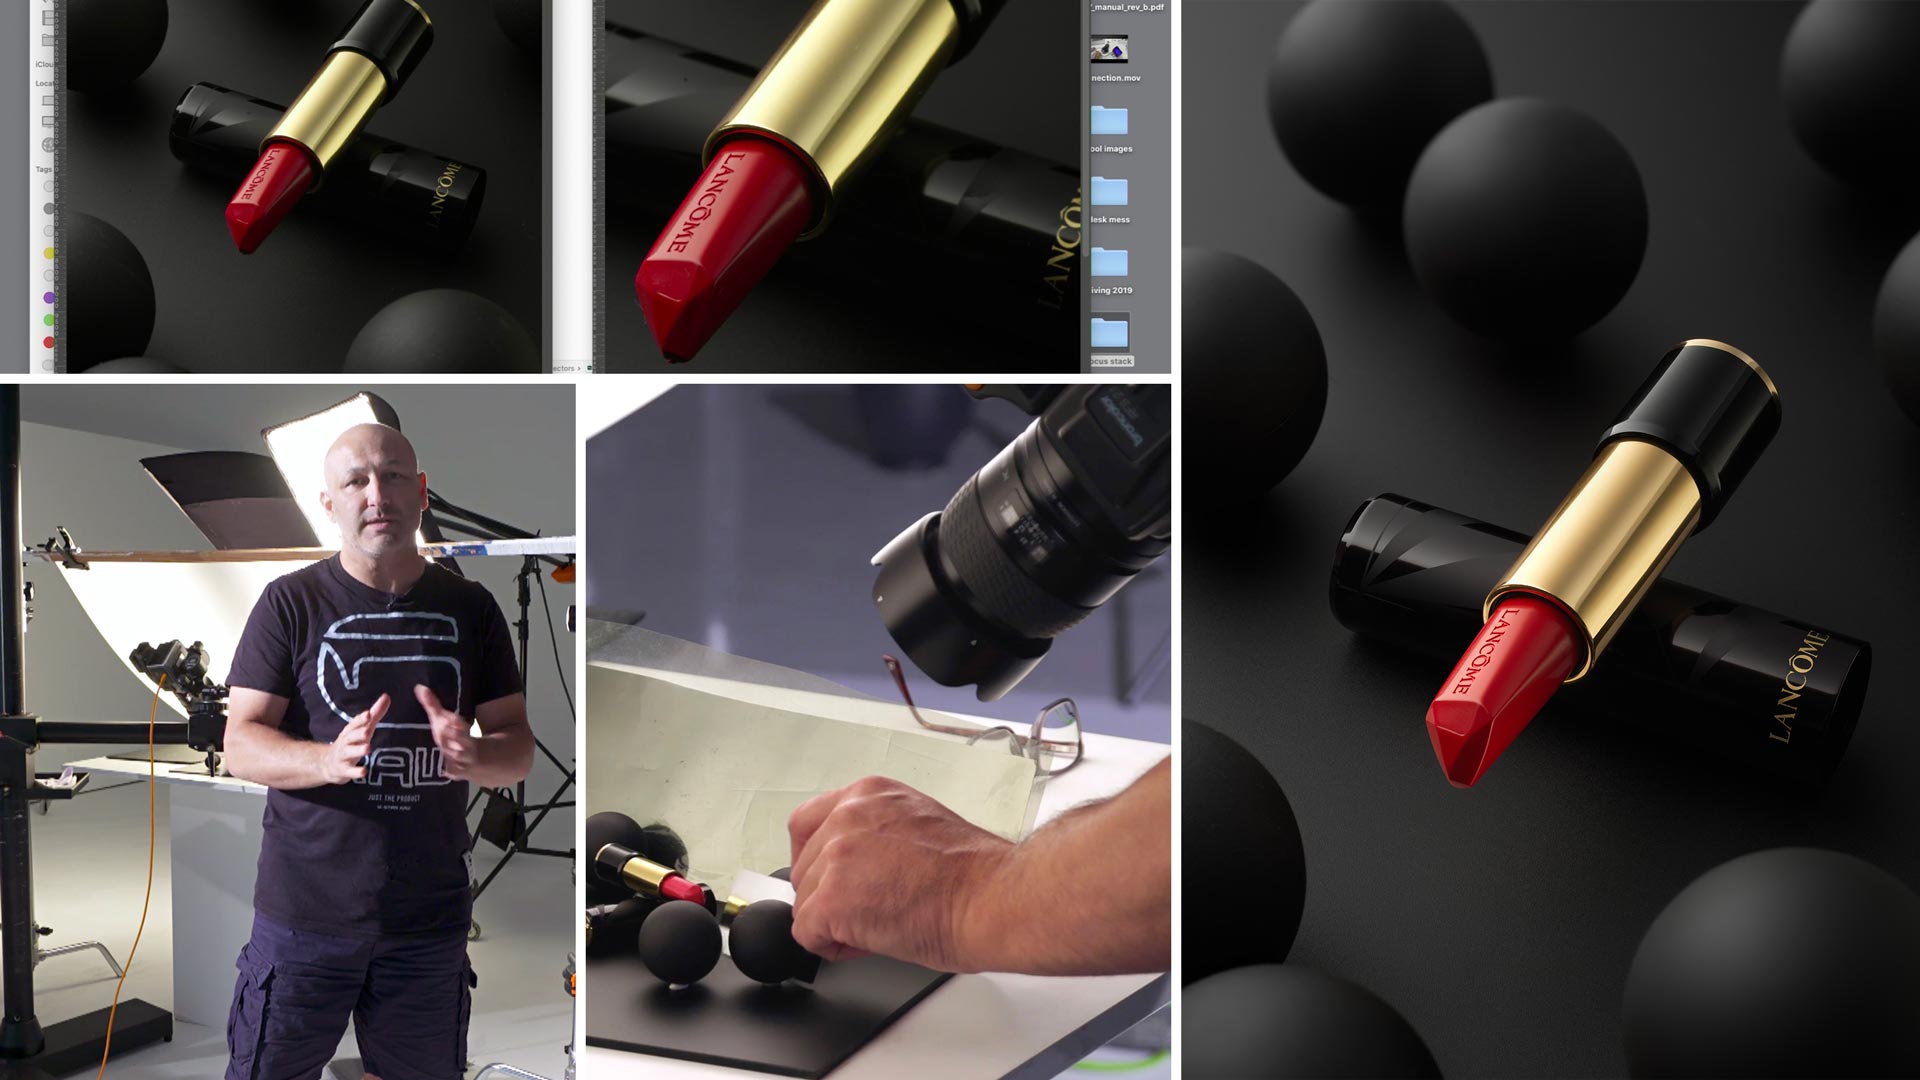
In this live photography workshop, Karl demonstrates how to photograph a close-up macro shot using the technique of focus stacking, explaining what exactly focus stacking is, when and how to use it and how to get the best results.
He covers concepts such as magnification, tilt-shift, hyper-focal distance and more. In addition to showing you how to do a complete focus stack, from selecting the best aperture to changing your focus points and putting it all together in post, Karl also gives a quick run-through of the lighting setup used for the shot.
In this class:
- What is focus stacking
- How to focus stack images for greater depth of field
- Magnification
- Hyper-focal distance
- Tilt-shift photography vs focus stacking
- Lens diffraction
- Software for focus stacking
Questions? Please post them in the comments section below.
Comments
AWESOME! ❤ BEAUTIFUL! ❤ Thank YOU very much 😁
Hi Karl, first class content as always. One question regarding the focus stack; Instead of doing the focus stack twice would there be any reason why you could not of taken the background shot in just one shot and focus somewhere towards the centre of the lipstick to give the required depth of field for the background elements? Or would this cause you issues?
Thanks,
Aidan
Hi Aidan, thank you. Did I do the focus stacking twice, I can’t quite remember. If so can you point me to the time in the video where I said this so I can check why? Ordinarily there wouldn’t be any reason to do so unless it was because I had to remove a reflector which if it was the case then I could have also just taken that particular focus point again but it may have seen simpler at the time to just repeat the whole process. Also now in many of the software such as Capture 1 and Phocus it automates the focus points and stack sequence for you once you’ve told the software the near and far points.
Hi Karl, you first mention doing the two focus stacks at around 25.20. I figured there would be a reason for doing it this way that I was not seeing? I have tried the Helicon Remote with varying results. Currently I am preferring to manually control the focus steps via capture 1, for no other reason that I feel if I rely to heavily on automated systems then It may hinder my understanding/progress (possibly)? It’s reassuring to know that I have at least learned enough to know to ask this sort of question in the hopes that it will help me down the road when I encounter similar issues? Progress!!! ;-). I must have a good teacher?!
Thanks
Hi Aiden, yes it was simply that for one version I needed reflectors in place for the entire stack and then I also needed them out for the entire stack. In today’s live show ‘technical tools tilt and shift’ I explained how Tilt and Shift can help you avoid doing this.
Hey Karl..
Concerning focus stacking and using a rail/shifting the camera without changing focus versus refocusing.. there is a place for it but product photography.. unlikely. I use a powered rail that connects to your computer to calculate microns of shift BUT really that is ONLY needed for extreme close up photography such as the eyes of insects, well beyond 1:1 magnification.. using inverted lenses, enlarger lenses or even microscope lenses. That is extreme macro. Then you must shift along a rail, but for product photography..? I totally agree with you where it is easier to refocus and easily merge the images. I’ve done manual mergers and they require some scaling, either up or down depending on where you start your stack, but even 10-15 images isn’t horrible to do manually.
Hi Gary, thanks for the info – have you seen the insect work of Levon Biss?
Beautiful work.
Extreme macro takes loads of patience. I’m involved with a small group of people who specialize with focus stacked macro work. I do see a less obvious yet important overlap with your work, particularly concerning lighting and applying the same theories but on a much smaller scale. I’ve seen you use hand held fibre optics in a few videos. I built a fibre optic lighting system to use for macro work that inputs a speedlite into a focus box that is connected to a gooseneck set of fibre optics. I even created a small set of modifiers.. using small filters to colour and soften the light. The best macro work pays very close attention to lighting and I think many of your lighting concerns can be be applied in that small arena. Rim lighting, mixing soft and hard ight.. it is just figuring out a method to bring it down in scale. I’m thinking of a solution to use the fibre optics with my strobe system. It could be great for jewelry or other small products.. similar yet quite different to using pico lights.
That sounds very interesting and challenging to bring those lighting techniques down to that macro scale. I can imagine it used on a variety of small subjects, flowers, insects etc to reveal them in a new way.
In case anyone wishes to explore Levon Biss, here are some useful links.
https://levonbiss.com
https://www.ted.com/talks/levon_biss_mind_blowing_magnified_portraits_of_insects#t-323266
http://microsculpture.net
Thanks Andy, Levon would be a great guest for a future show when all of these travel restrictions are gone!
http://microsculpture.net is mind blowing – the level of detail and the amount that you can zoom in, it’s amazing. In the TED Talk he explains that some of the photos are made from 8,000-10,000 individual photos and his focussing rail can move in steps of just 10 microns!
Hi Andy, yes I’ve seen it many times it’s incredible work.
You are an amazing photographer! Thank you. 🙂
All the best for you!
your fan from Poland! 🙂
Hi Julia, thank you that’s very kind and all the best to you too.
Hi karl,
After watching your videos, my product photography skills are now improved & images which i click are becoming extra ordinary.
One question – Do you recommend continuous light instead of Flash Light? if Yes – Why & if No – Why or let me know when to use Flash Light & Continuous Lights.?
Hi, that’s great to hear. In answer to your questions:
1. Flash
2. More power, better depth of field. No need to work in the dark. Most often more full spectrum (apart from HMI continuous).
Karl mi dispiace soltanto non capire la lingua Inglese e non potera capire ma solo intuire, spero che metterai i sottotitoli in Italiano dei tuoi fantastici tutorial
Thank you for all your information and especially the creative lighting..
Now that’s a proper tutorial! Love watching your tuts, and I want all of the students here to realize that you are real deal and do this in real life, not just for social media. The new Canon R5 has focus stacking built in, you tell it the range and it shoots all of the in between shots! Great job as always Karl!
Thank you.
Hi Karl, about golden part of lipstick there is not sharp cut-off edge . Don’t should be necessary to represent glossy surface? thanks
Hi, please take a look at the finished photo on this page and let me know – http://www.karltaylor.com
Thanks again like the show looking forward to the next time
thanks again Karl
Cheers Frank
Karl,
At last, someone who understands that depth of field is related to magnification! When I challenged a speaker at a recent camera club workshop, he said that nobody would understand the concept. Grrr.
Helicon is a great piece of software and plays nicely with Capture One and Lightroom.
Unfortunately, the extension tube (Helicon FB Tube) that you mentioned is only available for Nikon & Canon Cameras, as is the tethering software Helicon Focus. In this situation I would use Helicon Focus for controlling the stack rather than hand focusing, but good to see how easy it is to do manually if you are not a canon or Nikon user.
A very useful demo. Thanks Karl.
Eddie
Thanks Eddie and for the info.
Bonjour je suis Franck Martiniquais FWI et j’ai bcp apprécié ce cours
Merci Franck
I need to meet Ash and share that bottle of vodka… best photography edu in the web. Keep up the good work, Karl.
Same here ;-)))) LOL.
Ha Ha great, I’ll let her know.
Hi Karl
Noticed you used soft-boxes instead of your usual bare bulb setup. What was the reasoning behind this? Is there a rule of thumb as to when to use softbox and when to use a barebulb behind a scrim?
Thanks
Amit
Hello Amit. I might be able to shed some light on this. I believe the strips boxes are used to create a strip gradient that follows the length of the lipstick. A bare bulb would create a different gradient fall off like a ball and would show up like that in the reflective gold part of the lipstick. You can see the darker areas on the gold part are rectangular like the lipstick. Plus the bare bulb would spill light every where affecting how the gradient looks if the light was too far away from the scrim. Hope this helps.
Hi Amit, a bare bulb makes a round ball gradient that will be brighter in the middle of the ball and then fade out to the edges. A thin soft box will make a thin line that can either gradate either side or on one side depending how you angle the softbox (as you see in this tutorial). It always make sense to create a light shape that is more closely matched to the shape of the subject you are trying to light.
Hi Karl
That was a great tutorial, undertaken in very difficult circumstances. Really love the double soft box lighting behind the perspex. If I were to take just one thing from your videos on Product photography, it would be the fantastic use of gradient lighting. I have already started to implement these techniques into some of my day to day shooting and it is working a treat. I’ve also worked with Helicon and agree that it does appear to be more accurate, and certainly quicker than Photoshop.
Just a quick question, you mentioned right at the end that you had shot with one of the Sony Alpha cameras and the 90mm macro (beautiful lens which I shoot with regularly). How did you find shooting with a Sony mirrorless? You’ve often spoken about Canon and Nikon but this is the first I’ve heard you mention Sony.
Thanks again for a great tutorial
John
Hi Jonny, I found it OK especially if I can use it tethered as I’m not a big fan of EVFs just yet but they are getting better. I was surprised by the sharpness of the lens and the quality of the image that it and the camera put out. FF 35mm doesn’t yet match MF but it comes close in many regards but it needs exceptionally good lenses to do so and this lens in particular seemed very good.