
06. Get Creative Shooting in Manual Mode
Now that you understand the fundamental concepts of shutter speed, aperture and exposure, you’re ready to start using your camera in manual mode.
The best thing about working in Manual mode is that you’ll be in full control. By simply adjusting shutter speed or aperture, you’ll be able to fine-tune each little detail of your image. If you want to achieve beautiful images with soft bokeh backgrounds, blur motion to get silky smooth water shots or get crisp, sharp action images, all you need to do is adjust your settings.

How to shoot in manual mode
The good news is that using your camera in manual mode couldn’t be easier. All you need to do is switch to ‘M’ on your camera dial. Now, you have full control. But, “With great power, comes great responsibility”. Any changes you want to make to your settings will have to be made manually — your camera will no longer automatically adjust anything for you.
The first step is to think about what it is you’re shooting. Are you photographing a landscape where you want a large depth of field? Or are you photographing motorbikes, where you need a fast shutter speed to freeze the action?

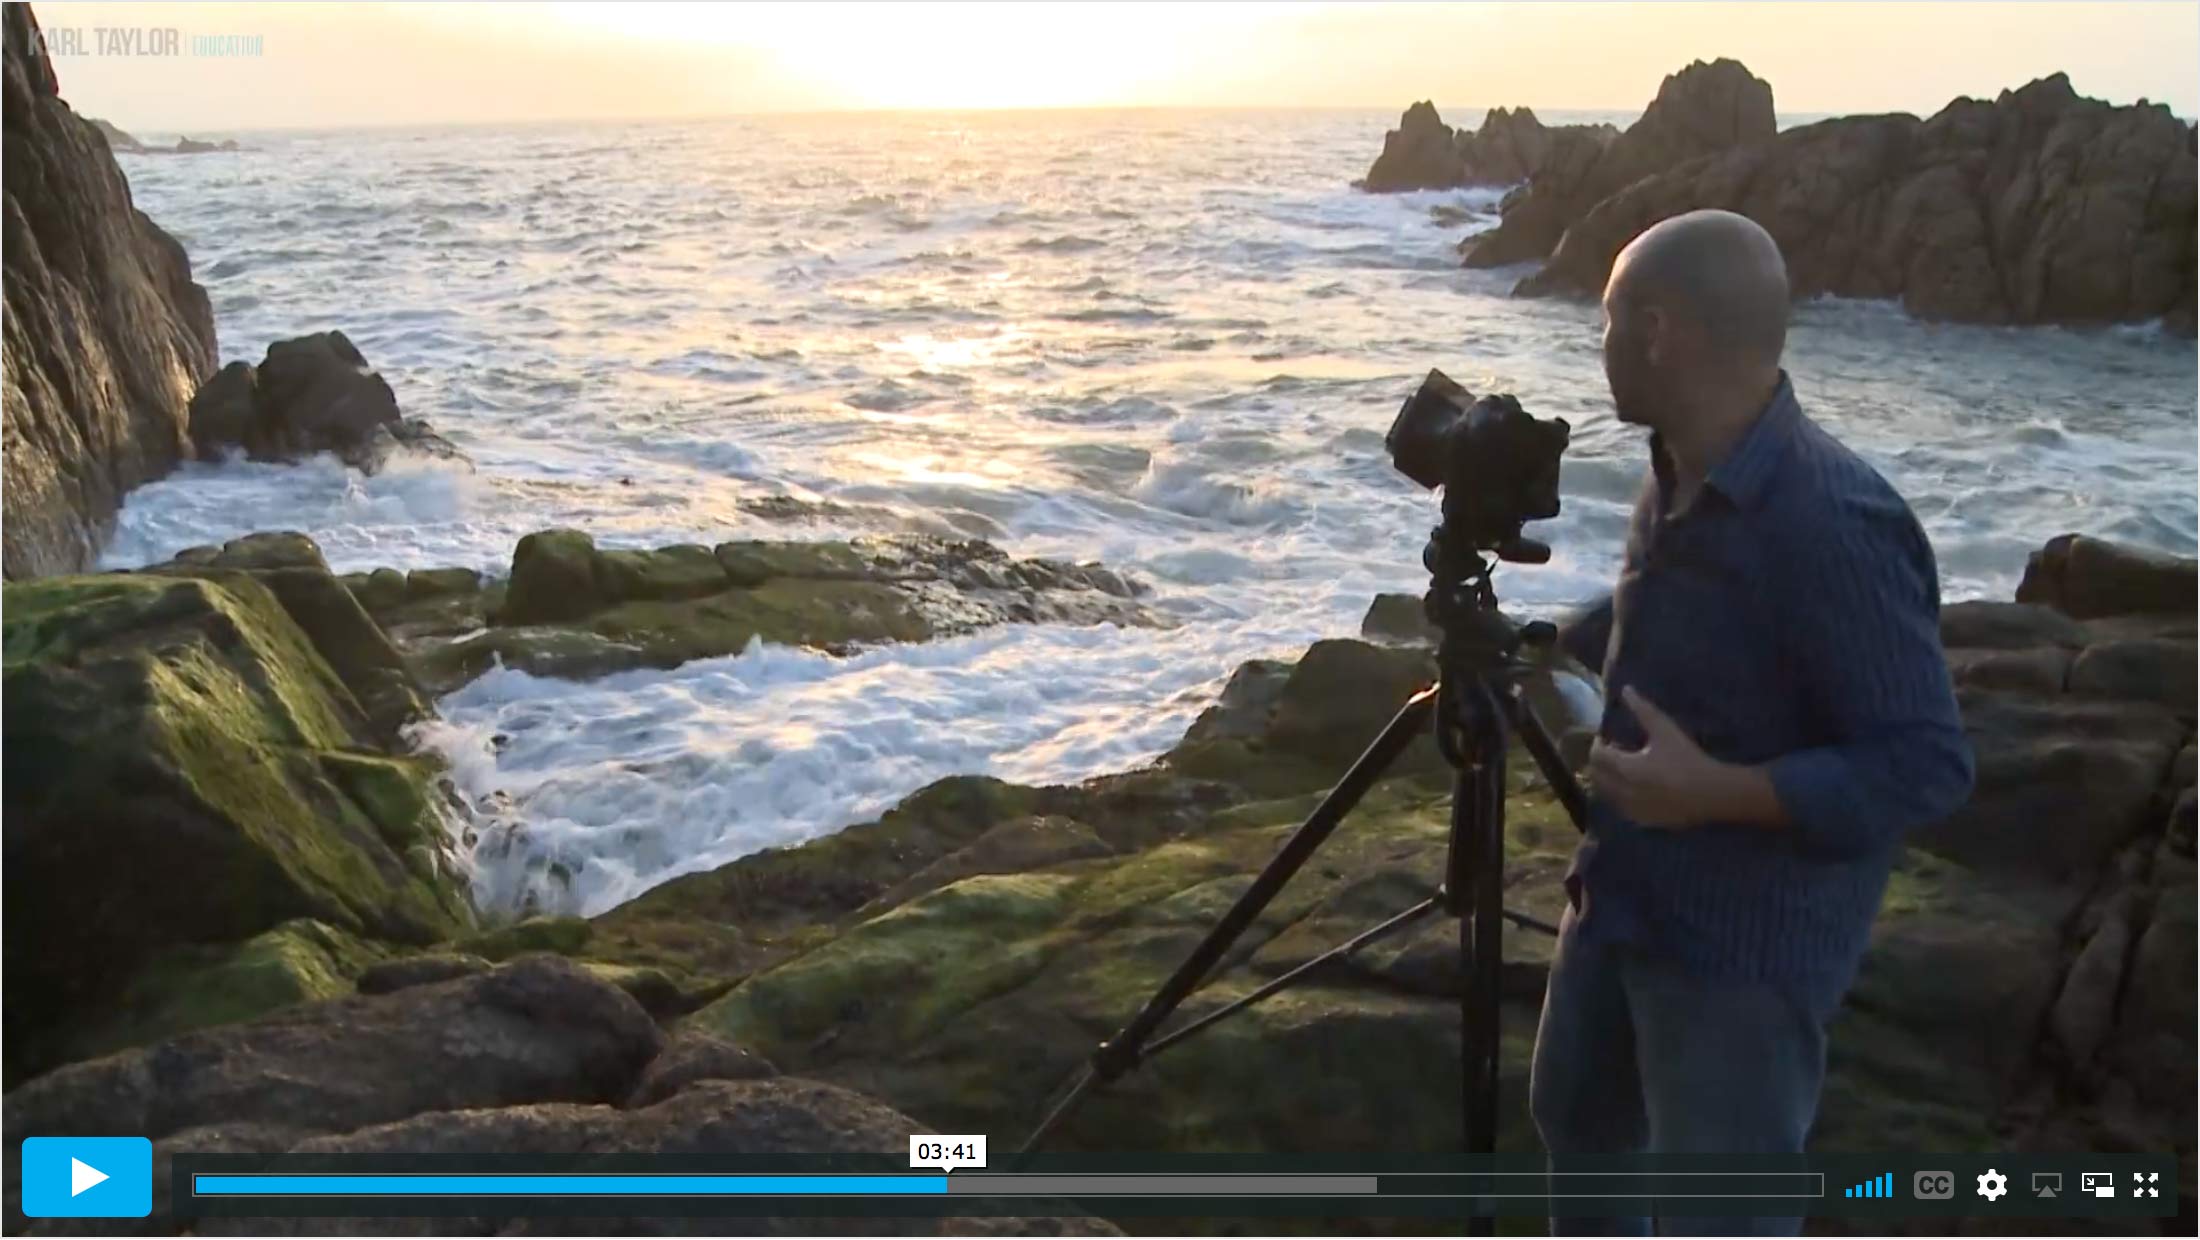
Full image.
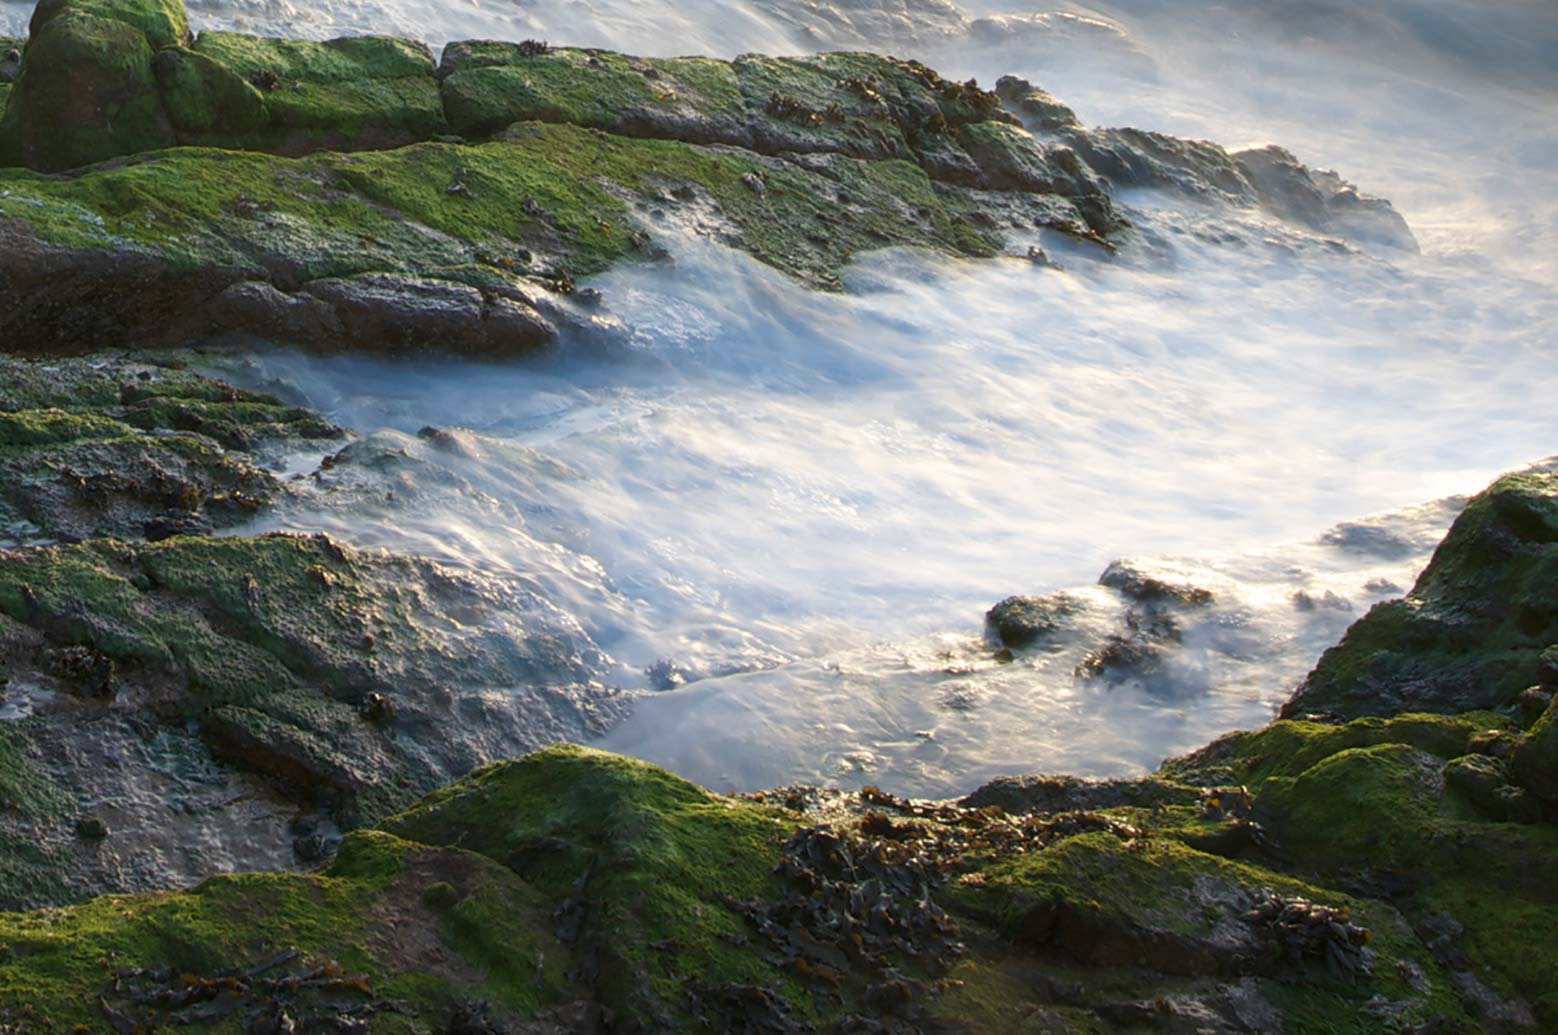
Cropped image.
In the landscape image above, which I shot in this chapter, I decided to use a shutter speed of four seconds, as this allowed me to capture some motion blur in the waves. As the light decreased with the setting sun, I had to adjust my aperture in order to maintain the four second exposure. While I could have adjusted the shutter speed, I knew that if I slowed it any further I would get too much motion blur.
You can clearly see the effect of that four second exposure in the cropped image. The slower shutter allowed me to capture some of the movement in the water to create a smooth, silky effect. This was a creative decision that I could only have achieved by shooting in manual.
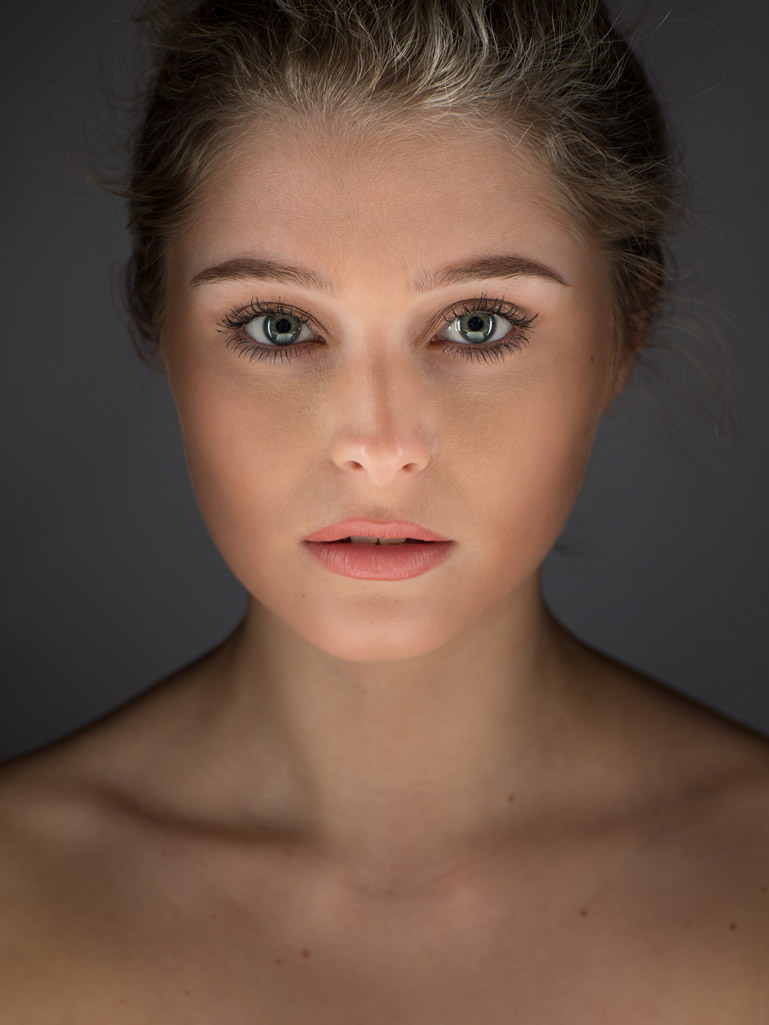
Interested in portrait photography? Click here.
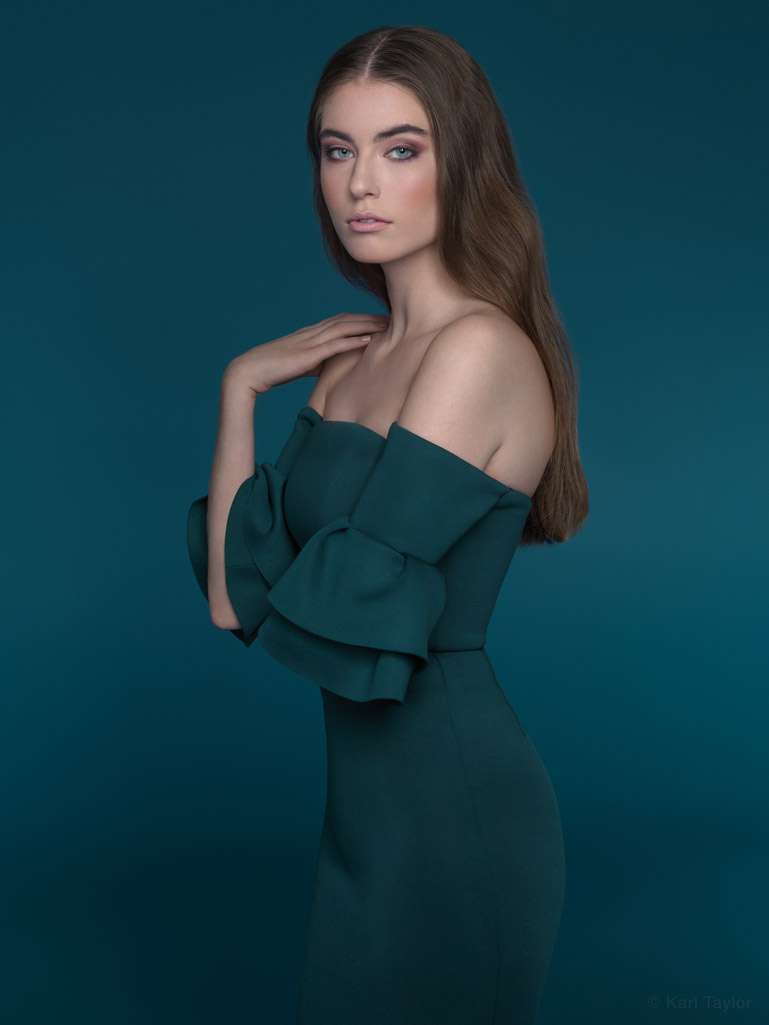
Interested in fashion photography? Click here.
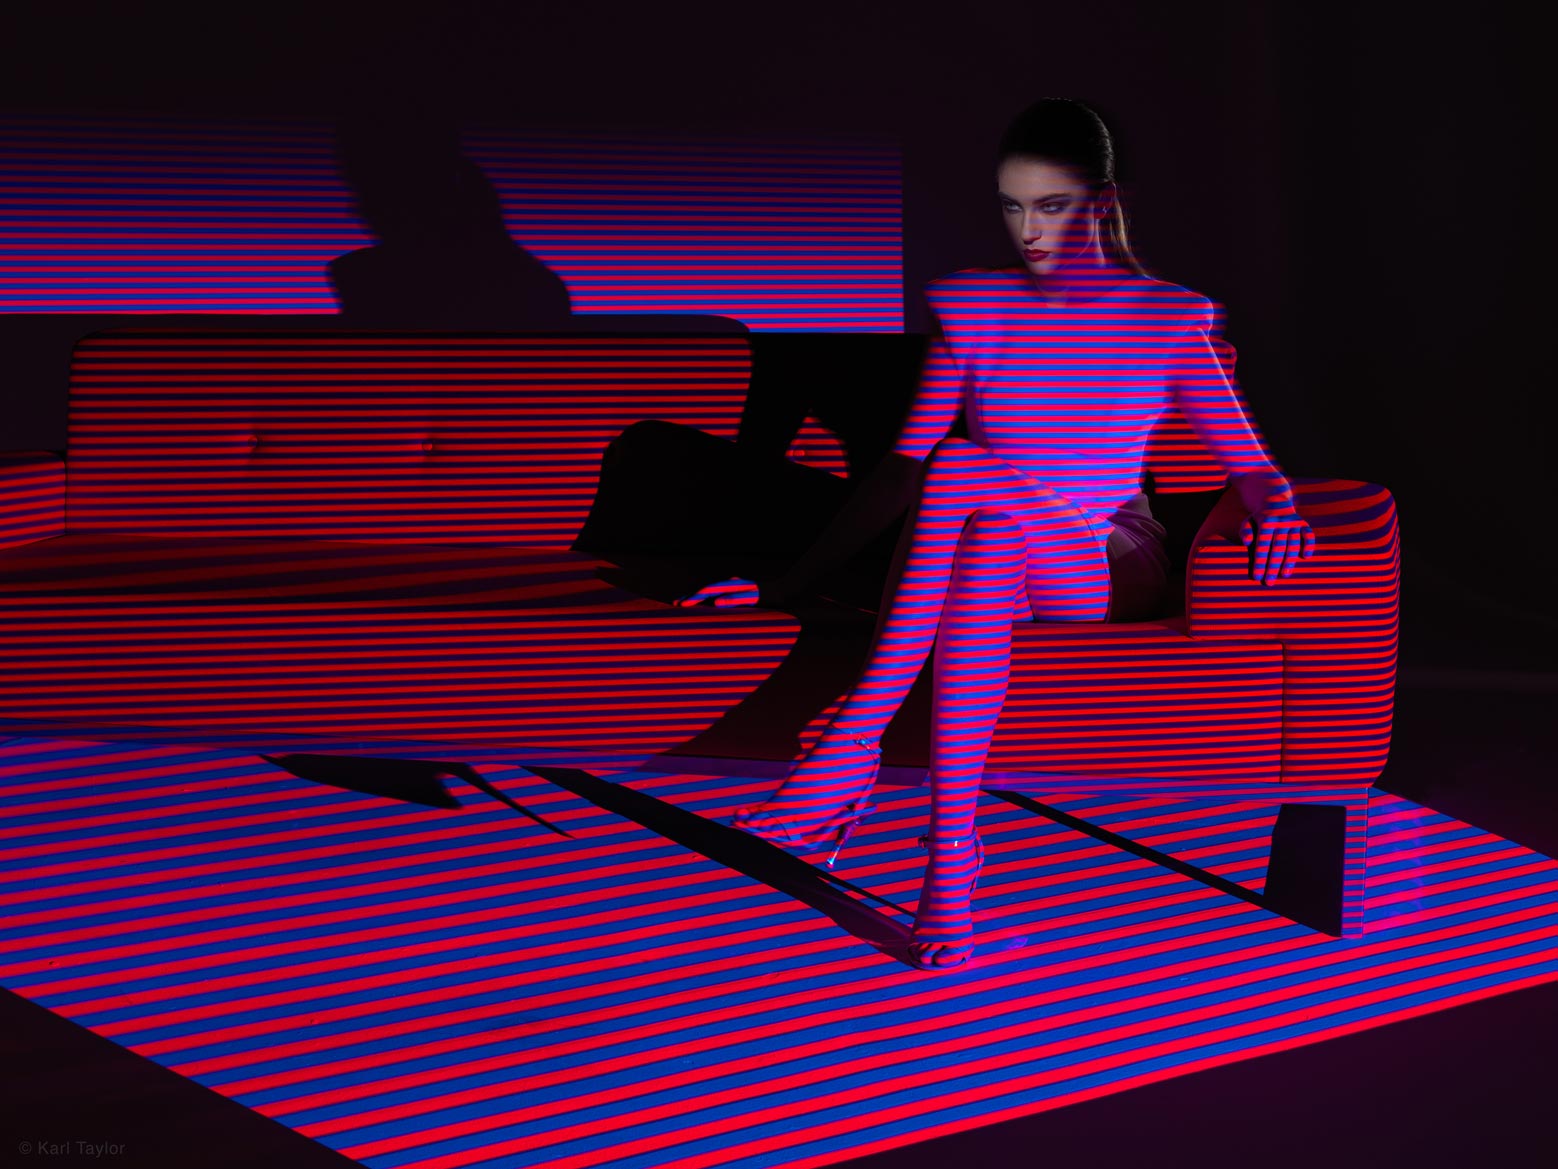
These examples show the difference between a shallow depth of field, which is a common choice for portrait photography, and a greater depth of field for a more fashion-style image.
Throughout this course so far you would have seen how I make a number of creative decisions regarding aperture and shutter speed. Whether it be using a slow shutter speed to allow for panning, or a shallow depth of field to isolate the subject, each decision should be controlled by you, the photographer. By shooting in manual, we have far greater creative control than if we used an automatic mode.
Interested in fashion photography? Click here.
The advantage of shooting in manual is that it gives you precise control over your images. You can select the exact exposure, depth of field or amount of motion blur, without leaving anything to chance.
But by making these decisions yourself, it's important that you understand how to compensate for any adjustments you make. Any change in exposure, whether this be done with shutter speed or aperture, will need to be balanced with an equal change in the other setting too (as you would have seen me do in a number of previous chapters already in this course).
To begin with, while you’re still getting to grips with shooting in manual mode, you may need to check your images from time to time to see that you’re achieving the correct exposure. This you can check using the methods discussed in chapter two.
If you need to adjust your settings, remember the exposure seesaw (also covered in ‘What is exposure in photography?’). In order to get the best exposure, you need to balance your shutter speed and aperture. If you find your image is too dark, you need to either slow your shutter speed or open your aperture (the reverse also applies if your image is too bright).
Now that you understand how to control the different settings on your camera and shoot in manual, the next step is to take a look at how different lenses can influence your shot. Later, we'll also be looking at ISO, which can also be used to adjust exposure (but is not necessarily the best practice).
All content © Copyright Karl Taylor Education.
Get the e-book!
Introduction To Photography
To get your copy of this 90 page e-book click the download button below.
Comments
Hey Karl,
Great information so far in the course. But what happens with the videos? They barely load and many times they fail to load. Is your server overloaded, or down?
Hi We are not experiencing any problems. We use enterprise private Vimeo for our video delivery so their shouldn’t be any problems. Please ensure that your internet connection is correct and sufficient and that no other people in your household are also watching video. Which country and location are you viewing from we can check if there are any issues with our provider, thank you.
Hi Karl, may I ask what kind of filter you are using in the video? thank u
Hi That would be a graduated Neutral Density filter which you will learn more about as you progress through the courses.
Dear Karl, how to get the best result as your photo above if I using 85mm 1.4 , not wide lens 16-35mm 2.8 ? Thank you
Hi, that wouldn’t be possible. Please watch the chapter on Lenses and Optics.
Bought this course and it’s good. Only thing that puts me off a bit is gear they use . It is kind of beginner level tutorial wit so expensive top cameras and lenses , studio lights etc. Maybe one day somebody can make course for standard Canon like 70D with affordable lenses . Still don’t want to sell my kidney or slice of liver on eBay to buy just camera body . Anywa … course is well explained . I am watching it 5th time to get the modest of technical aspect and will put it into my Canon 70D cam.
Hi, As this course teaches it can be done with any camera. It simply introduces you to the basic concepts of camera control and manual exposure and understanding light. It applies to all cameras and all photographers.
Hi Karl,
This is a very nice composition, I just want to look at it for like ever. Is the lens set on 16mm?
Hi Ario, thank you. Yes it was on the 16-35 lens but probably at about 20mm.
Ok… Nice shoot… I understand this is a more basic video but I need to understand some things… Did you expose for the sky probably don’t you?but now… Did you expose with the meter in zero? Because some people say u should let it shine and expose 2/3 of stop higher making the sky brighter and trying to keep the rocks in a level where u don’t loose details.
Hi Alexandre, you will see my more detailed explanation regarding exposure on your other question on Chapter 02. ‘Understanding Exposure’. In this chapter I overcame the problem of the ‘exposure range’ by bringing that range back into my recordable parameters by using graduated filters, we will learn more about these as the courses progress.
Kark, FAB pic mate!! Just one question, what was the ISO at? 100?
Hi Andrew, yes I always almost shoot at the lowest or default ISO to get the best image quality (low noise). I only up the ISO when situation demands and there is no other way to record the image.
Why are You Tilted the filters during the shot
Thanks and I really enjoy it .
Hi Akansh, I’m glad you are enjoying it! I tilted the filters so that it didn’t cover over the rocks on the left too much, so I followed the angle of the rocks on the left.
I really love this shot.
Thank you.
Hi Karl
Please can you tell me why everytime i shoot in manual mode it become dark ? Do I need change my shutter speed and increased my ISO.
From
Ross
Hi Ross, manual mode is the way to learn and to master your camera. Manual mode is also the ‘purest’ form of photography because you are controlling the Aperture, the Shutter and the ISO. When the camera is in Auto modes it also controls those same 3 things but it doesn’t always know what it is doing or why and often the auto modes won’t give you the creative freedom. If you’re shooting in manual mode and the picture is to dark then it is easy to figure out as there can only be one of three (or combination) of options. 1. Slow the shutter speed to let more light in, 2. Make the aperture bigger to let more light in. 3. Increase the ISO to record more light. The best options are 1 and 2 as you will find out as you progress through the course.
Do you currently have any night photography courses? I live in Alaska and its dark almost all the time in the winter, I take northern lights photos all the time and have trouble with lighting people, trees or even the ground the way i would like to.
Hi Felicia, There are some night photography sections in Advanced section courses but we also have more planned soon.
i am really enjoying your course so far, i have been having trouble truly understanding how to get depth of field and the correct exposure, however now i understand it all better and how to get the desired effect without just switching back to auto mode to get what I’m wanting because I am frustrated. Thank you for explaining it the way you do!
Thank you Felicia, you are most welcome.
I don’t know guys. I bought some videos from you a couple years ago and although I love your results, you never explain what you are doing to get the shot you got. ie where are you focusing, why did you choose those particular filters, etc.
Hi Gerry, the focus on this particular shot was set in the moving water area where you see the sunlight reflecting strongly off the waters surface. At this position the depth of field was sufficient enough to render the area of rocks in the foreground sharp and the further distances sharp. This is often the case with wide angle lenses as they inherently have large depth of field. To check the DOF I simply use the ‘stop down’ button but more commonly I take a test shot and zoom in on the results on the back screen and pan around to check. For the filter you never know which one you will need until you actually try it as the exposure in the sky varies based on the conditions. However I didn’t introduce information on filters in this stage of the course because they are covered later as you progress through in order and my way of instructing is delivering the right amount of information at the right time so that it sticks. As you progress through the lessons and onto ‘Travel & Landscape’ and ‘Advanced 1 & 2’ you will find more information revealed about these subjects. But for your information the filter in this shot was a graduated neutral density which means it is dark at the top and clear at the bottom (and changes gradually from one to the other) its purpose is to keep the sky exposure the same level as the rocks level, without it the sky would not be able to be recorded but as I said I cover that in the ‘Travel & Landscape’ course which is the course to complete after this one. Cheers Karl.
Was your focus on the rock cliff to the left?
I think it was slightly past that, I use the stop lens down button to quick check my DOF range and then take a test then I zoom in on and around the test shot on the screen to check everything I want is sharp.
Why the LEE filter was inclined ?? Not as per the horizon ? Or you consider the Inclined Big Rock ?
Yes exactly right