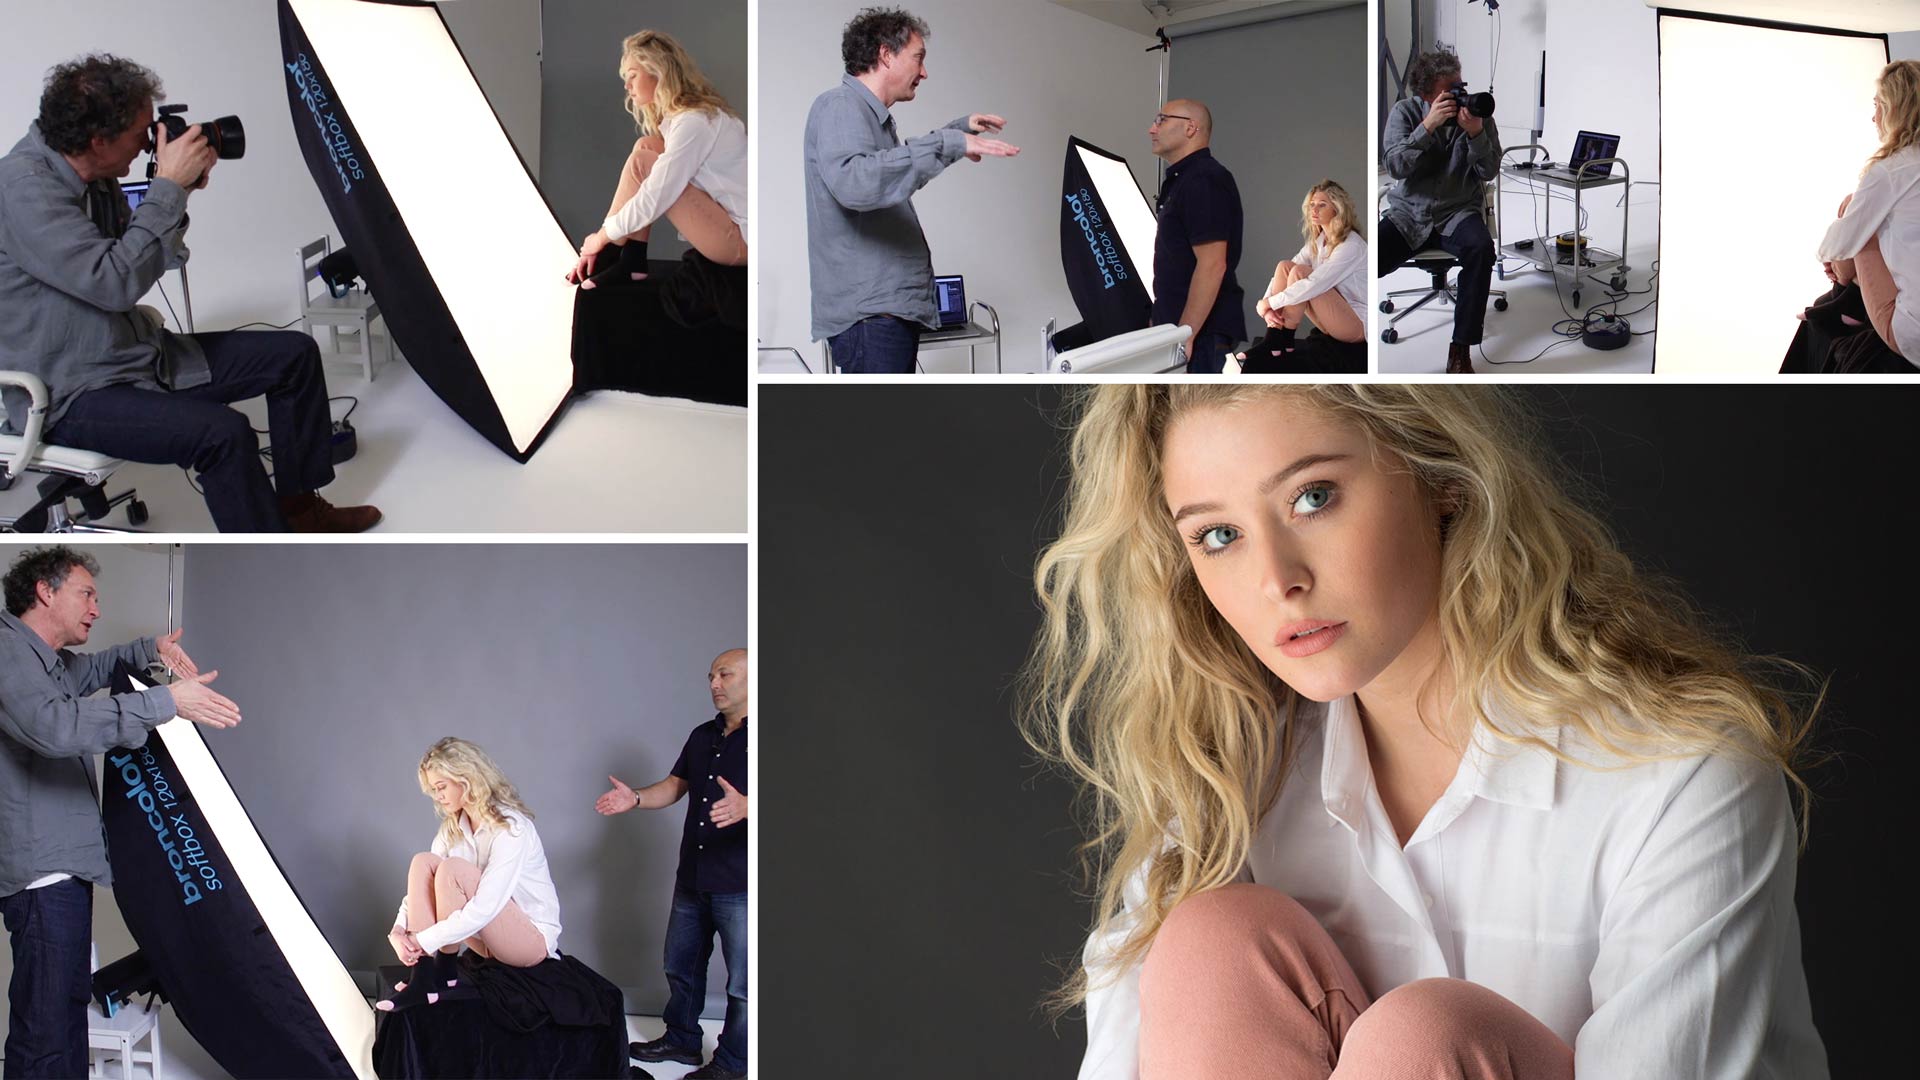

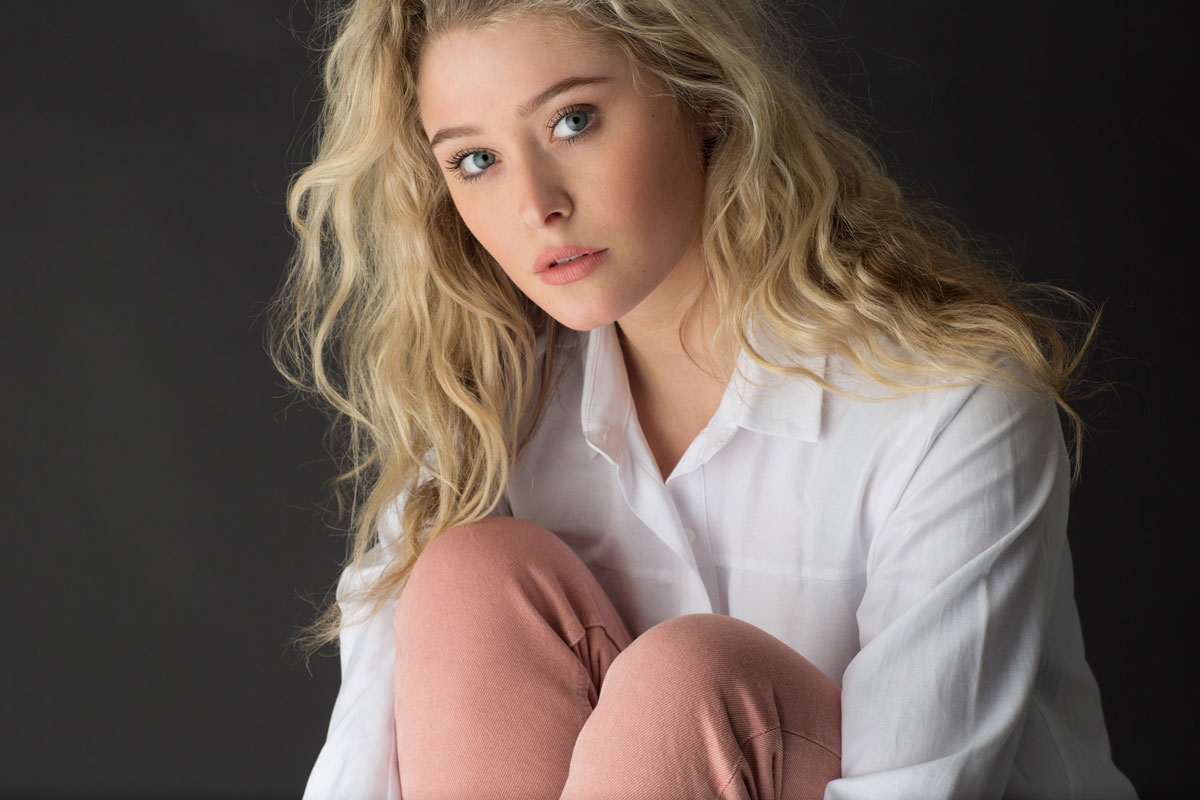
Contoured Single Soft-Light Portrait
Small adjustments, big changes – give this simple setup a try.
For this portrait photography class, Karl and Urs use a simple lighting modifier in an unusual position to create a beautiful, contoured soft light.
Working in a small, confined space, they show how this single-light setup is ideal for those working in a small studio, but, with minor adjustments, you can greatly change the outcome.
During this tutorial, Urs talks you through his lighting setup, power settings and the reflectors he uses, explaining the impact of each.
In this class:
- Creative portrait photography using a single light
- How to create soft, contoured light
- Photographing in small studio space
- How to use reflectors
- How to convey emotion in an image
Questions? Please post them in the comments section below.
Comments
I am glad you cover everything. I am thinking of getting my strobe or Speedlight out tonight to do a test shot in a small room. Use me as a model for men’s bracelets and see what I can come up with. I will be using a 12-year-old digital camera to see if I can get good shots. Older technology but can be used with photo editing software like Photoshop to resize Instagram also.
Hi Karl, this is truly remarkable that this 120×180 softbox can be so versatile! I am new to studio photography and I really want to know how to build the background stand using the c stand. I would really appreciate your help.
Many thanks
Shan
Thanks Shan, please see our clamps stands grips class in the Lighting Theory section. This was just a pole held between two c-stands with clamps that you will see in that class.
I enjoyed this video. Out of curiosity, is there much you do in post using Lightroom? Naturally, I have many more videos to look at but are there photo shoots that show how you bring it into post for retouching?
Thank You
Mark
P.S. I bet kids would like the idea of a tiny studio setting.
Hi Mark, some of the shoots you see on our platform have no retouching and the results are as they were in the tethered software where only minor contrast adjustments are made. In other classes such as our fashion and beauty series then there is post production and often the post production is show in our post section. For example we have recently completed a new series of beauty and fashion shots and I also recorded the post production for each one, these will be published later in the year. For general post production on beauty (and other subject) images then please visit our post production section.
It would be helpful if the camera settings were provided also, you seem to have documented everything else.
Hi, The aperture would have been mentioned during the shoot and the ISO would have been the default 100ISO. The shutter speed isn’t really relevant as it is flash so you should be using the highest sync speed to cut out the modelling lights. We often put the exif data at the end but we are going to add the exif data to the ‘equipment list’ which you can find on the lower right.
I noticed that too. When you show a close-up on the Lightroom page when you show the model you can see the settings in the upper right hand corner. I must get Lightroom!
Impressive to see how much can be accomplished with a creative use of a single strobe. Curious about whether you typically color correct your images (e.g., in LR with a Color Card in an initial shot, etc.). In most of these single light source portrait videos, there seems to be a slight color cast depending on the setup.
Hi, for fashion, product and any colour critical work every new setup or outfit is first shot with a colour checker and adjusted in the raw file or post on an Eizo. These sort of shots are just graded by eye on screen to whatever we feel looks good.
hello Karl, do you have a tutorial on how you adjust color with a color checker in the raw file on a eizo?
thx
Hi Fabrizio, we have already filmed this tutorial and it is being released on the 11th of December.
Hi Karl,
I’m still not a 100% clear on how you use the histogram to evaluate your shot. I understand that the right side of the histogram is light and the left side is darker. But what do you look for in a histogram? Do you look for peaks, slopes, curves or a nice spread in the middle?
Thanks
Philip
Hi Philip, this old video might help you https://www.youtube.com/watch?v=DfQM7nZ2IN4&t=144s which reminds me I’m going to make a new one for the platform here at KTE.
Cheers Karl!
Hey I am just wondering if the shots are a combination of the modeling light and the flash or just the flash?
Hi, just the flash that comes out of the same light.
Thank you for answering that sir!! I also watched the new YouTube video where you explain the question and more. GOD bless!!
I’ve just subscribe, and already amazed with the plethora of contents.
Is there a flash too? (+ softbox)
Where is it positioned?
Portrait => One Light Setups => 25. Contoured single soft light => timecode 6:25
Hi Ale, you need to watch this: https://visualeducation.com/class/types-of-studio-lighting/
Thanks a lot Karl for all this knowledge, would like to know the % of grey of the background
Thanks
Hi, thank you. I don’t know the percentage but you can see exactly which Colorama background paper it is in the equipment list on the lower right of the video page.
Hi Karl
Can you explain the angled background on the 1st creation of light grey background.Is it opened more from the the softbox side and little bit closer to the model on the shadow side?
Thanks
Hi, no as far as I remember the background remained fairly parallel to the camera behind the model and there was a reflector on the right side of the model (from camera perspective) I think we did discuss or show moving the background further away or closer to change the intensity of grey. I’d have to watch it again to remember exactly, is there a particular time in the video you’d like me to check something?
it is really nice setup , but if i don’t have very huge soft box , can I use one big diffuser in front of the light source , but I think i have to put black boards in tow side of the light source to stop the lighting to spread to all directions.
Hi Yes but I’d put black and silver boards so that the silver side can bounce the light more evenly across your bigger diffusor.
Absolutely mind-blowing. Simple but yet super elegant.
Please Is this set up applicable if it’s an octobox.
Hi Allen, it can be but you could have answered that yourself if you watch this chapter first https://visualeducation.com/class/introduction-and-understanding-light/
Just started a new studio and thought Karl can mentor me to get the best out of my gear i purchased. Looking forward to leanring.
Good luck with everything!
Will this work with a rectangular soft box of the same exact size but just a little deeper? I noticed the soft box used in the shoot is fairly shallow.
Hi David, the depth of a softbox is irrelevant, there is a big misconception that deep softboxes somehow give a better quality of light. The physics of this makes no sense, as long as the light is sufficiently bounced and diffused internally so that when it comes through the front diffuser that it is homogenous. If the front panel is homogenous then there will be no difference between it and any other softbox the same dimensions with equal homogenous levels. Lighting equipment marketing always makes me laugh, we only need to look at the physics of how light works to figure out anything. Check chapter 1 of this course.
Thanks so much Karl, your comments are very enlightening. I skipped ahead to this particular video, but I’ve already gone back to start at the beginning and benefited already. The pace, level, and information of these videos, for me, who’s been in this a while are very comprehensive. Thanks for the quick response.
Hi
is there a special section for comments on photos or where photos of others are discussed?
thank you, closer will not be a problem, further away, given the 3 meter width of my space
I find the site very moi good and clear, learn an astonishing amount
thanks
regards
HArm
Thank you Harm. There is also a forum area which you can access at the very bottom of this website.